Moparts

Redoing rear seat back upholstery of Challenger

Posted By: Swiss_Robert

Redoing rear seat back upholstery of Challenger - 01/17/11 02:22 PM

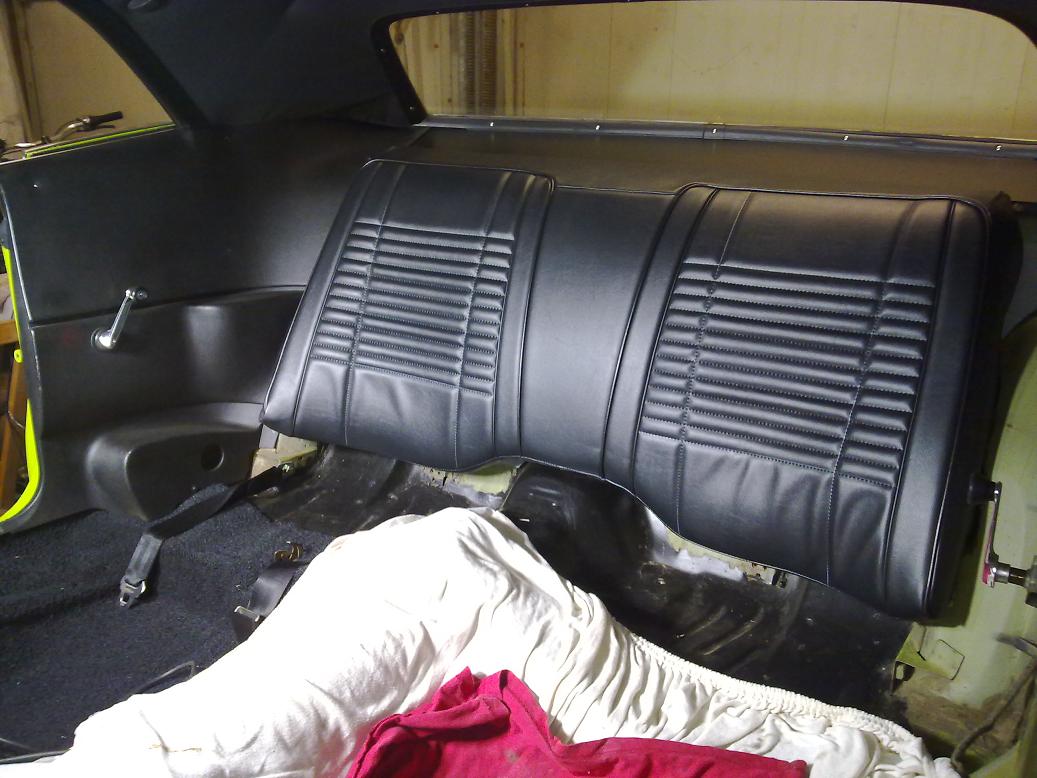
The partial-resto of my 1970 Challenger hardtop progresses and now I start dealing with seat upholstery. Beginning with rear seat back.

Removing the partially rotted cover I found the upholstery looking not too bad - it's not foam but may be wool or like enwrapped in mull and having a jute backside. I'll use it again, as I also will reuse the additional divider (between feathers and upholstery) out of jute with horizontal wires through it.

But now to my question:
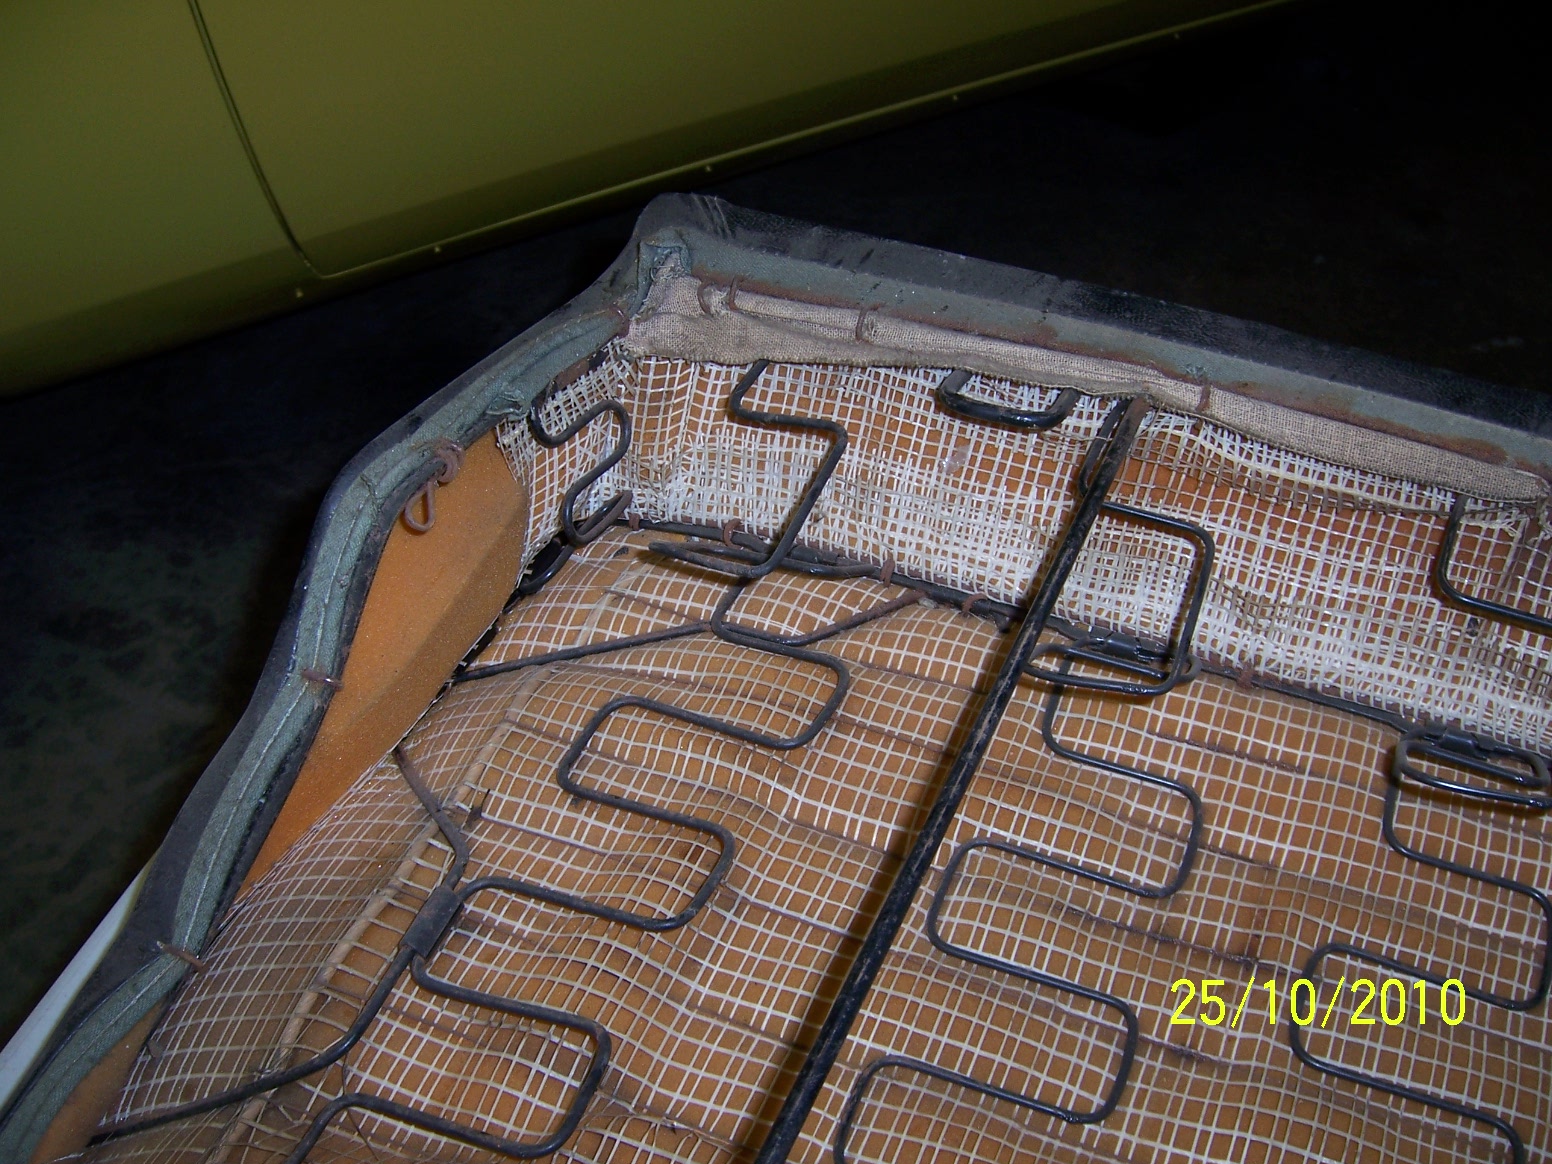
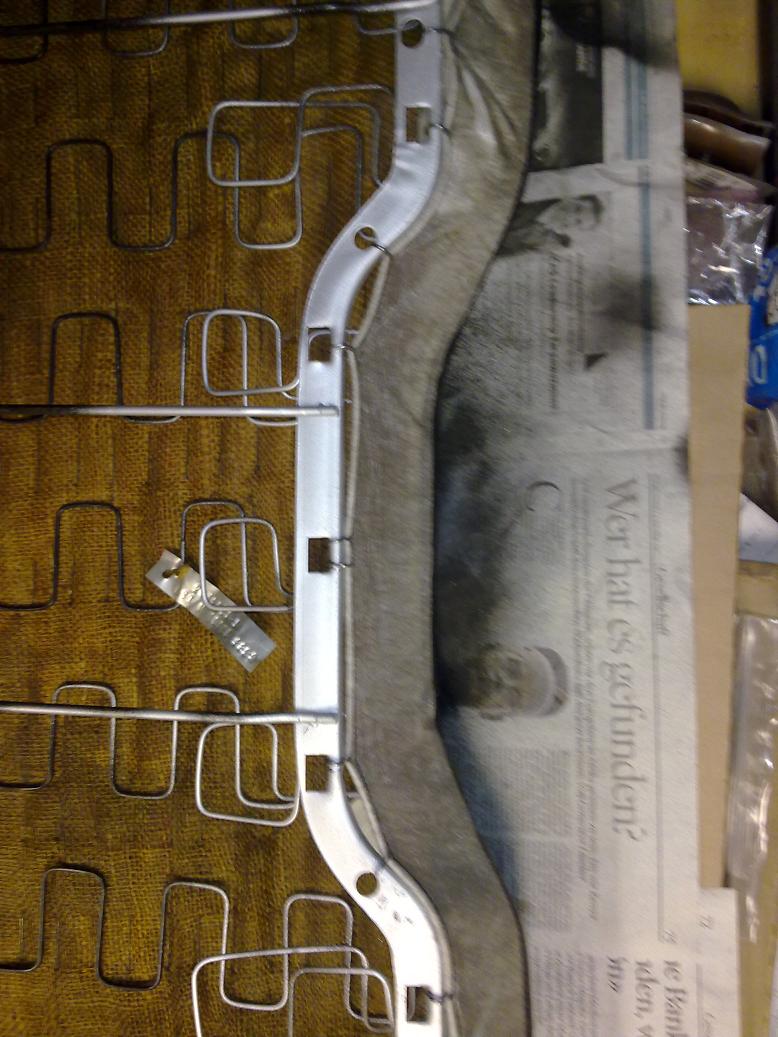
The remaining, metal feather-skeleton has on its top another stripe of jute attached (see pic). It has a wire stitched in on both edges (that's where it has cracked).

What's the duty of that stripe out of jute? What will happen, when it's left away?

Is it appropriate to just use textile cord to knot a rough web instead of that stripe?
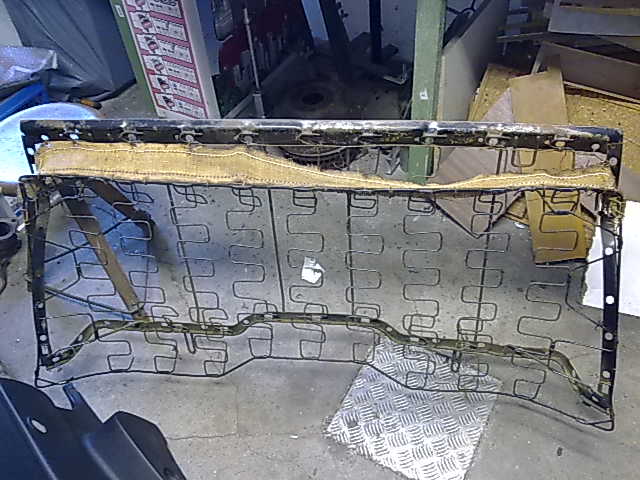
Attached picture 6422791-160120111106.jpg
Posted By: wally426ci

Re: Redoing rear seat back upholstery of Challenger - 01/18/11 02:46 AM

Are you sure that wasn't part of the cover?

I believe that there was a mesh material past the vinyl to stretch onto the frame.
Posted By: Swiss_Robert

Re: Redoing rear seat back upholstery of Challenger - 01/18/11 10:29 AM

Quote:

Are you sure that wasn't part of the cover?


Yes, I'm sure.

It has a wire on each edge which are fixed to the frame using hog rings. And all that stuff has genuine-looking labels attached, so I assume it's all stock.

It was not only under the cover (which has a slime foam-padding there at the top edge) but also under the upholstery (the enwrapped wool material).

I now guess it's there to prevent the upholstery material to sink down behind the feather-frame or kind of supporting it...

...just not to say I'm sure about that. I remember that the upholstery material was not really fixed to the rear seats frame with hog rings but just layed onto that jute-stripe. Makes sense - that wool-stuff and enwrappment is not very robust and would not bear a lot of tension.
Posted By: 19cuda73

Re: Redoing rear seat back upholstery of Challenger - 01/18/11 03:00 PM

Mine was the same way. I believe it is just support for the foam and cover. I reinstalled it prior to recovering.

Attached picture 6424926-BackSeat013.jpg
Posted By: 19cuda73

Re: Redoing rear seat back upholstery of Challenger - 01/18/11 03:12 PM

another picture

Attached picture 6424946-BackSeat050.jpg
Posted By: Iceman01

Re: Redoing rear seat back upholstery of Challenger - 01/18/11 03:29 PM

Quote:

Mine was the same way. I believe it is just support for the foam and cover. I reinstalled it prior to recovering.


Same here...
Posted By: screamindriver

Re: Redoing rear seat back upholstery of Challenger - 01/18/11 05:02 PM

It's a support but it's also a framing spacer....You'll need to keep that piece on the frame no matter what material you use to replace it...Burlap is easy to find over here at any upholstery shop if you want the original material...I'd think it's used{for upholstery} where you're at also....
Posted By: Swiss_Robert

Re: Redoing rear seat back upholstery of Challenger - 01/31/11 12:56 PM

It worked - this is just sharing the pics:

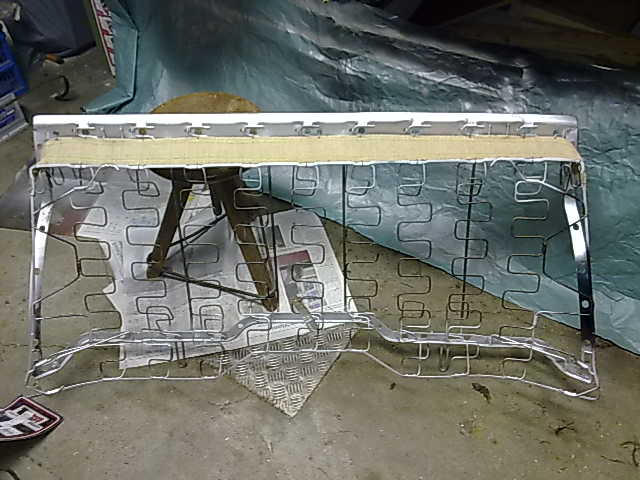
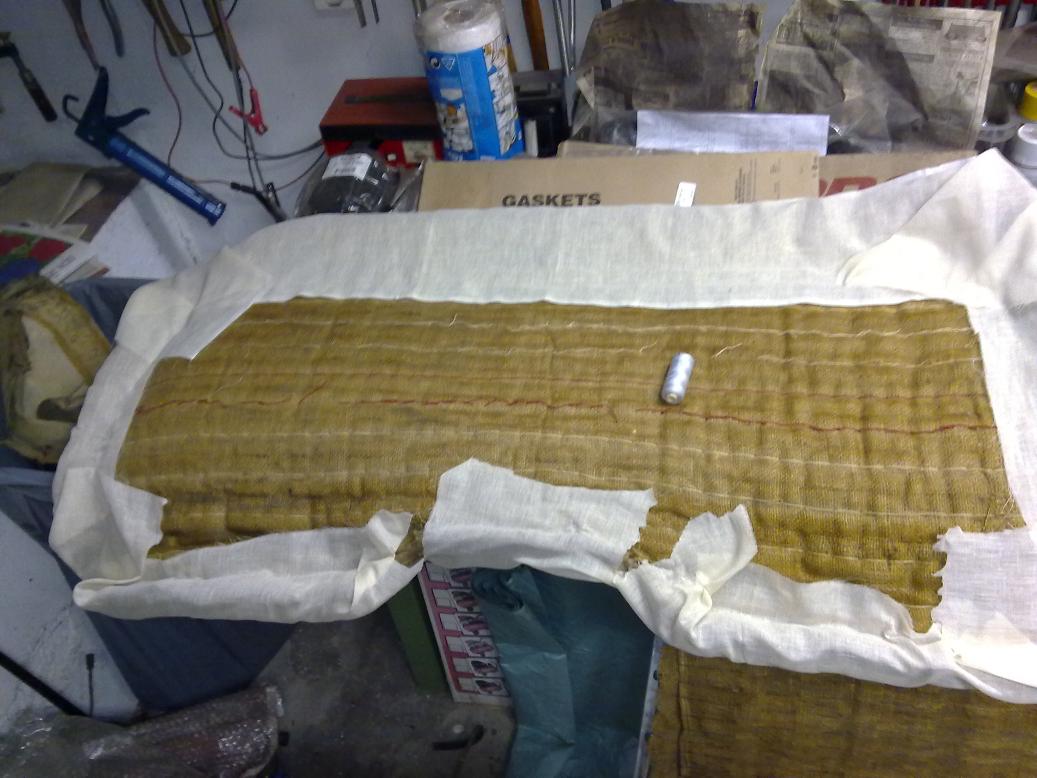
Sewed a new stripe out of burlap.

Attached picture 6448370-220120111112.jpg
Posted By: Swiss_Robert

Re: Redoing rear seat back upholstery of Challenger - 01/31/11 01:00 PM

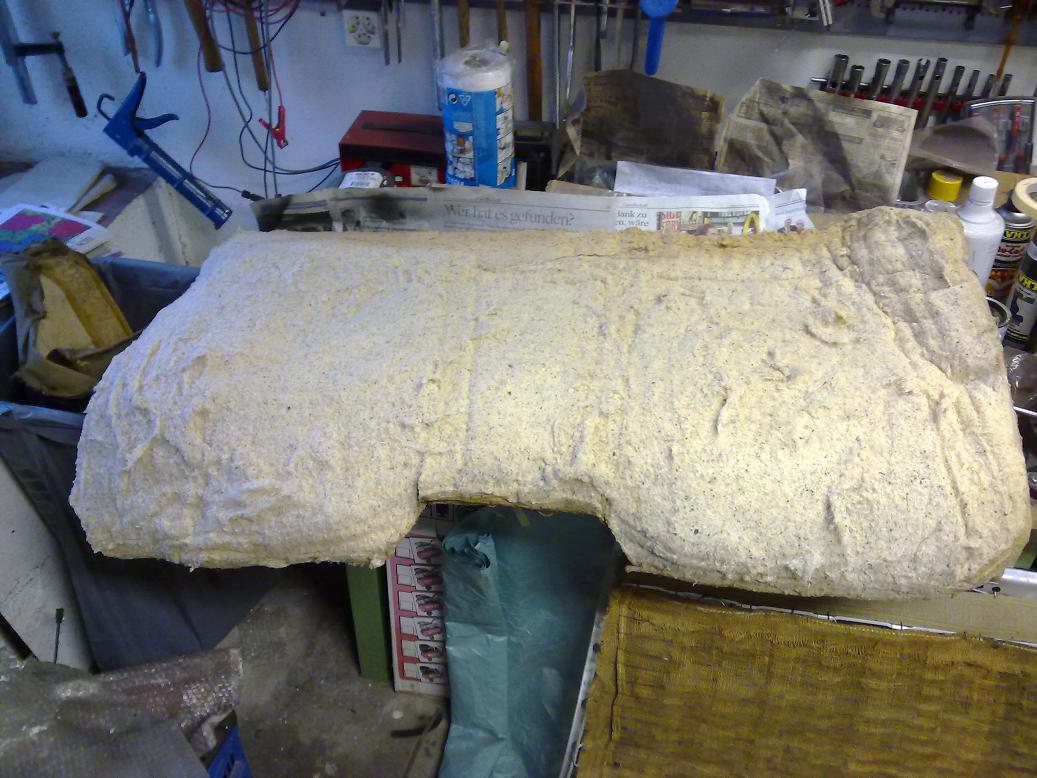
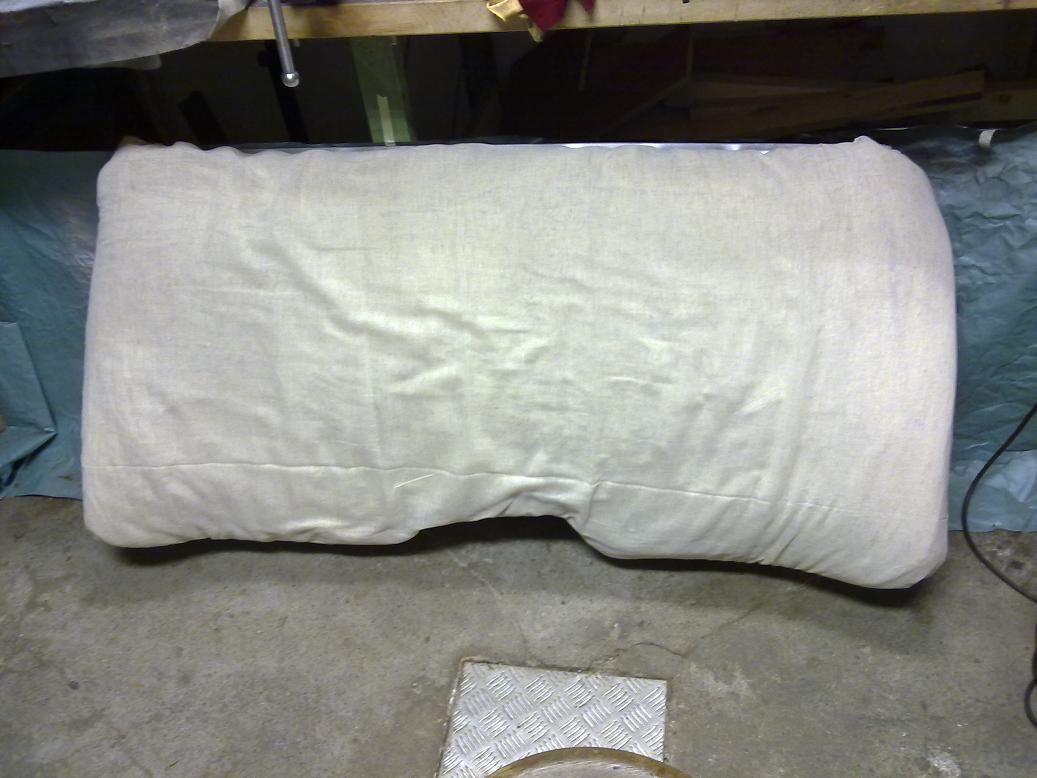
Reused the wire-armed burlap mat that lies on the steel feathers. And reused the upholstery material that is like wool. Removed the enwrapping and cleaned as good as possible (vacuum cleander).

Attached picture 6448372-290120111128.jpg
Posted By: Swiss_Robert

Re: Redoing rear seat back upholstery of Challenger - 01/31/11 01:05 PM

Enwrapped it newly with new gauze material. Fixed it with rough stitches to the old burlap backside.

Attached picture 6448377-290120111131.jpg
Posted By: Swiss_Robert

Re: Redoing rear seat back upholstery of Challenger - 01/31/11 01:07 PM

Fixed this "new" upholstery package to the frame using some hogrings from backside. Looks rough but - will do it.

Attached picture 6448378-290120111132.jpg
Posted By: Swiss_Robert

Re: Redoing rear seat back upholstery of Challenger - 01/31/11 01:10 PM

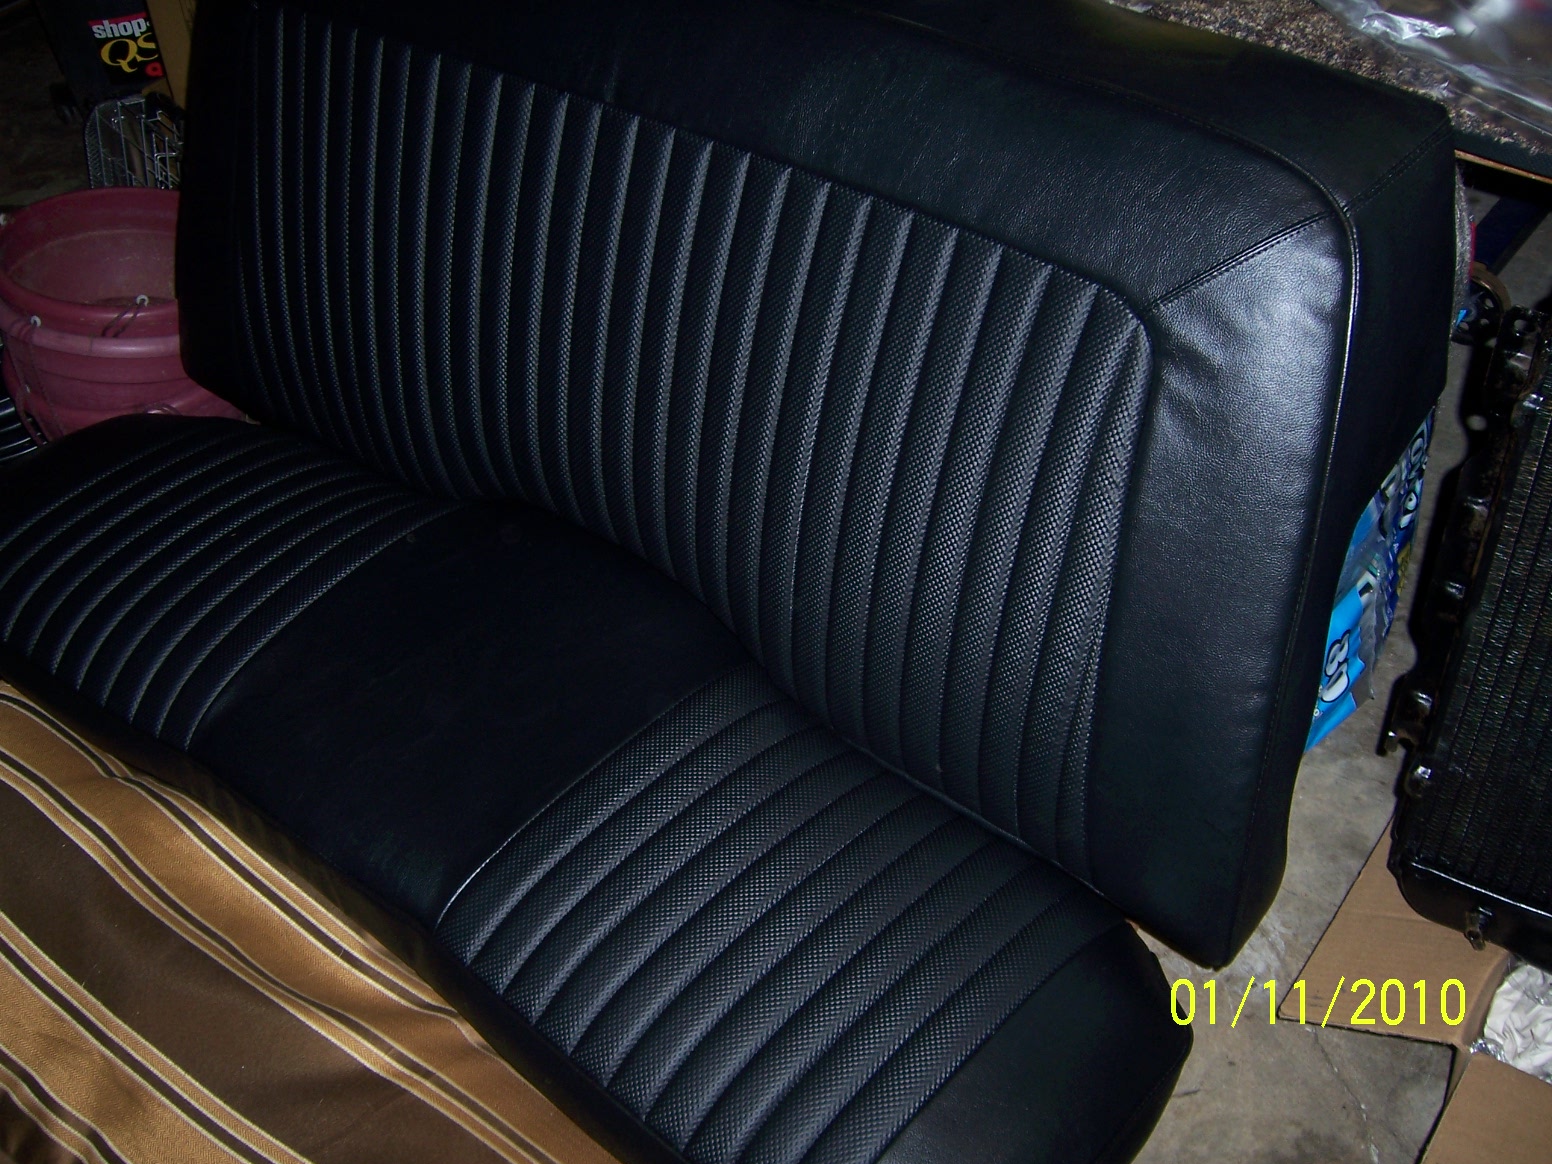
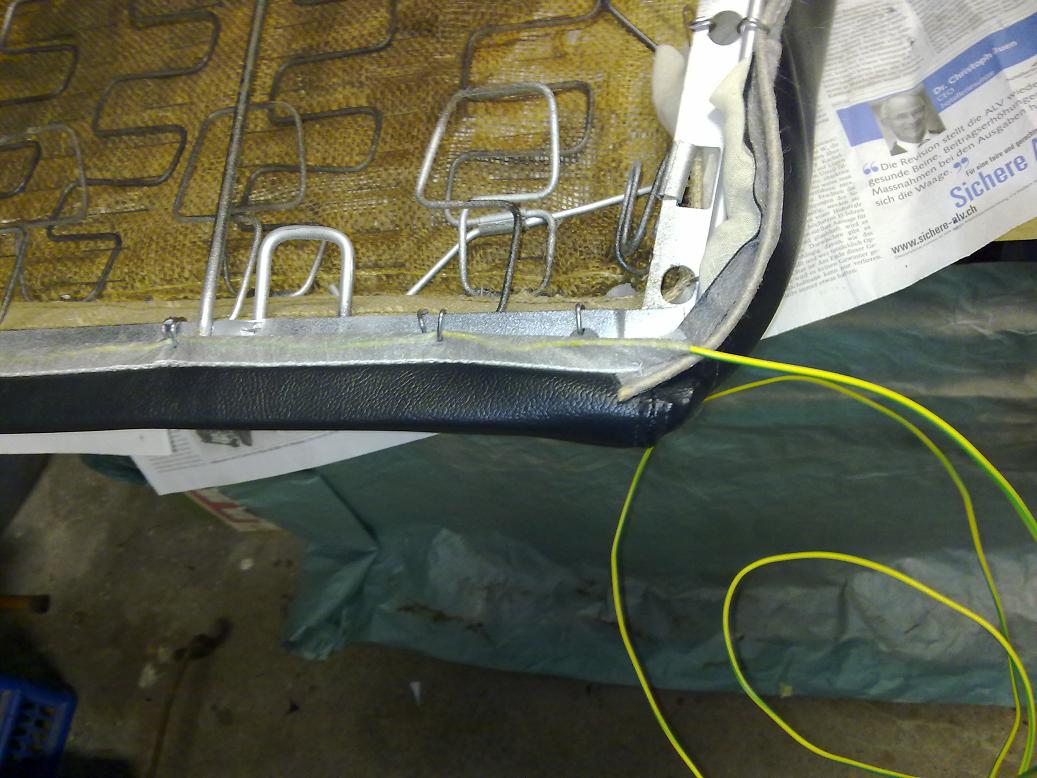
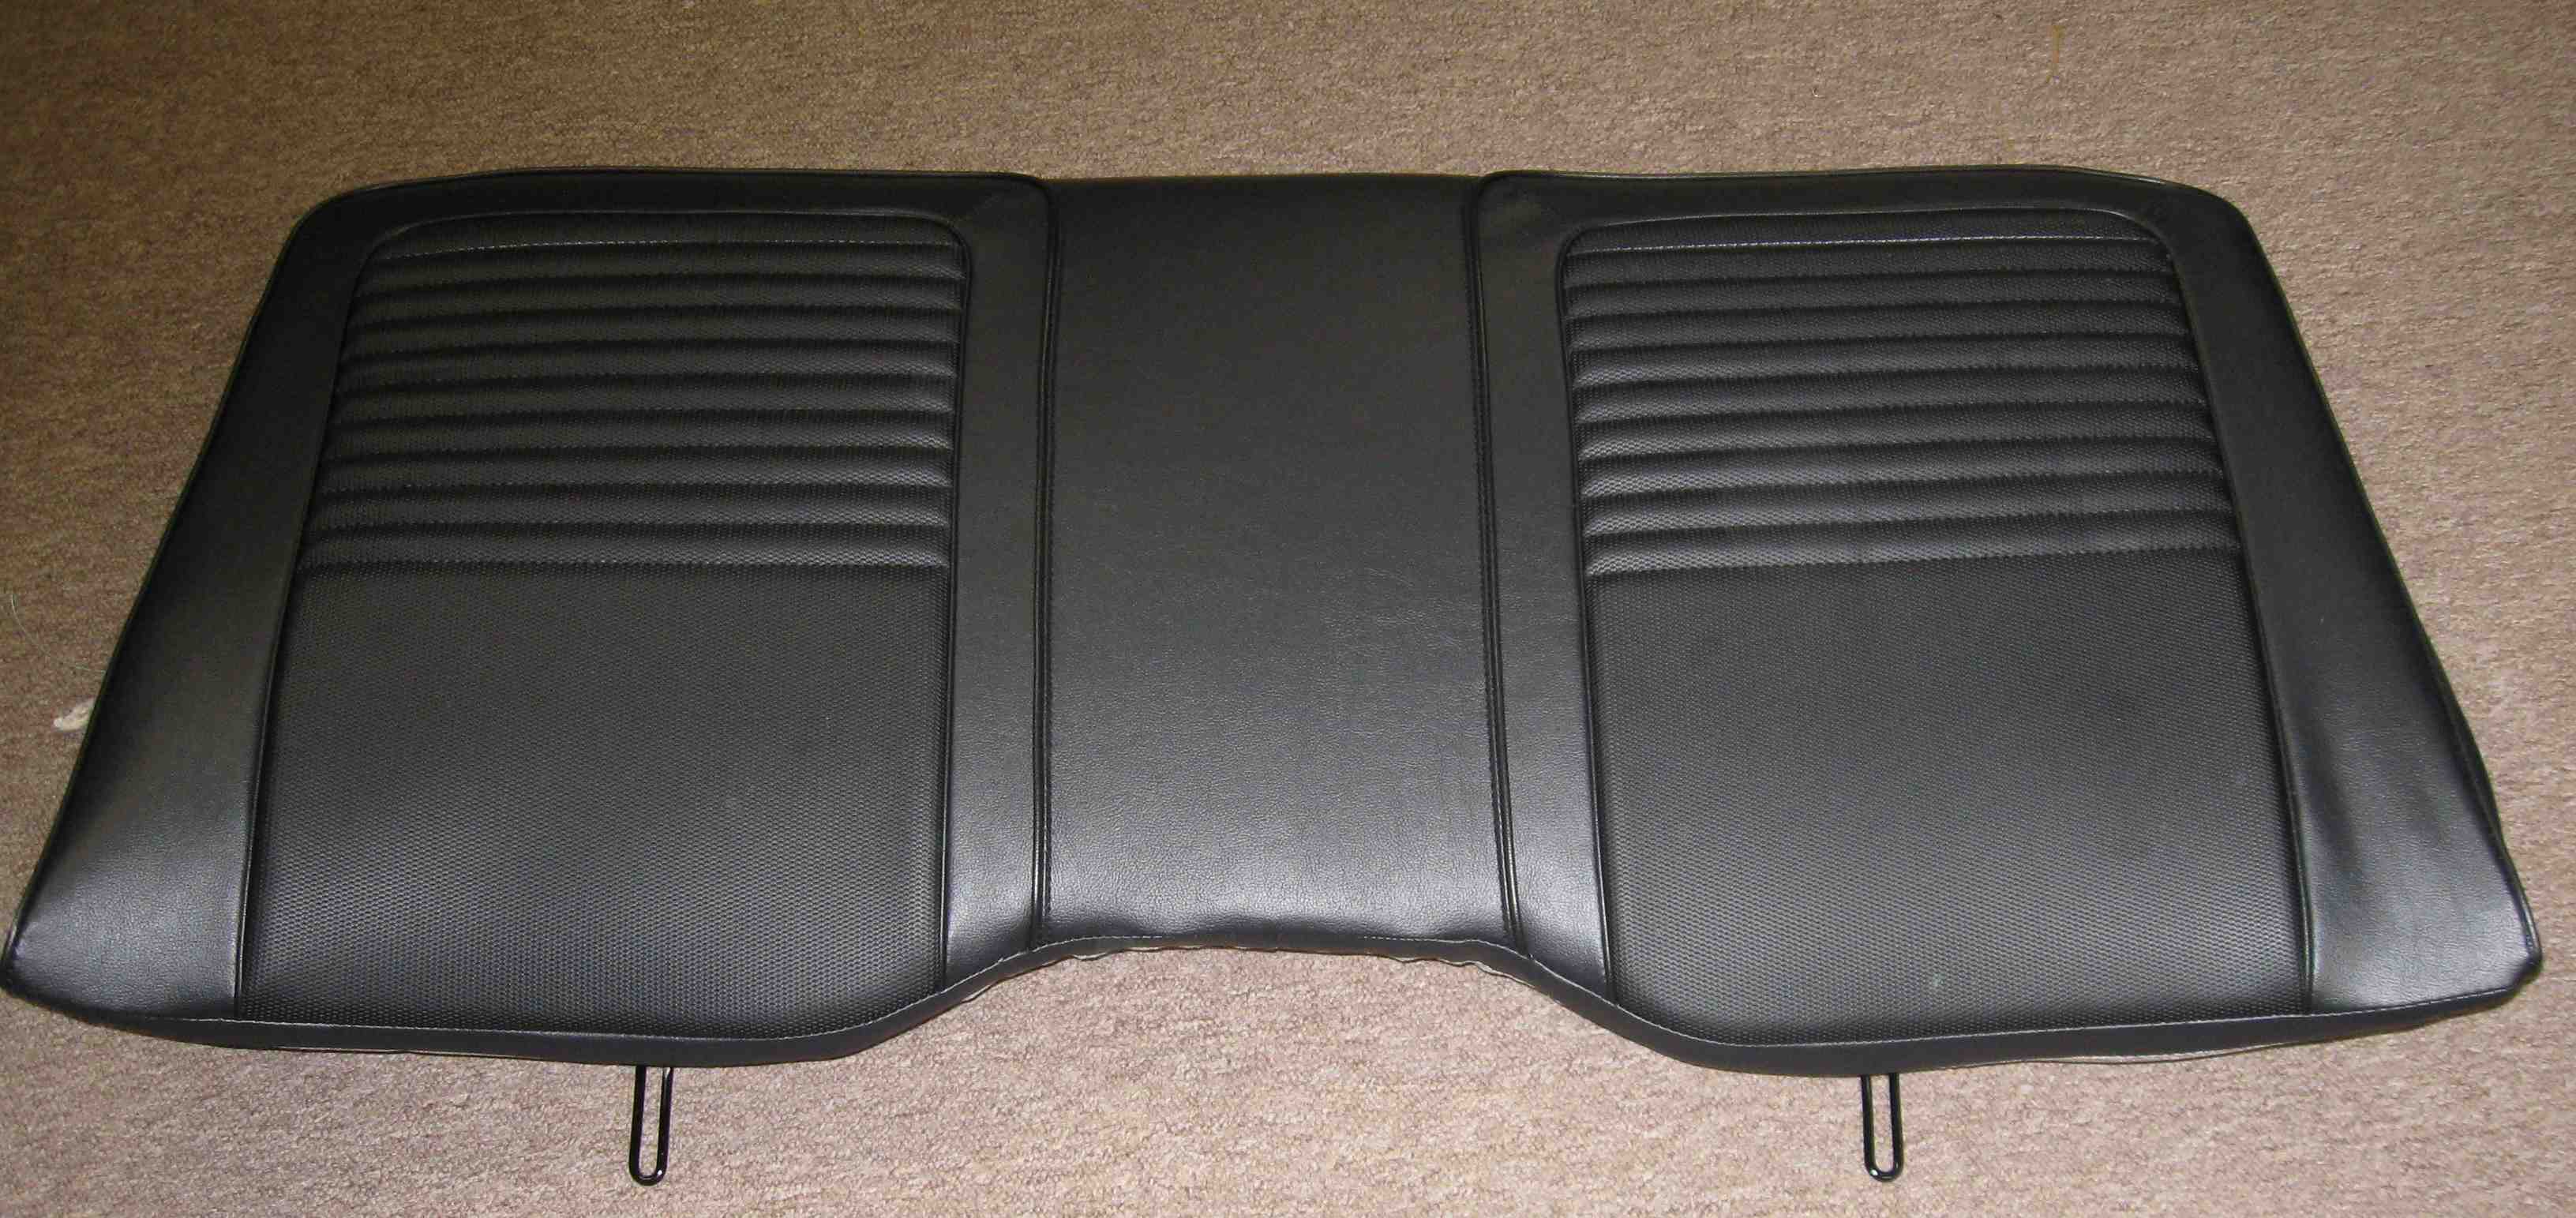
Went on with the new back seatback cover - from Legendary (got it from Dante's). It's impressing good quality - but I missed the wire in the topside seam, so I inserted an electrical wire.

Attached picture 6448382-290120111133.jpg
Posted By: Swiss_Robert

Re: Redoing rear seat back upholstery of Challenger - 01/31/11 01:13 PM

There's a lot of tension at the lower edge. Used more than one hogring in some holes...

Attached picture 6448386-290120111135.jpg
Posted By: Swiss_Robert

Re: Redoing rear seat back upholstery of Challenger - 01/31/11 01:16 PM

Looks not too bad! Some folding I could not pull out, may be upholstery needed to be filled up a bit - but the seams are where they should be. Took me about 20 minutes to admire it

Attached picture 6448393-290120111137.jpg
Posted By: 70plymA34

Re: Redoing rear seat back upholstery of Challenger - 02/01/11 03:09 PM

Quote:

Looks not too bad! Some folding I could not pull out, may be upholstery needed to be filled up a bit - but the seams are where they should be. Took me about 20 minutes to admire it


Just a quick tip to get those wrinkles out if you want to go through the trouble. remove all the hog rings and follow the exact directions from legendary. i think that they say to start at the center and work your way out to the edges and that should pull the right tension to get rid of those wrinkles. It worked for me on my rear seats and there were no problems. Nice job either way. Seat Upholstery is no walk in the park and can be annoying at times. Legendary has online instructions off their website.
Posted By: Swiss_Robert

Re: Redoing rear seat back upholstery of Challenger - 02/01/11 03:18 PM

Well, I DID follow those directions.

If the seam of the cover is on the edge of the upholstery - it cannot be pulled more sidewards.

I assume I lost a bit volume in the upholstery material.

Usually the rear bench is the easiest piece to start with... will get harder.
Posted By: 70plymA34

Re: Redoing rear seat back upholstery of Challenger - 02/01/11 04:56 PM

Quote:

Well, I DID follow those directions.

If the seam of the cover is on the edge of the upholstery - it cannot be pulled more sidewards.

I assume I lost a bit volume in the upholstery material.

Usually the rear bench is the easiest piece to start with... will get harder.


I tried to duplicate exactly what was under my seat cover with new material. The best way to possibly fix that problem is to maybe start again. I used 3 or 4 layers of cotton batting cut to the exact dimensions of the original batting then wrapped it in cheesecloth which holds the batting together. Also did you slightly heat the covers to make them more elastic to work with before installation. here is a pic of my rear seat after installation and to legendarys instructions. I noticed with each hog ring placed it would eliminate the wrinkle.

Just some advice to you if you are doing bucket seats. Bring them to a seat shop with a small steam unit. That makes installation a little easier. You are right, the rear seats are easiest, the fronts are a different story. Be patient and I am sure your rear seat will come out fine.

Attached picture 6450507-cudaseatback.jpg
Posted By: bee71mopar

Re: Redoing rear seat back upholstery of Challenger - 02/01/11 05:17 PM

I had the same question to myself about that middle piece. I just left it out and made the foam under it longer,while rolling it over the frame, and turned out great.Sorry didnt take a pic of that just have pics of the bottom and my front seats.
Posted By: demon

Re: Redoing rear seat back upholstery of Challenger - 02/01/11 09:11 PM

Where you hog ringed the cover to the lower frame, the rings should go thru the opposite side of the holes. This will make the cover fit snugger but will help with the wrinkles too.
© 2024 Moparts Forums