 Retrosound Radio System Installed in 3rd Gen B-Body
#996865
Retrosound Radio System Installed in 3rd Gen B-Body
#996865
05/21/11 07:23 PM
05/21/11 07:23 PM
|
Joined: Jan 2003
Posts: 1,251
Slidell, LA
Ronnman
 OP
OP
pro stock
|
OP
pro stock
Joined: Jan 2003
Posts: 1,251
Slidell, LA
|
I had been thinking about upgrading the sound system for a while. When I purchased the car, a 1971 Roadrunner, it came with an AM Radio and a FM converter. I had the original front speaker and on of the previous owners added a round speaker in the left rear of the package tray. To say the least, the system left a lot to be desired. Changing FM channels was touchy since it was accomplished my a small knob and the FM scale was not very visible. I started looking at sound systems of which there are many choices. I had a few ground rules. I did not want to cut the dash, nor did I want to mount the system in the glove box and I wanted to play songs that I have recorded in MP3 format. I then came to realize that the original placement of the radio was where I wanted the system located. So I had a few options. One, purchase and install a new radio that would fit in the dash and was available on eBay for just under $600. Second, remove my AM radio and have it converted for FM and 1/8� plug for input from a MP3 player for around $400. If I wanted to play songs from an MP3 player, these options required they be routed through a 1/8� headphone jack. This meant I would have to power theMP3 player for extended use. The third option was the RetroSound Model One. The problem was no one had apparently installed this model with the optional bracket to move both knobs to the left of the system faceplate. It was asked if anyone had installed the RetroSound system a few times on several websites. But no one responded that they had installed the system.  I bit the bullet and purchased the RetroSound Model One with the special bracket. I also purchased the RetroSound 6 X 9 speakers for the rear and their 3.5� speakers for the front. Additionally, I purchased a bracket from 74Sport here on Moparts. I purchased the speakers from Crutchfield and they arrived first, so I started the rear deck installation. I installed the right rear speaker with #10 sheet metal screws. 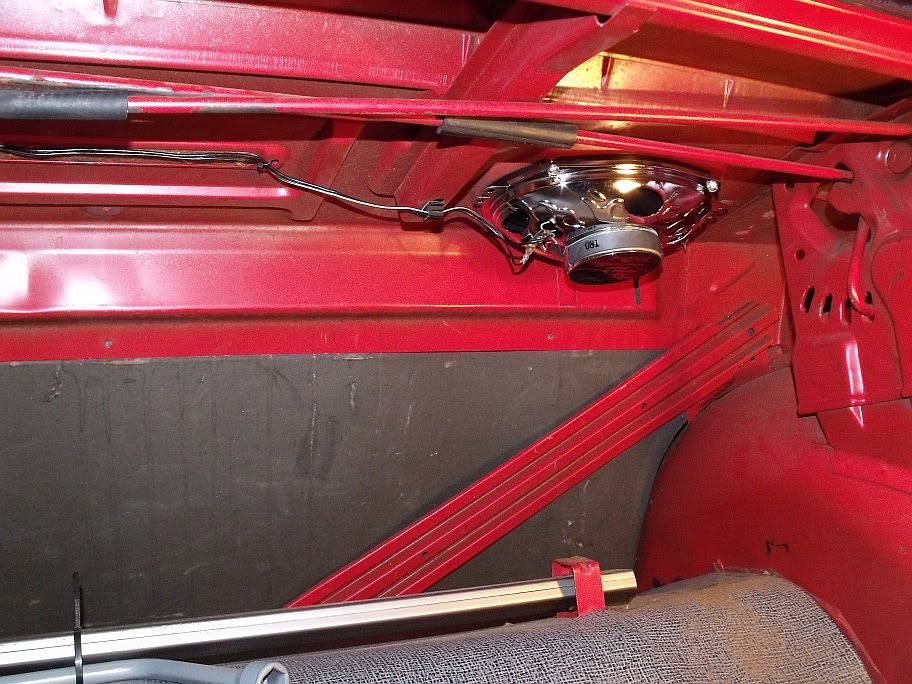 The left speaker was installed using 10-24 X 1-1/2� long screws and cutting the heads off. Then I put a nut from the trunk to line up over the 6 X 9 holes and threaded the stud into the nut. Then I ran a jam nut the lock the stud to the rear shelf. The opening on the drivers side is for the rear defroster, but there are holes that line up with the 6 X 9 pattern on the flat section just outside the stamped metal flange.  Next I moved to the front speakers. I removed the front speaker metal grille carefully stuffing rags into the defroster ducts to prevent losing a screw. I used a few 1/4� extensions and a universal to get the front screws out. The rear are phillips screws which can be removed with a stubby screwdriver. The I exposed 40 years of dust. 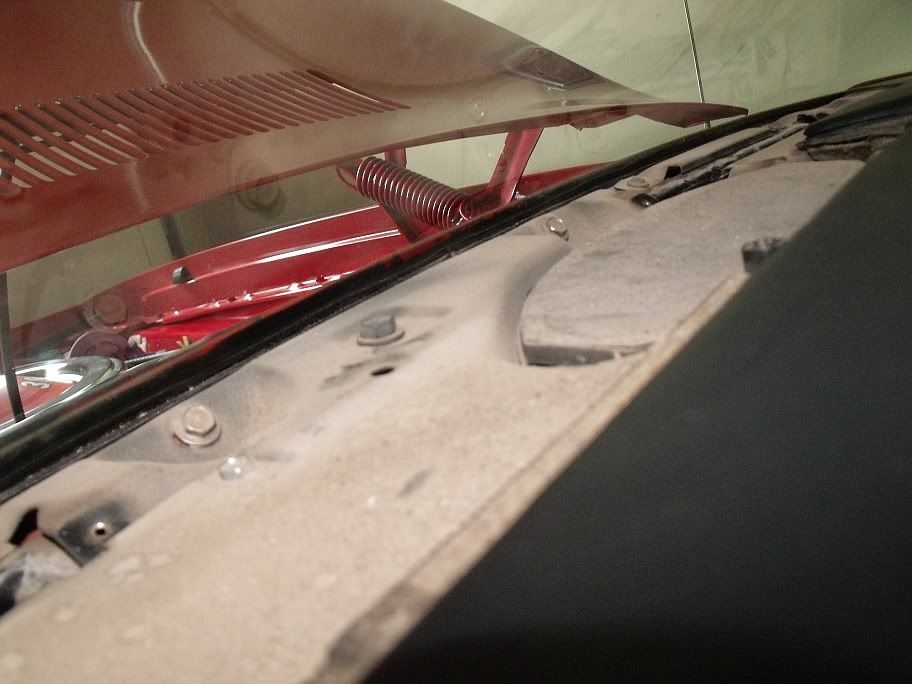 Next I mounted the two 3.5� speakers to the aluminum bracket. 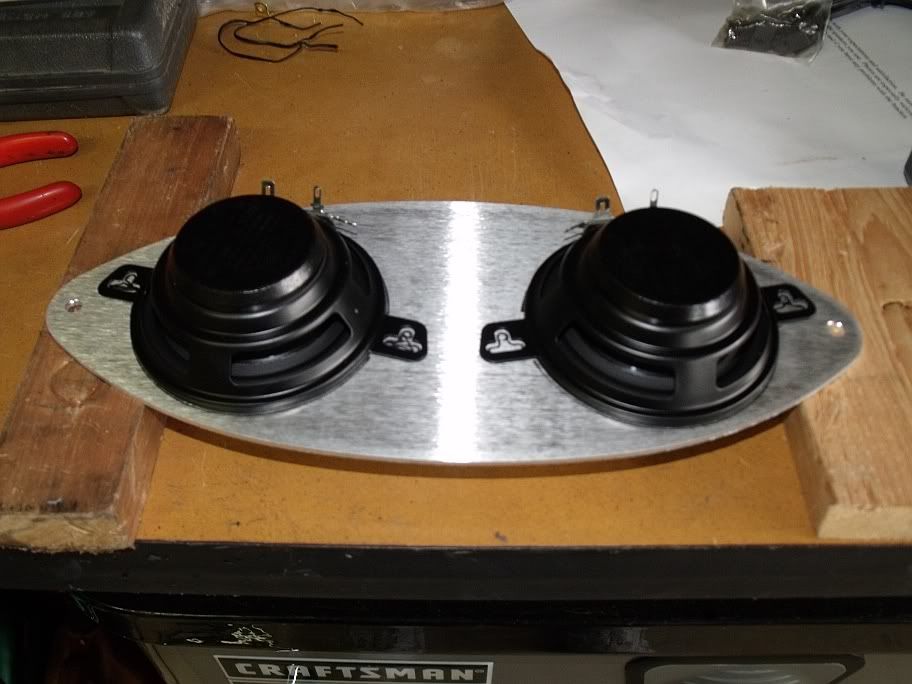 Painted the bracket flat black. 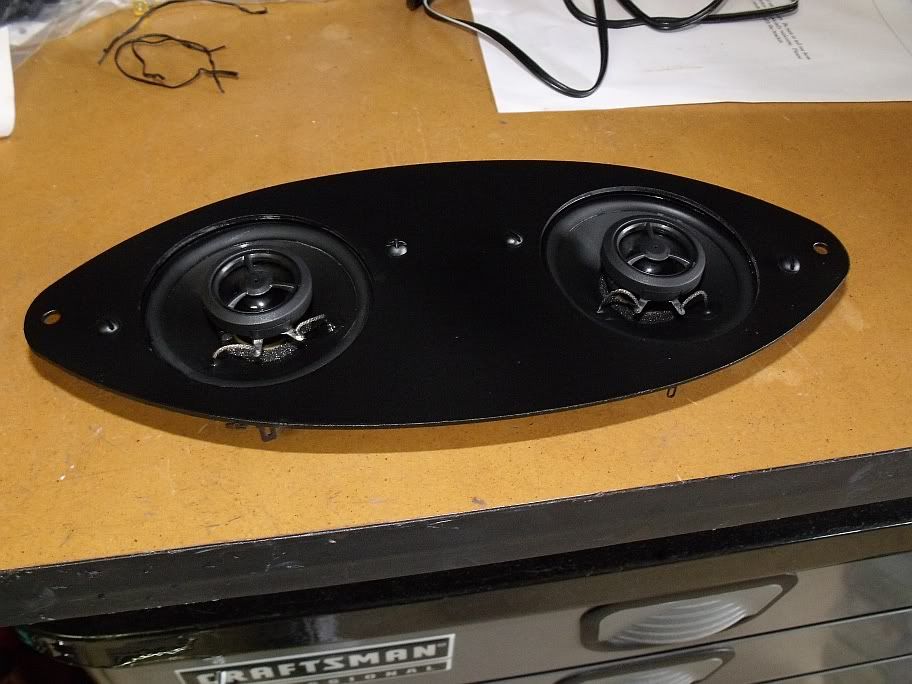 And installed the assembly in the front speaker opening. 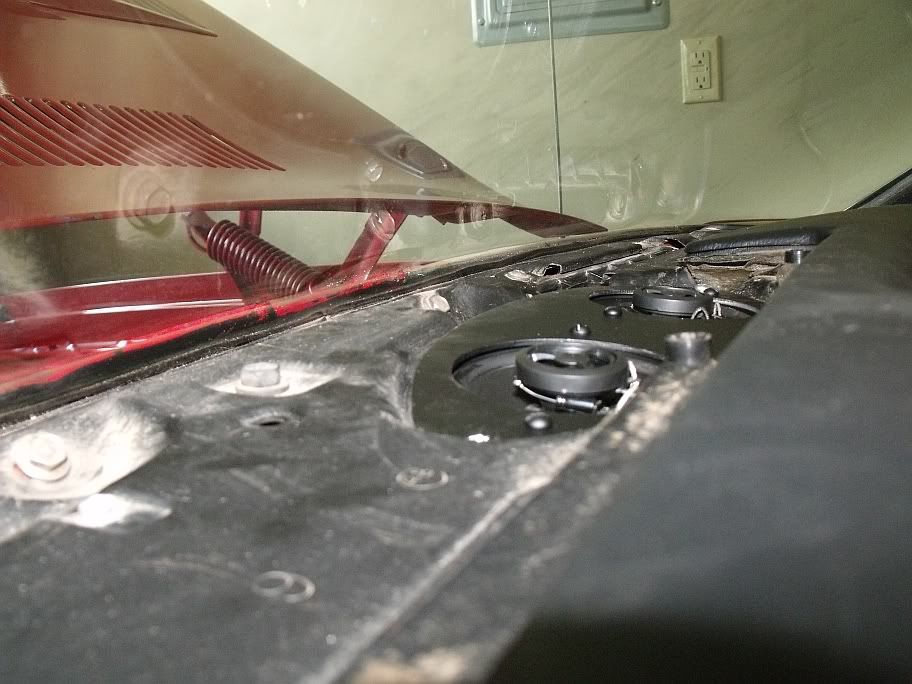 Then, I mounted the radio in the dash opening, made a few adjustment and installed a metal bracket included with the kit to brace the rear of the radio housing. The system came with a remote mountable SD Card/ USB port/ 1/8� input jack housing. In the pic below, you can see it at the lower lip of the dash board below the right side of the radio face plate. I attached it with double-sided tape. This allows you to play MP3 songs via SD card or USB thumb drive media. Additionally, the system came with a hand held remote which works through a RF signal. 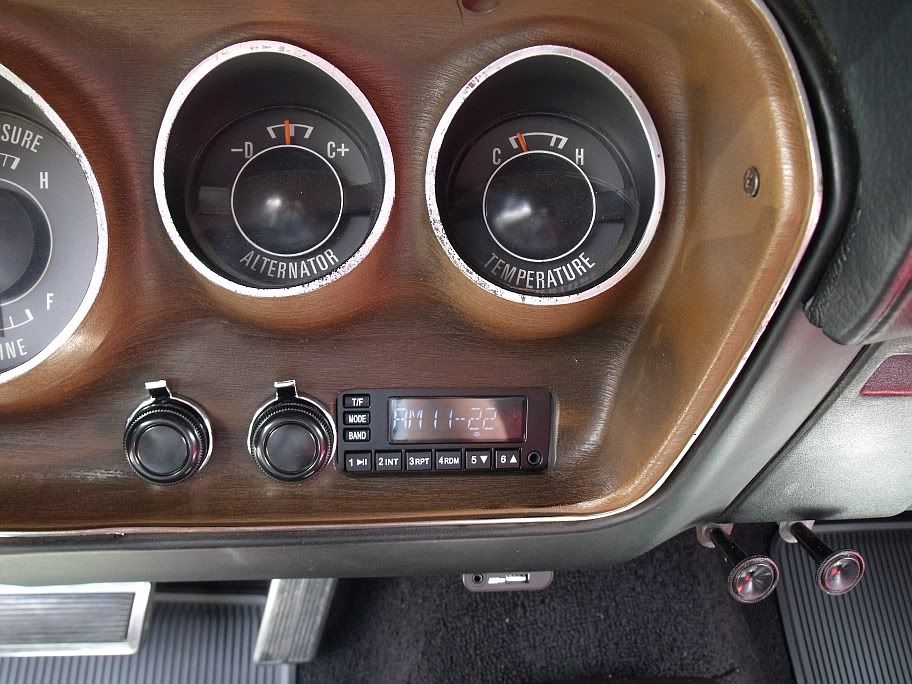 I am pleased with the system and look forward to listening to tunes from all sources. This is a workable option for the 3rd generation B-Body cars with the somewhat unique configured radio.
|
|
|
Re: Retrosound Radio System Installed in 3rd Gen B-Body
[Re: Ronnman]
#996866
05/21/11 10:59 PM
05/21/11 10:59 PM
|
Joined: Sep 2003
Posts: 1,168
Vancouver, WA
MoparMarq
super stock
|
super stock
Joined: Sep 2003
Posts: 1,168
Vancouver, WA
|
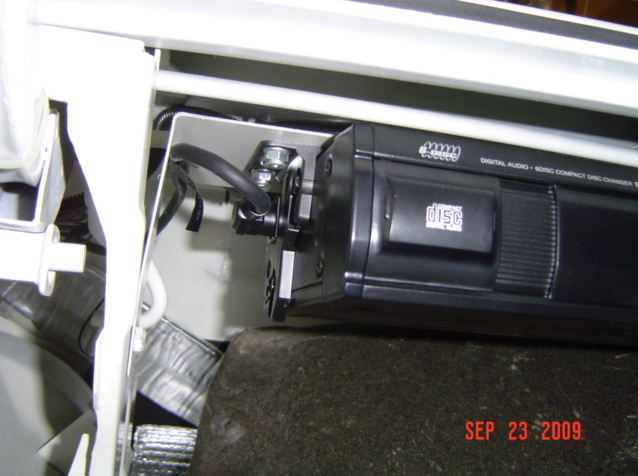
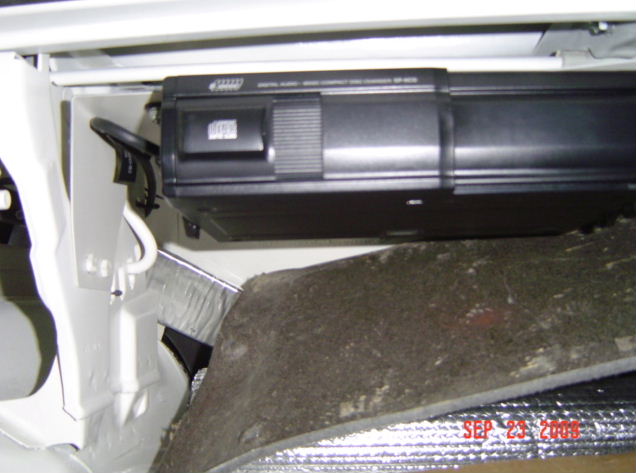
I went a slightly different route. As I'm a technophobe, I own no iPod, so had no need for MP3 jack. I sent the existing AM/FM factory radio to Gary Tayman at www.taymanelectrical.com to replace the existing guts with electronic guts and a new harness. Went with dual cone 4X10 for the front and new 6x9s in the back with new wires. The rear has a 6-disc changer compatible with the new radio. Control of the changer is effected by a separate control panel which I placed on a bracket I fabbed that swings out of view when not in use. When swing up, it stays up by velcro that is stuck to the back of the bracket. That strip adheres to the other half which is stuck to the bottom of the radio. The control panel also has a separate remote which I can keep under the seat, in the ashtray, or on top of the visor. When the CD is turned on, it automatically cuts out the radio, and control of the tunes is by the separate control panel. When the CD is off, control of the radio is by the radio panel itself, of course. The rheostats controlled by the knobs have been modified so that they control not only volume, but also balance, fade, and tuning. The tuning knob is actually mostly unchanged, but the tone control of the volume knob is multi-function: When the tuning is brought to full scale on one side, the tone control is a balance control. When the tuning control is brought to full scale on the other side, the tone control is a fade control. Once balance and fade are set, you don't have to mess with them much, so it's pretty easy to work. This setup did require slightly modifying my existing harness to wire in the new 12-pin plug. If I had to do it over, I would have sent Gary a different plug to use. EBay sellers have some Acura/Honda stereo harness plugs - male and matching female - that are way more robust. The plug in this setup boogered up a few pins after the second test fit.
|
|
|
Re: Retrosound Radio System Installed in 3rd Gen B-Body
[Re: MoparMarq]
#996870
05/21/11 11:14 PM
05/21/11 11:14 PM
|
Joined: Sep 2003
Posts: 1,168
Vancouver, WA
MoparMarq
super stock
|
super stock
Joined: Sep 2003
Posts: 1,168
Vancouver, WA
|
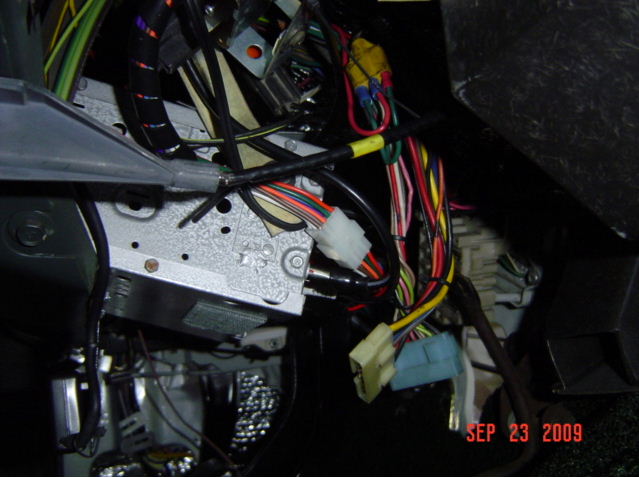
The underdash shot. The radio connector is the white one. It's pretty lame, but for now it's working. 12-pins are needed, as there are 8 for the speakers, one for power, one for ground, one for CD power-on sense, and one for backlighting.
What's not shown in the pic is the radio is also modified for the two RCA plugs that come from the CD changer. Power to the CD changer comes from the same source as the radio via a small remotely mounted interface box (I put mine on a small bracket above the glove box).
|
|
|
 Re: Retrosound Radio System Installed in 3rd Gen B-Body
[Re: MoparMarq]
#996871
Re: Retrosound Radio System Installed in 3rd Gen B-Body
[Re: MoparMarq]
#996871
05/22/11 10:06 AM
05/22/11 10:06 AM
|
Joined: Jan 2003
Posts: 16,810
Between Houston & Galveston TX
SattyNoCar
Smarter than no class Flappergass by a mile
|
Smarter than no class Flappergass by a mile
Joined: Jan 2003
Posts: 16,810
Between Houston & Galveston TX
|
Thanks for the info guys!!  The retrosound kit is almost $100 cheaper. I wonder how well a universal add-on CD changer would work with the retro unit?  
John
The dream is dead, long live the dream.......😥
|
|
|
Re: Retrosound Radio System Installed in 3rd Gen B-Body
[Re: Ronnman]
#996875
05/22/11 03:06 PM
05/22/11 03:06 PM
|
Joined: Jan 2003
Posts: 5,439
So Cal
Sinitro
master
|
master
Joined: Jan 2003
Posts: 5,439
So Cal
|
Quote:
MoparMarq - What speaker did you use in the front? Any pics of the installation?
The speakers in the picture are (2) 3.5"..
My recommendation would be to use (2) 4", as they can handle more power plus there a wider choice of options available..
The fit is titer with (2) 4" but they go in fine...
Just my $0.02... 
|
|
|
|
|


