|
 1972 Charger SE Project by CDN72SE
#834710
1972 Charger SE Project by CDN72SE
#834710
10/20/10 04:38 PM
10/20/10 04:38 PM
|
Joined: Aug 2010
Posts: 428
Oakville, Ontario, Canada
CDN72SE
 OP
OP
mopar
|
OP
mopar
Joined: Aug 2010
Posts: 428
Oakville, Ontario, Canada
|
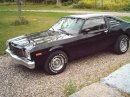
Hi All, I figured I would record my restoration (it will move slowly) here as I spend a lot of time on the site reading and following others restorations. I am also on the 71-74 site. This is my Y8 1972 Dodge Charger SE Brougham (production date 7-71) that I purchased from Nigel at National Moparts it was a rust-free North Carolina car that was parked due to a bad transmission and brought to Canada. To keep it running and because it was also a 318 car I swapped in my old 318 & TorqueFlite 727 from my first SE and drove it for about 5 years. It was last registered and on the road in 1992. It's traveled with me from place to place waiting for a restoration. I guess it's time to track what I will be doing, I am not a mechanic (or a body guy) but I have enjoyed working on my cars since I was young. I learned a lot early on from not having a lot of money to pay someone else to do the work for me. Funny enough now in my 40s I still don’t have the money. This is basically how I bought it in August of 1992, I put on my Western Turbine rims that I had on my previous SE. It did come with 14" Rallye's which I sold to a guy with a Challenger. Then I bought a set of 15x7 Rallyes from Motor City Originals. Shortly after getting it home I added the Year One front spoiler, I also added the dual cut-out exhaust rear valence from a '74, it was pretty rusted, I cleaned it up and painted it, thought it looked cool even though my exhaust was nowhere near the openings. I never would have thought that 17 years later there would be new ones being produced, thanks AMD. I’m not sure on the colour, I could go original but I probably won’t. I’m just adding the parts to it that I like such as the Ramcharger hood, front & rear spoilers, buckets, console with shifter, R/T taillights, hood pins and a tachometer to replace the clock. As far as the engine I will probably go with a 360. I'd love to hear any comments or suggestions guys/gals. 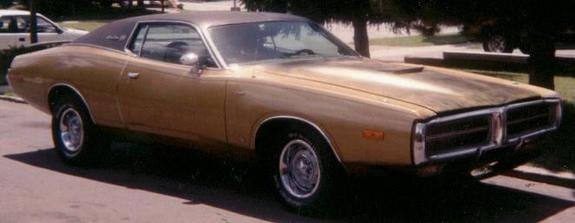 Those are P275/60R15's on the rear and up front P255/60R15's. 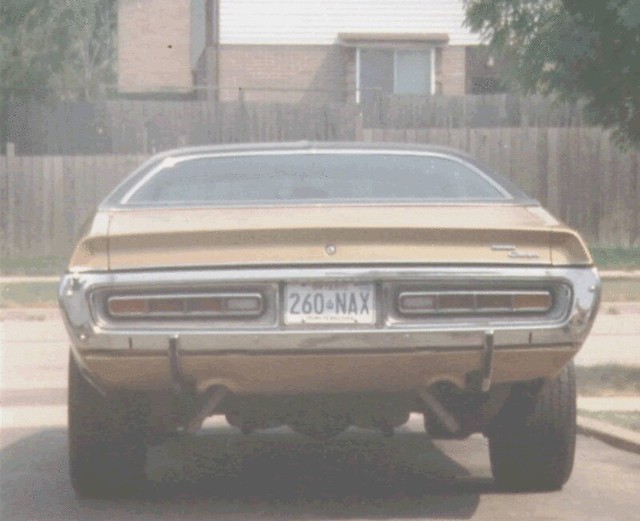 Rattle-can WAL-Mart black primer: 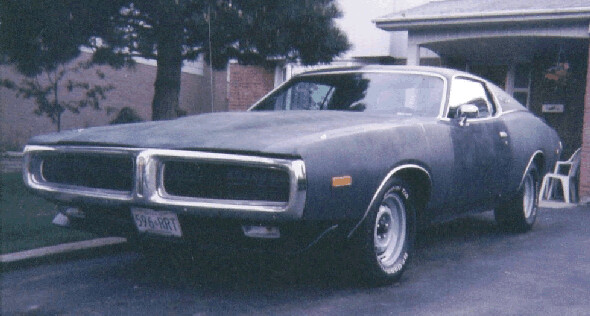 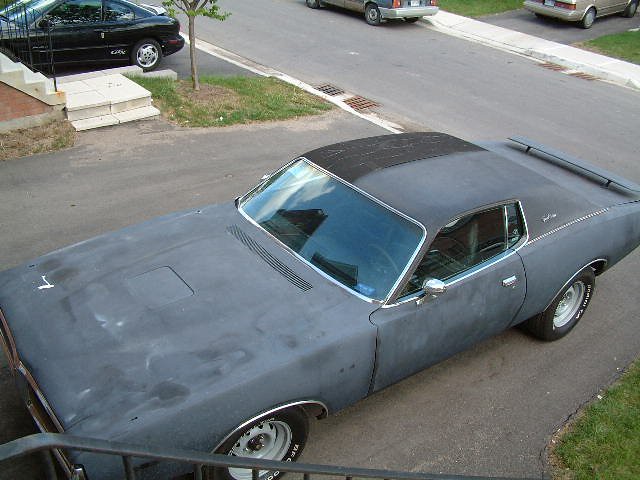 Yes it has the rear spoiler decklid cut-outs and yes it is the original '72 decklid. :2thumbs:  Here she sits, March 2007 just after me moved to the new house, double-car garage... finally, now I'll have some room to work on it. Don't really have a budget, I'll probably fund some of it by selling some of my extra "back-up" pieces (yes still have a few). This will be a slow restoration that's for sure, I'll be doing as much as I can. 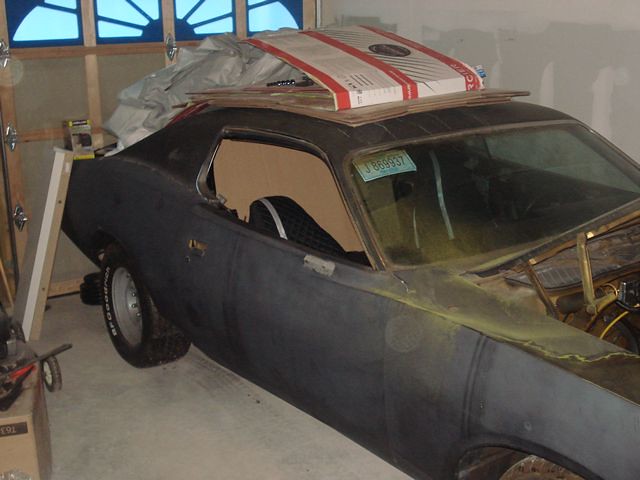 Removed the hood, decklid, fenders, doors, etc. 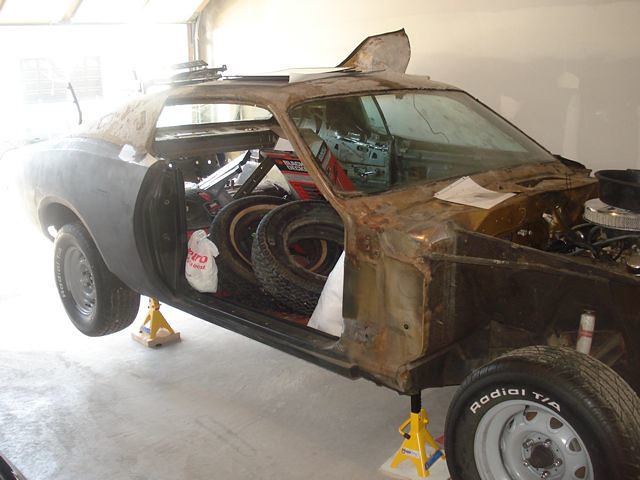 Not too bad behind the fenders: 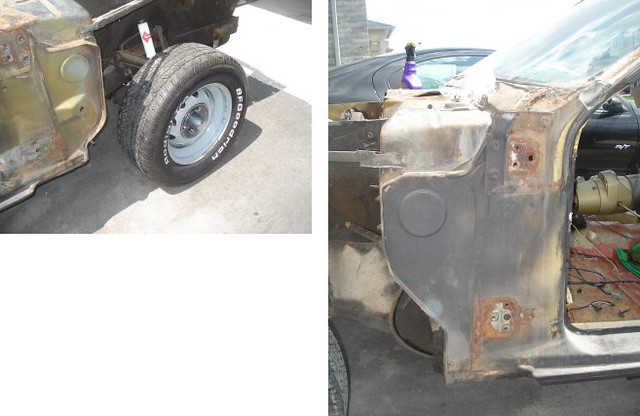 Quite a bit of undercoating.  Some rear shots: 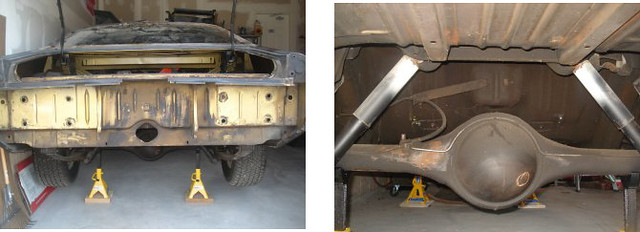
Last edited by CDN72SE; 05/03/18 03:08 PM.
|
|
|
Re: 1972 Charger SE Project by CDN72SE
[Re: CDN72SE]
#834711
10/20/10 04:40 PM
10/20/10 04:40 PM
|
Joined: Aug 2010
Posts: 428
Oakville, Ontario, Canada
CDN72SE
OP
mopar
|
OP
mopar
Joined: Aug 2010
Posts: 428
Oakville, Ontario, Canada
|
The car is pretty much fully covered with factory undercoating: 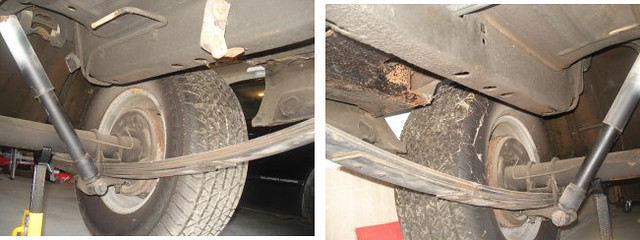 Couple of my 318 from my previous 72 that I installed in this car: 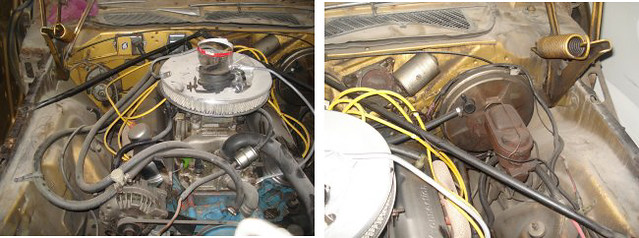 Rented an engine hoist from my local Stephenson's Rental, took me about two hours by myself (I did take my time) to get it out, as you can see I left the tranny attached and pulled it out as a unit. I had to let the air out of the two front tires to give me enough clearance over the radiator frame. Maybe I could have gone higher with the jack but was a bit fearful that my anchoring bolts on the engine may give way. 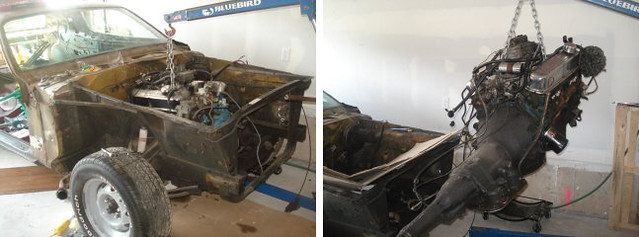 Transmission separated:  After 18 years the 318 is out again. 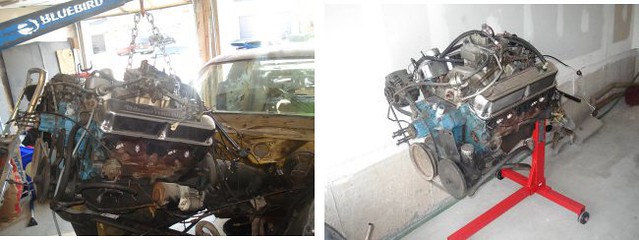 Rolled it outside, you definitely don't see anything like this in my neighbourhood. 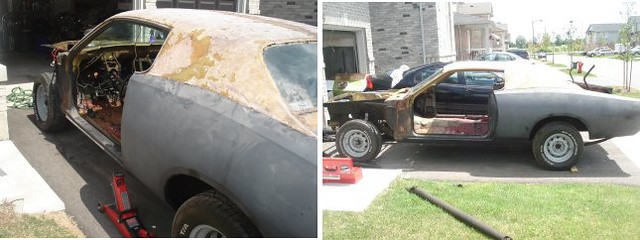 Removed the torsion bars, wasn't as bad as I thought it would be, really had to whack them though. 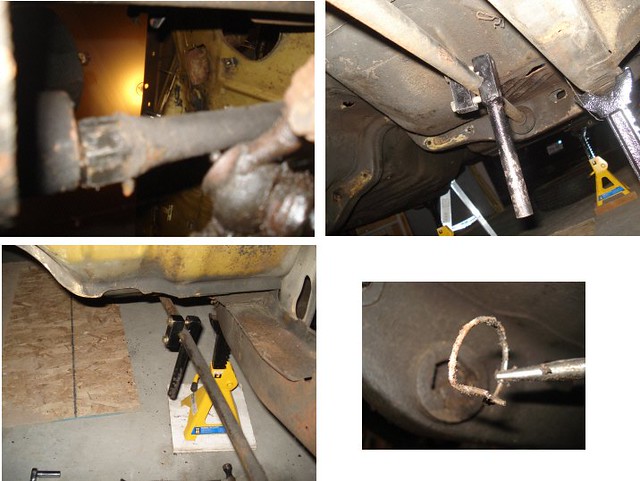  Then I removed the 4 bolts for the K-Frame and dropped the whole assembly on to some blocks temporarily. 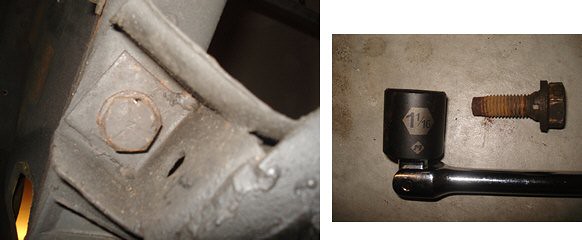 Here's the front suspension: 
Last edited by CDN72SE; 05/03/18 03:11 PM.
|
|
|
Re: 1972 Charger SE Project by CDN72SE
[Re: CDN72SE]
#834712
10/20/10 04:48 PM
10/20/10 04:48 PM
|
Joined: Aug 2010
Posts: 428
Oakville, Ontario, Canada
CDN72SE
OP
mopar
|
OP
mopar
Joined: Aug 2010
Posts: 428
Oakville, Ontario, Canada
|
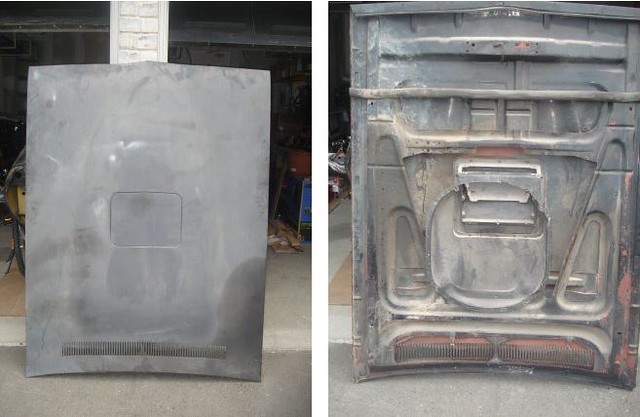
Rallye Wheel Center CapsDecided to do a little cleanup of some '71 Rallye Wheel centre caps (appliques) that I bought off eBay, I have seven in total some are the correct dark (charcoal) colour for '71 and some are the argent silver for 1970. I loosely followed an article that I have from a June 1991 Musclecar Review magazine. Materials I used include: Eastwood's Charcoal Rallye Wheel paint, 000-grade steel wool, chrome polish, 3M masking tape, and new rallye wheel center cap inserts. This is the procedure I followed: 1. Use a fine grade scuff pad like a 3M or Scotch to rough up the area which will allow the paint to adhere. Be sure to get into all the hard-to-reach areas, like lug nut holes. 2. Use the steel wool to to clean the unpainted chrome areas and use a polish to then polish those areas. 3. Mask off the clean chrome areas with 3M masking tape, leave some overhang and then trim off the pieces with a sharp knife or razor blade. Mask the back of the holes to prevent overspray. 4. Then paint the cap keeping the spray approx. 18-30 inches away, remember to turn the cap around a few times to get all the areas and 100% coverage. 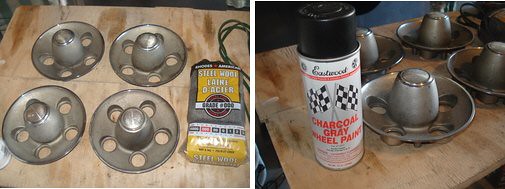 Here is the finish product, with a fresh coat of paint and a new center cap insert which I purchased off eBay. I think they look good enough and I spent about 1.5hrs and less than $40. The taping and masking was the time consuming part. 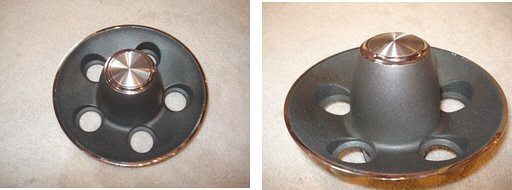 Interior InteriorI had removed the interior years ago, originally gold with a benchseat. I replaced the bench with one green and one white bucket seat that I had purchased and some panels from my previous SE that had the blue interior. Some of the panels I painted black (bad vinyl spray) and the back seat. I think I'm going to go with a white interior. Still debating the exterior colour. 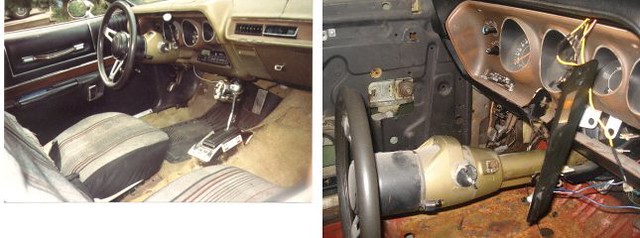 Some more, I still have one of the Chrysler issued trash bags that came with the car. POR-15, peeled in a lot of places, yes I followed the directions, that was applied in 1992.  Back seat area: 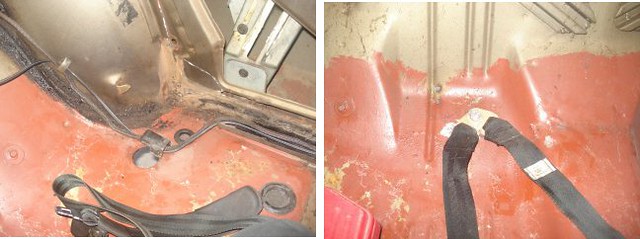 Trunk: 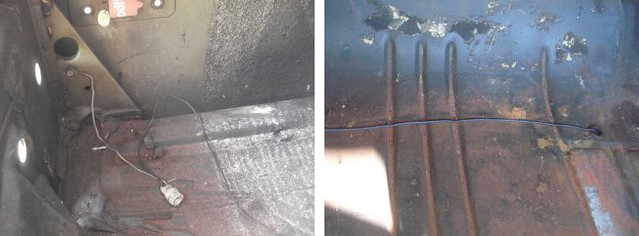 More - really not bad, the trunk has some surface rust and all floorboards are pretty solid. 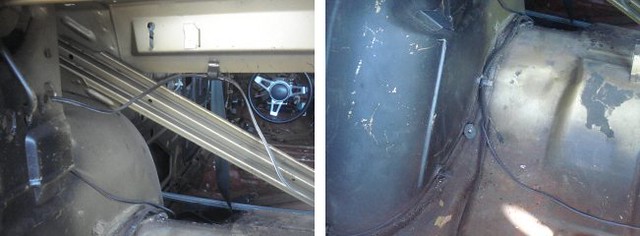
Last edited by CDN72SE; 05/03/18 03:12 PM.
|
|
|
Re: 1972 Charger SE Project by CDN72SE
[Re: CDN72SE]
#834714
10/20/10 04:51 PM
10/20/10 04:51 PM
|
Joined: Aug 2010
Posts: 428
Oakville, Ontario, Canada
CDN72SE
OP
mopar
|
OP
mopar
Joined: Aug 2010
Posts: 428
Oakville, Ontario, Canada
|
Rear BrakesGot out the wire brush and the rust encapsulator, these are 10" drums.  I had some red paint kicking around so used it on the drums as I'm using rallye's. 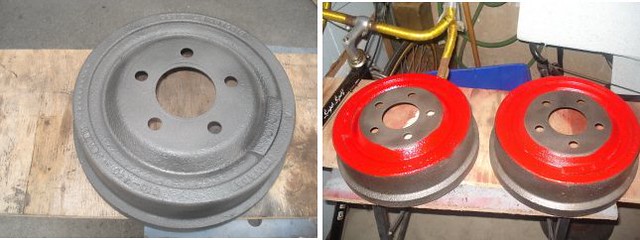 Think I had changed the rear shoes once since I've owned it, not sure if the hardware is original or not, I did order a kit. 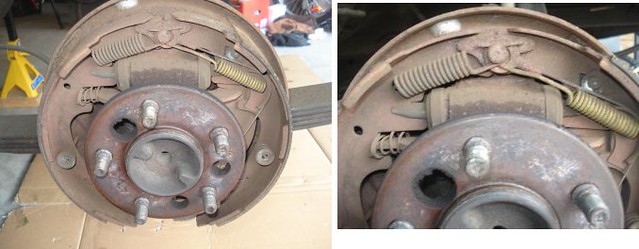 Took care of the backing plates, one finished and one unfinished, I did the vinegar, lemon juice and salt method for removing rust on these. Did an excellent job. 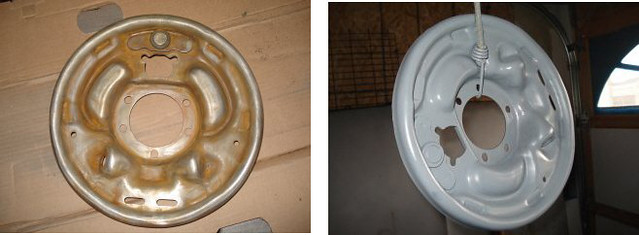 I used some rust encapsulator, primer and then some of Eastwood's black steel rim paint that I have kicking around. 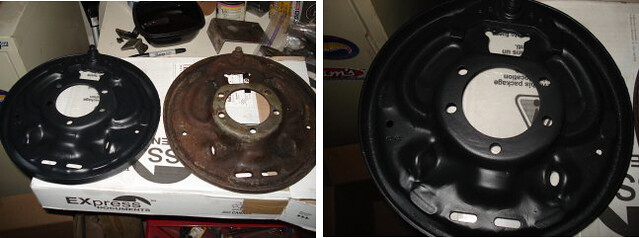 Got the wheel cylinder gaskets from DMT, the wheel cylinders from Canadian Tire and the riveted brake shoes from Napa. 
Last edited by CDN72SE; 05/03/18 03:14 PM.
|
|
|
Re: 1972 Charger SE Project by CDN72SE
[Re: CDN72SE]
#834715
10/20/10 04:52 PM
10/20/10 04:52 PM
|
Joined: Aug 2010
Posts: 428
Oakville, Ontario, Canada
CDN72SE
OP
mopar
|
OP
mopar
Joined: Aug 2010
Posts: 428
Oakville, Ontario, Canada
|
Headlight BucketsWell I've got a few things on the go and trying not to get too far ahead of myself, been working on the rear leaf springs, rear brakes, heater box and headlight buckets. For now I'm concentrating on the headlight assembly and the heater box. So here are some pics of the start of my headlight and accessories re-fresh. Drivers side fender with assembly attached: 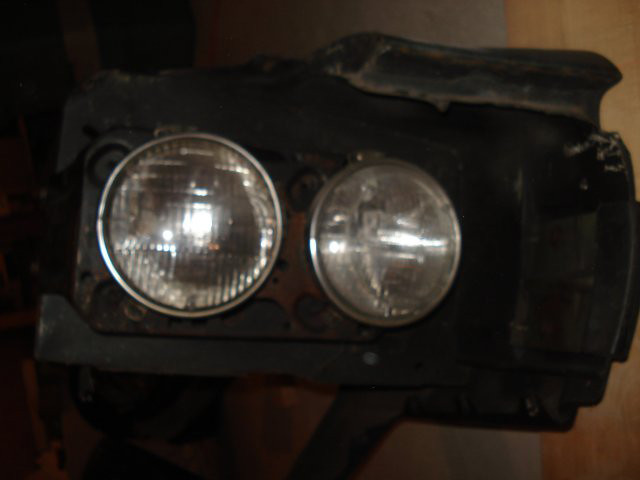 Removed... not much to it, four bolts I'll bag those and clean them up later. 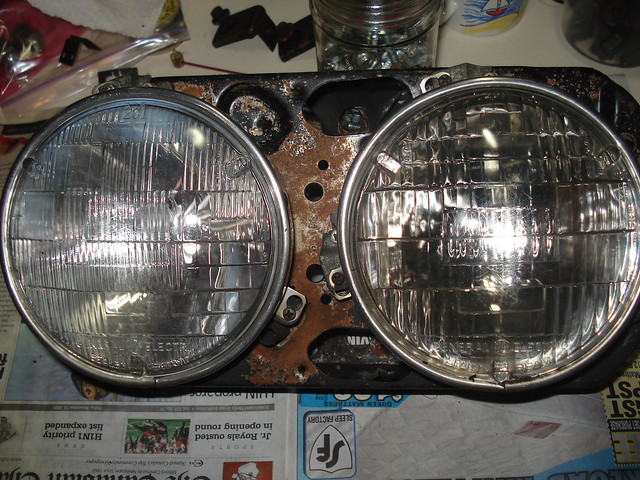 Took a bunch of shots of the position of everything for later:  Before cleaning, discovered the part numbers and paint marks, looks like we have red, orange and blue and I think black on the different cups, I have to record them: 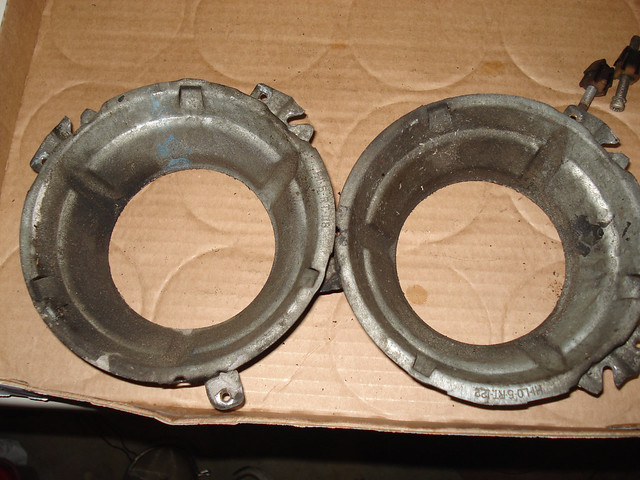 Here's HI-LO-5-RT-.122 after a bath:  Here's one of the mounts after a little sanding and a few coats of Eastwood's Underhood Black Paint. 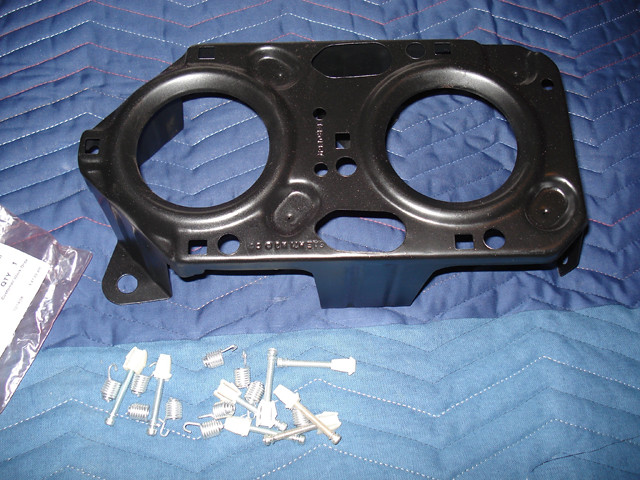 Next I'll finish cleaning the other parts, install the new headlight screws and hardware, reproduce the coloured stripes on the cups, polish the headlight rings and install the new sealed beams. 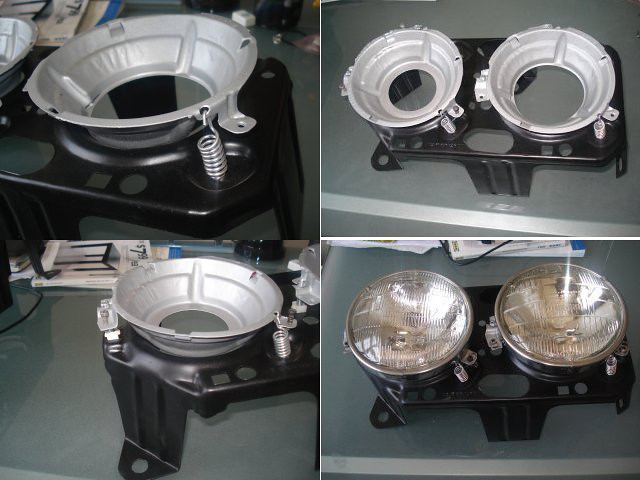
Last edited by CDN72SE; 05/03/18 03:15 PM.
|
|
|
Re: 1972 Charger SE Project by CDN72SE
[Re: CDN72SE]
#834716
10/20/10 04:55 PM
10/20/10 04:55 PM
|
Joined: Aug 2010
Posts: 428
Oakville, Ontario, Canada
CDN72SE
OP
mopar
|
OP
mopar
Joined: Aug 2010
Posts: 428
Oakville, Ontario, Canada
|
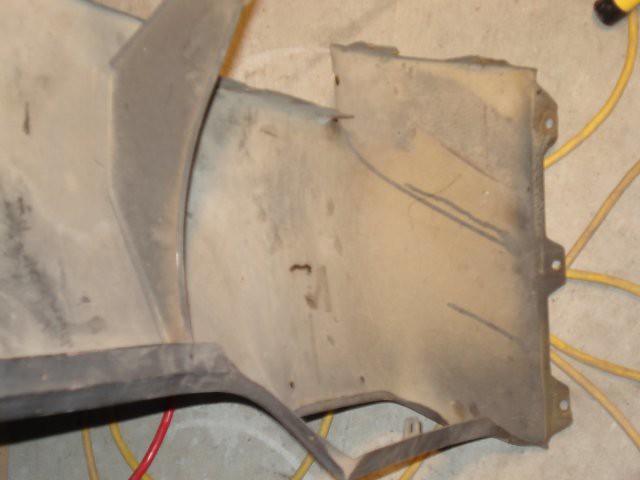
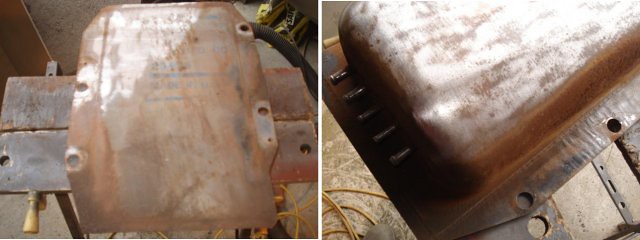
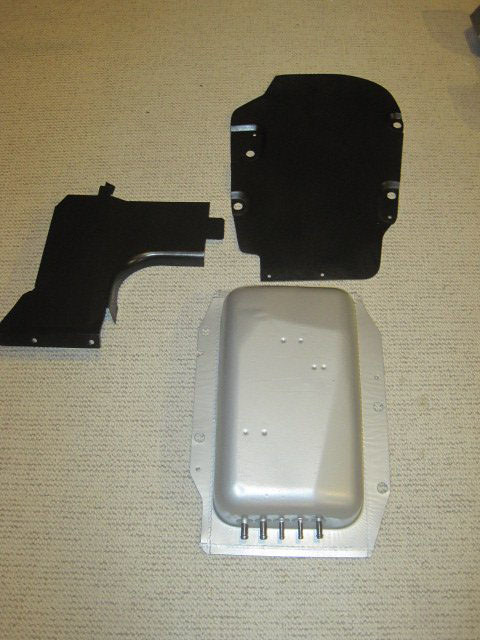
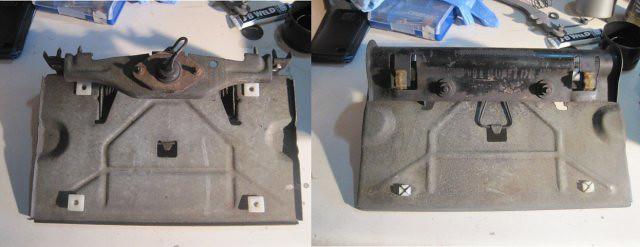
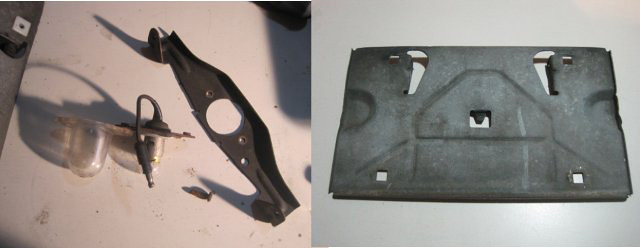
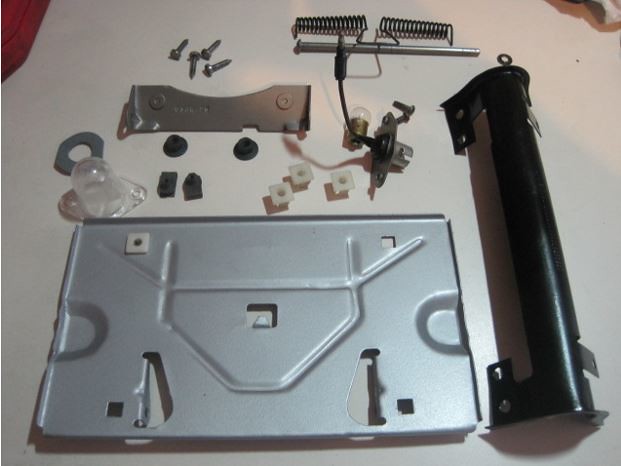
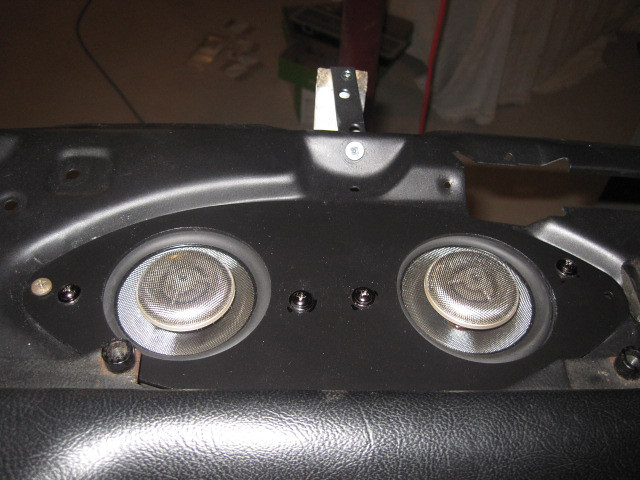
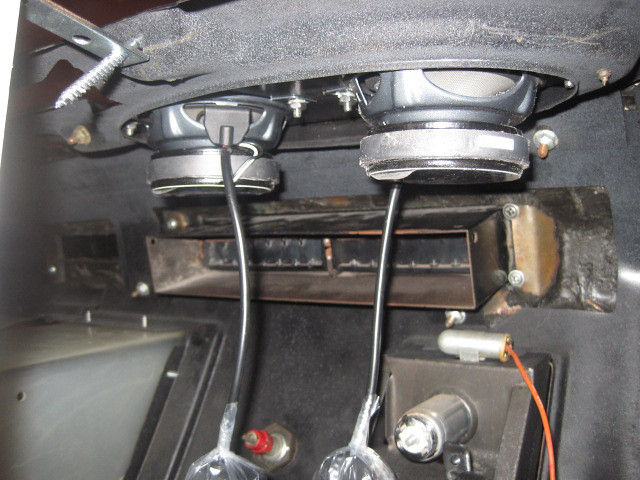
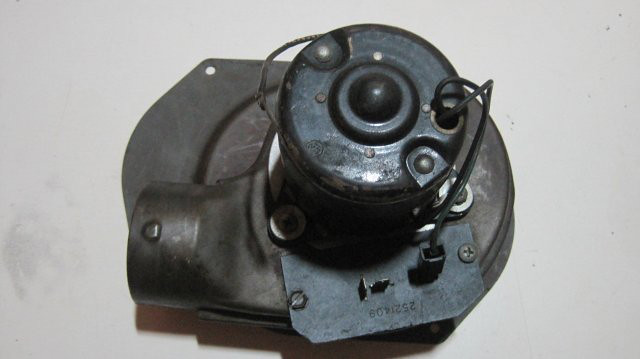
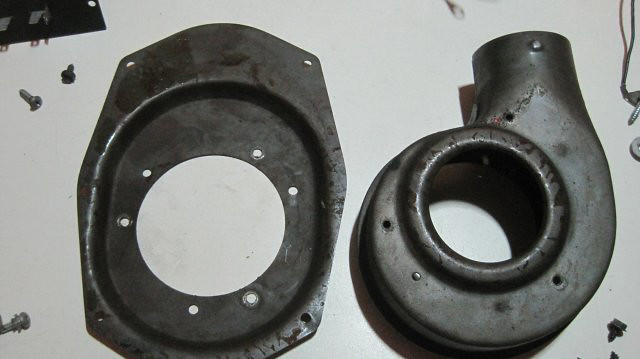
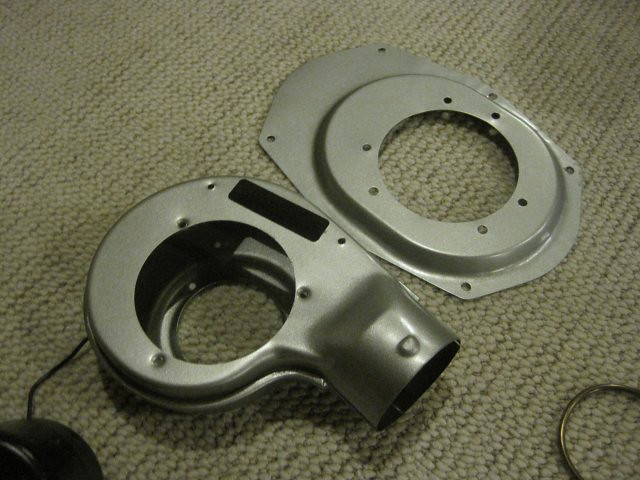
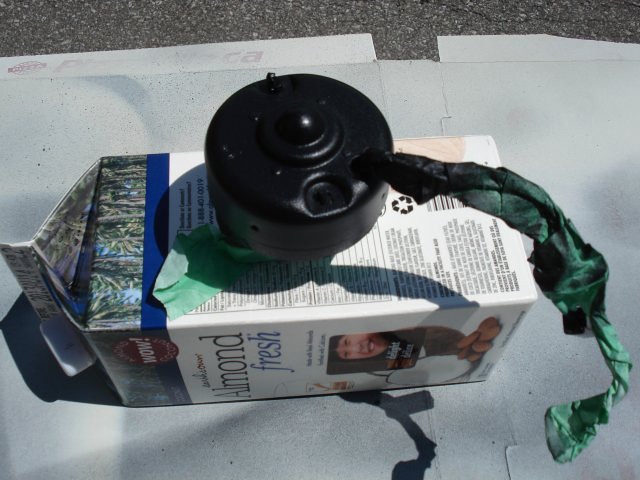
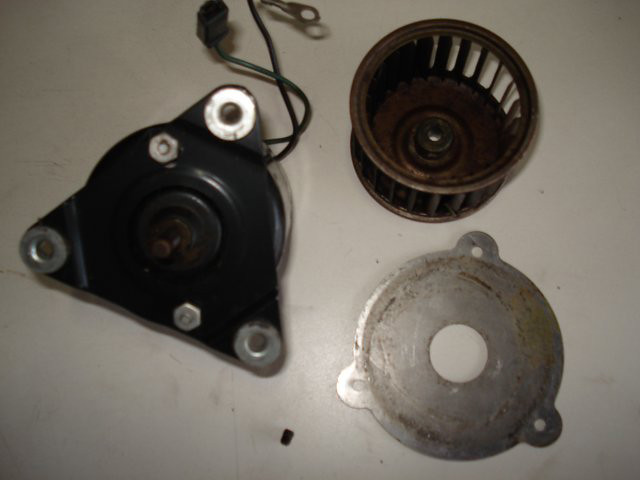
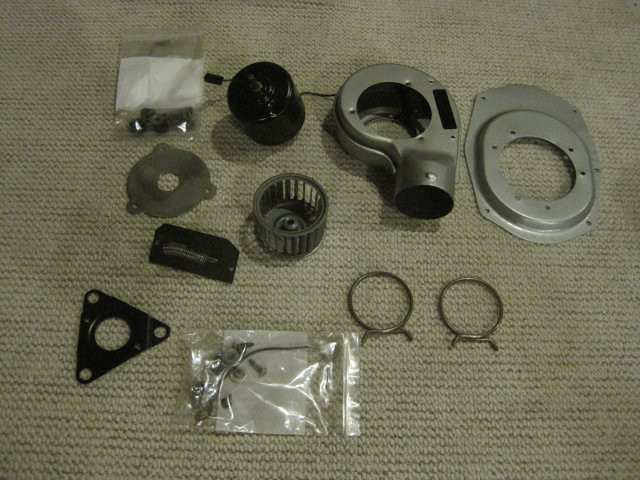
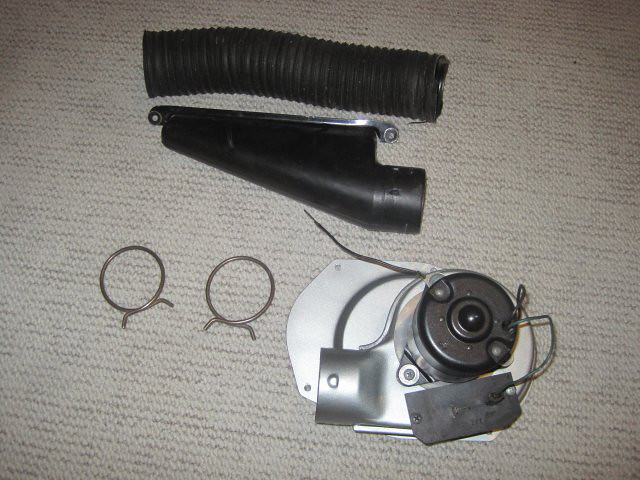
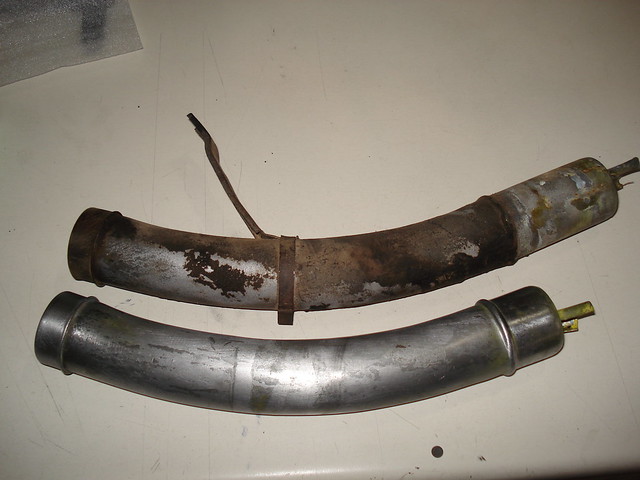
Heater BoxCompared my original heater box to one I bought off eBay, hoping to make one out of the two, unfortunately the parts one got damaged during shipping. I should still be able to put the two together. Original: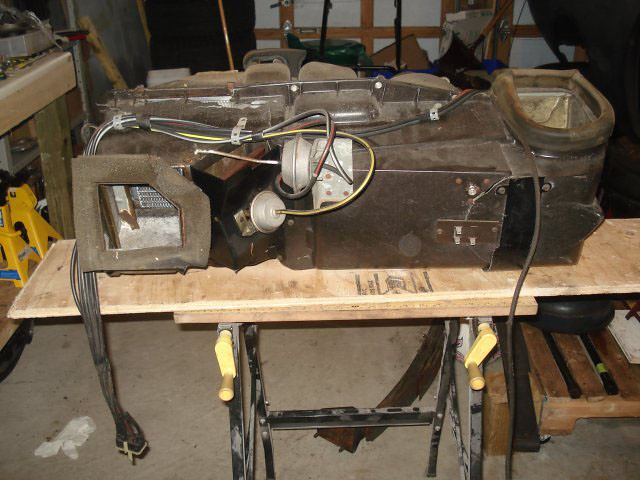 Donor: Donor: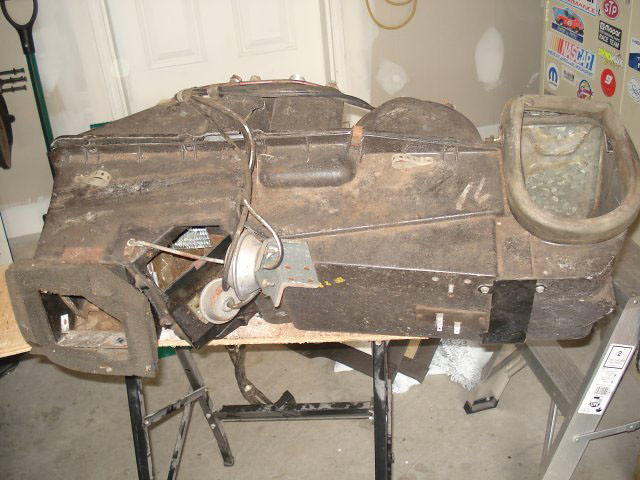 What I'm working with: 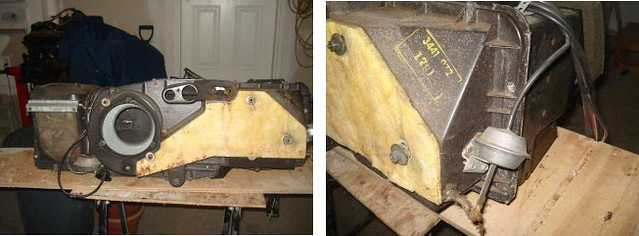 Acouple more:  Last of the many pics I took: 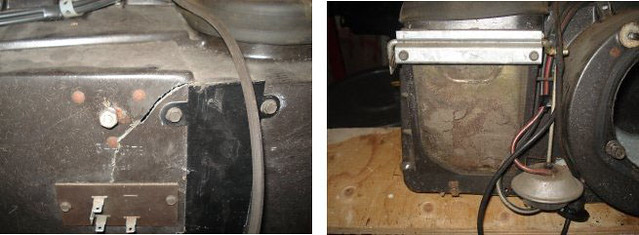 Ordered a kit to do the rebuild, I'll update as I go along.
Last edited by CDN72SE; 05/03/18 03:16 PM.
|
|
|
Re: 1972 Charger SE Project by CDN72SE
[Re: CDN72SE]
#834717
10/20/10 04:57 PM
10/20/10 04:57 PM
|
Joined: Aug 2010
Posts: 428
Oakville, Ontario, Canada
CDN72SE
OP
mopar
|
OP
mopar
Joined: Aug 2010
Posts: 428
Oakville, Ontario, Canada
|
Front Brakes & ComponentsStarted to take apart the front brakes, I will clean up the calipers, maybe I'll rebuild them. Strip down the dust shields and paint them black as I do see that they had black paint on them. I bought new brake positioners and I have a pair of NOS hub grease caps. 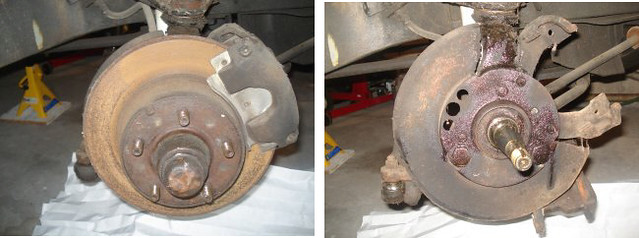 Further taken apart:  Did a little painting: 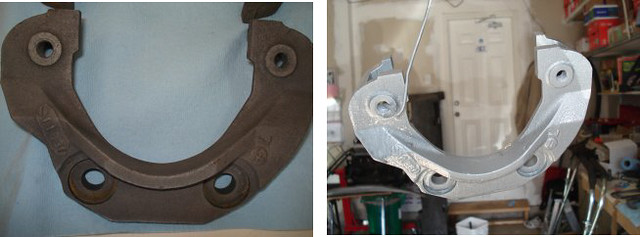 More to come...
Last edited by CDN72SE; 05/03/18 03:17 PM.
|
|
|
Re: 1972 Charger SE Project by CDN72SE
[Re: CDN72SE]
#834719
10/20/10 04:59 PM
10/20/10 04:59 PM
|
Joined: Aug 2010
Posts: 428
Oakville, Ontario, Canada
CDN72SE
OP
mopar
|
OP
mopar
Joined: Aug 2010
Posts: 428
Oakville, Ontario, Canada
|
CrossmemberYou can see how much undercoating I have on the bottom of this car, I plan on removing it. I guess some options are to just apply more undercoating over what's already there, leave it and patch or... what others have done use Lizardskin and re-cover the bottom. I have noticed in some spots where I have removed undercoating there is surface rust there so that leads me to believe that no everything is not going to be perfect underneath. I had gotten the car rustproofed over the years (Rustcheck) so I think that helped a lot and helped me dismantle the car with the basic tools I've always owned. I don't think I have ever broken a bolt. The crossmember I'll de-grease and paint with Eastwood's Extreme Chassis Black. I bought a set of NOS crossmember bolts, they were cheap, mine were ok but all four were not the same. Does it make a difference? No, but hey they were NOS and now I can say I have some NOS parts. 
Last edited by CDN72SE; 05/03/18 03:18 PM.
|
|
|
Re: 1972 Charger SE Project by CDN72SE
[Re: CDN72SE]
#834721
10/20/10 05:02 PM
10/20/10 05:02 PM
|
Joined: Aug 2010
Posts: 428
Oakville, Ontario, Canada
CDN72SE
OP
mopar
|
OP
mopar
Joined: Aug 2010
Posts: 428
Oakville, Ontario, Canada
|
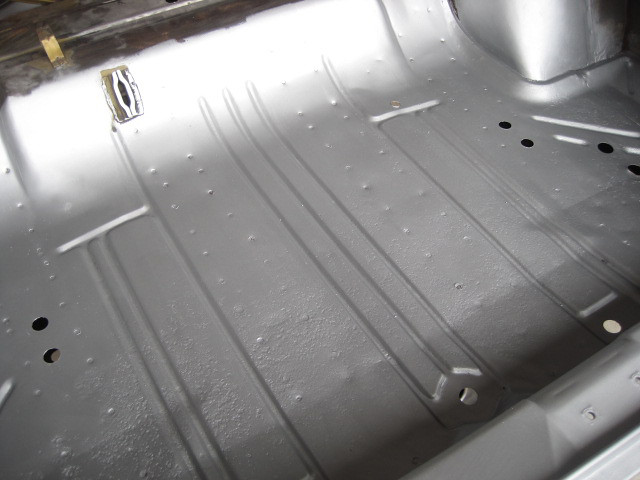
Undercoating & RemovalWell, on sunday I got my propane torch and putty knife and decided to start removing the undercoating, I am planning on replacing it at some point. The bottom of the car is starting off very easily, I think mainly because I used to get the car rustproofed so it's kind of supple. I haven't come across any rust yet, I know there is a little bit of surface rust where the gas tank resides, there was no undercoating there as the undercoating was applied after all the components were already on the car. Needed the torch on the stuff in the wheel wells and the front wheel well area. I almost regret removing it but I didn't want to take a chance of their being rust present. Here are some before pictures showing how much coverage the car has. 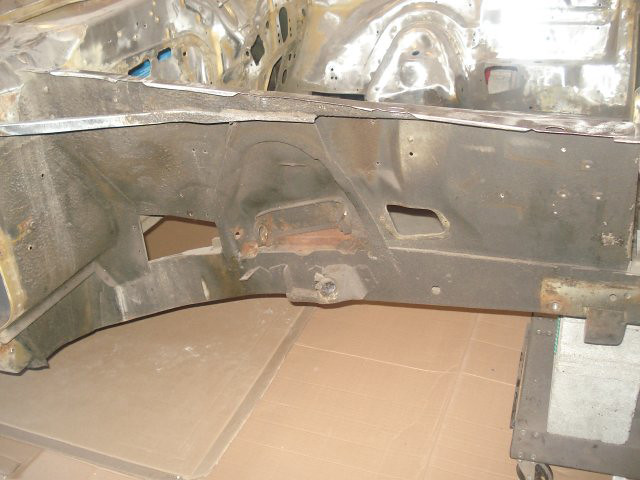 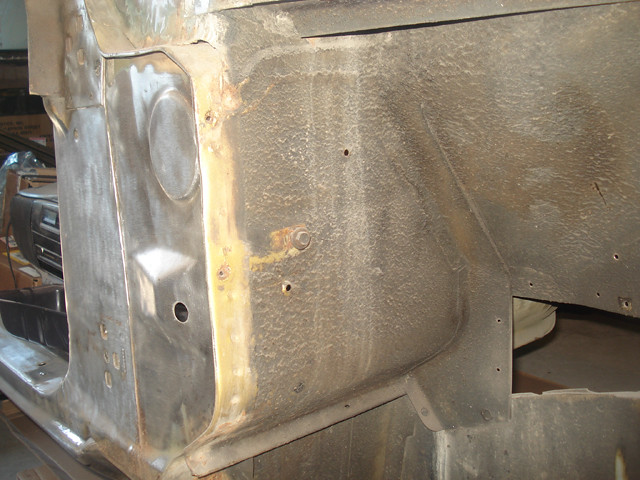 Gas tank area with a little surface rust: 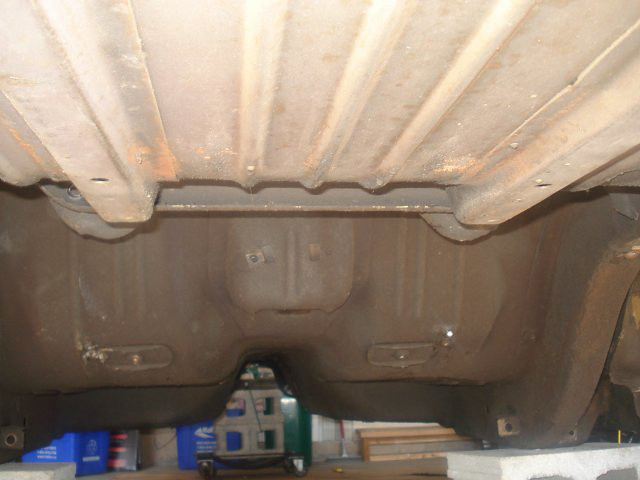 You can see the little patch that is missing and how clean it is underneath: 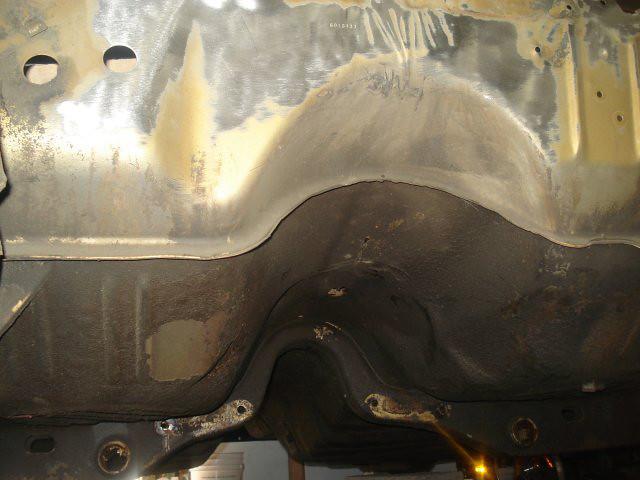 Here are some progress pics, nothing too exciting: 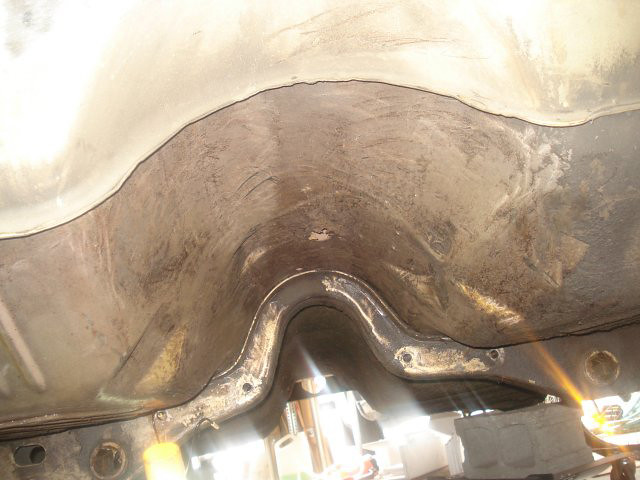 The whole floorpan basically looks like this, I was trying not to scratch it too much with the putty knife. 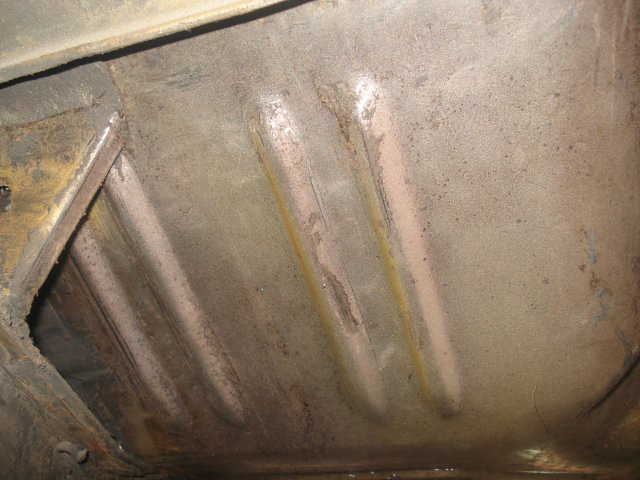
Last edited by CDN72SE; 05/03/18 03:19 PM.
|
|
|
Re: 1972 Charger SE Project by CDN72SE
[Re: CDN72SE]
#834722
10/20/10 05:05 PM
10/20/10 05:05 PM
|
Joined: Aug 2010
Posts: 428
Oakville, Ontario, Canada
CDN72SE
OP
mopar
|
OP
mopar
Joined: Aug 2010
Posts: 428
Oakville, Ontario, Canada
|
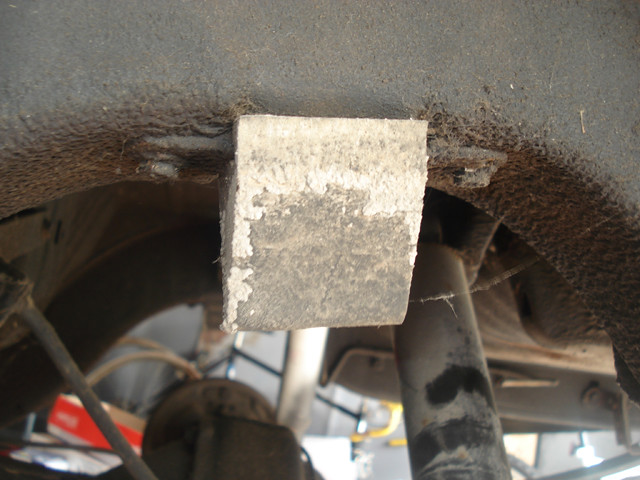
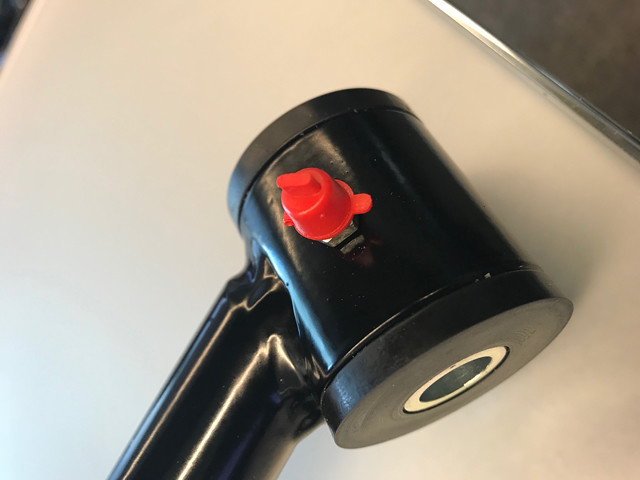
Rear Axle & DifferentialThought I'd do a little cleaning of the axle, what a lot of caked on grease. I may replicate some of the paint daubs and markings not sure yet. Main goal is to strip it down, prime it and coat it with some of Eastwood's Extreme Chassis Black. With the differential I think I'll hit it with some Detail Gray. 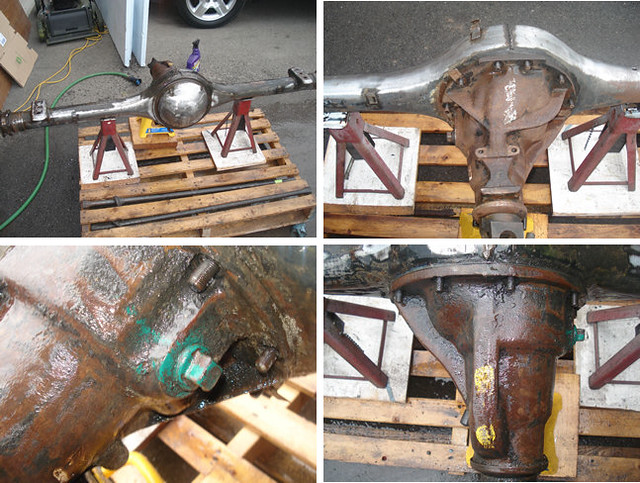 Differential: 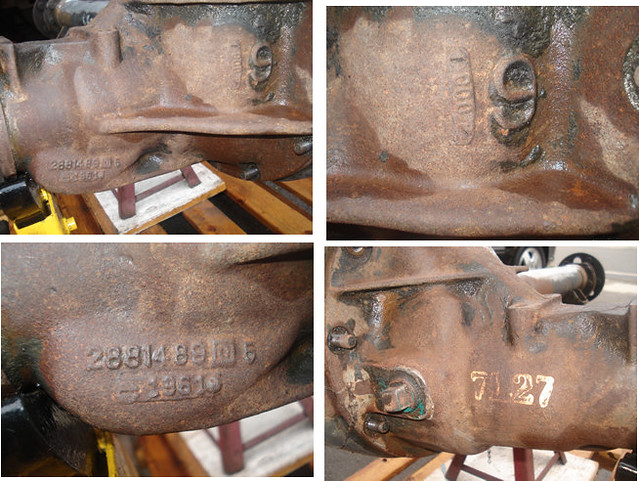 Started to do some detail of the rear. 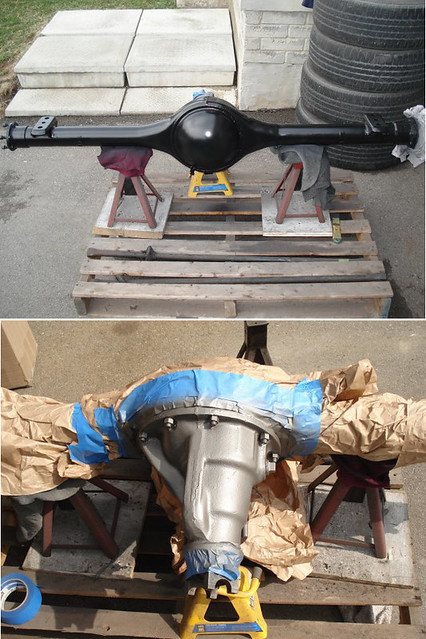 Took care of the pinion snubber. De-greased it, soaked it in some Evaporust, primed it and then painted it. 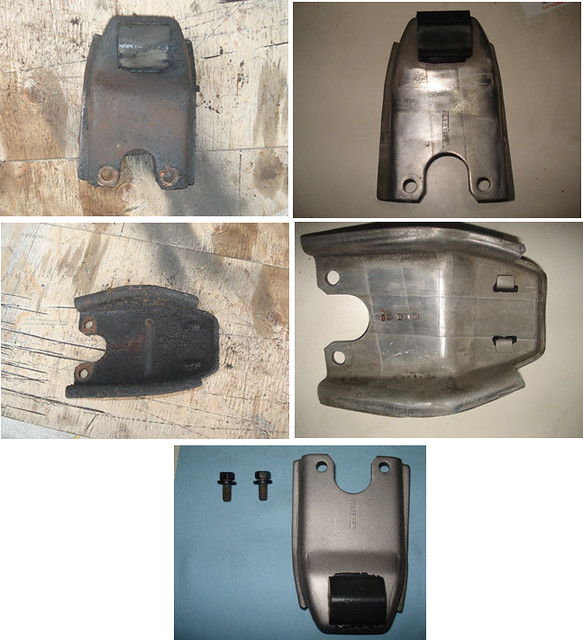
Last edited by CDN72SE; 05/03/18 03:19 PM.
|
|
|
Re: 1972 Charger SE Project by CDN72SE
[Re: CDN72SE]
#834723
10/20/10 05:06 PM
10/20/10 05:06 PM
|
Joined: Aug 2010
Posts: 428
Oakville, Ontario, Canada
CDN72SE
OP
mopar
|
OP
mopar
Joined: Aug 2010
Posts: 428
Oakville, Ontario, Canada
|
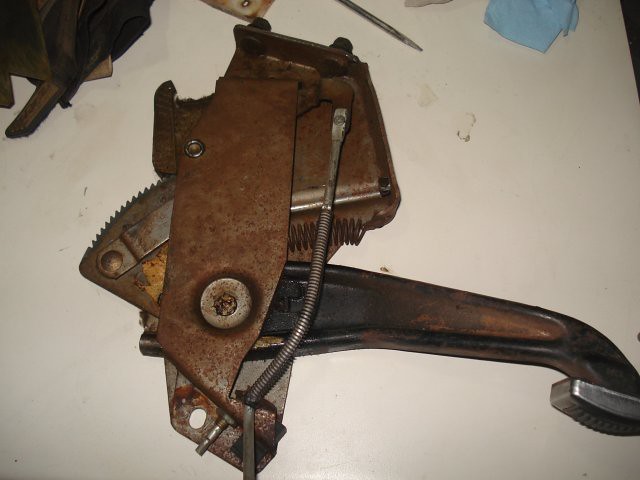
Brake PedalHere is my brake pedal assembly that I just finished freshening up. Did it over a few days as time permitted. Here it is as removed from the car. 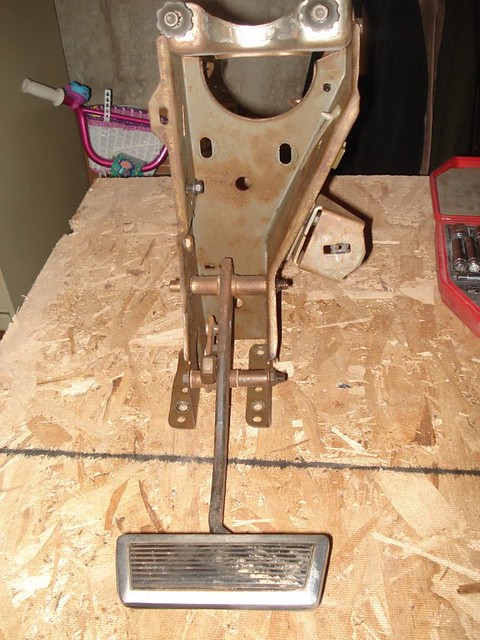 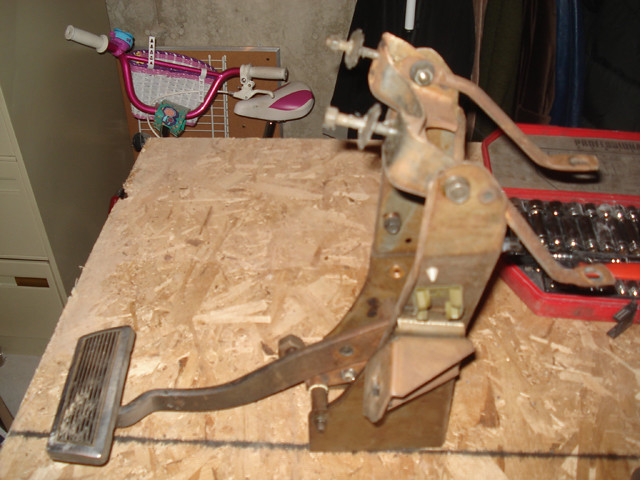 Disassembled:  Gave this part a little bath in the vinegar, lemon juice and salt solution. For the rest I used Evaporust, for light stuff I used the red scotchbrite pad and/or steel wool. 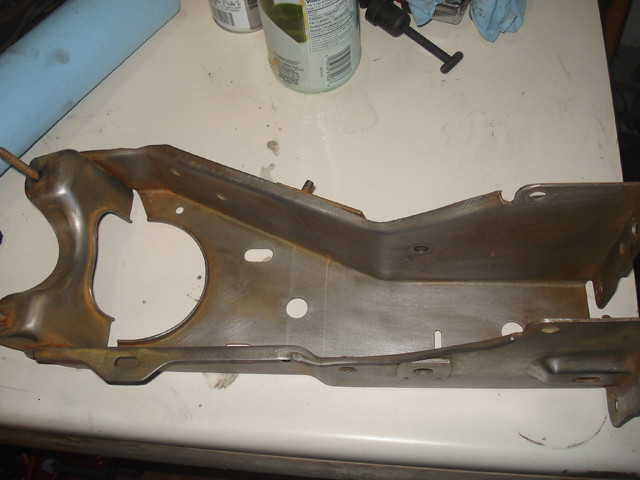 Cleaned up and painted: 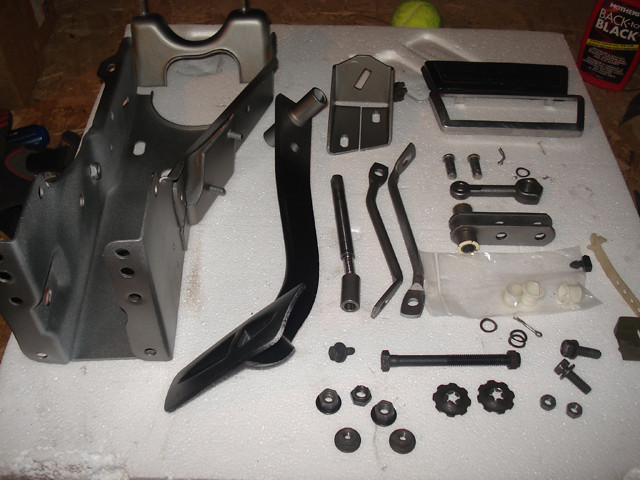 These pieces I left their natural colour and coated with some of Eastwood's clear. 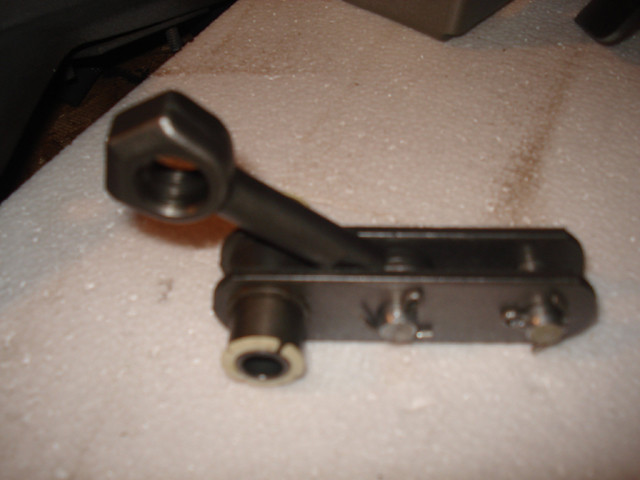 Here is a before shot: 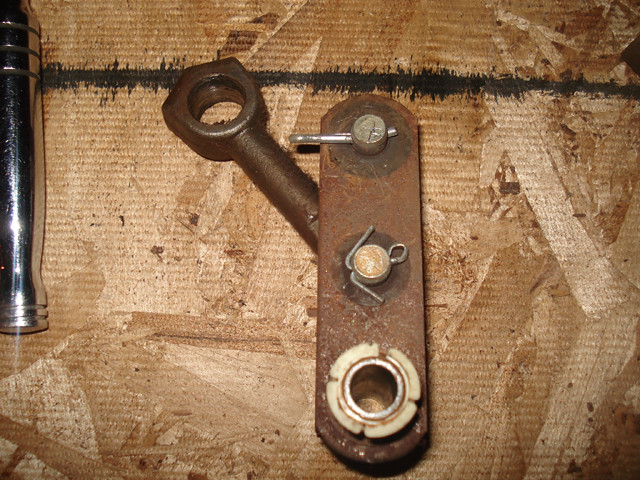 Some more: 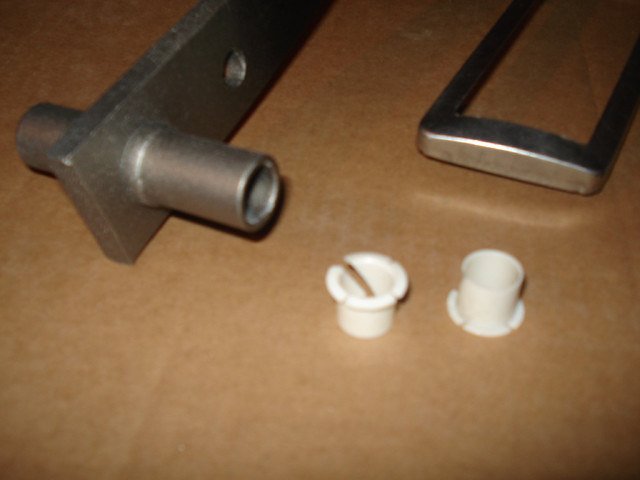 another, painted the whole thing with Seymour Stainless Steel paint and then sprayed over most of it with Eastwood's Underhood Black. Mine originally faded from black paint to bare steel. 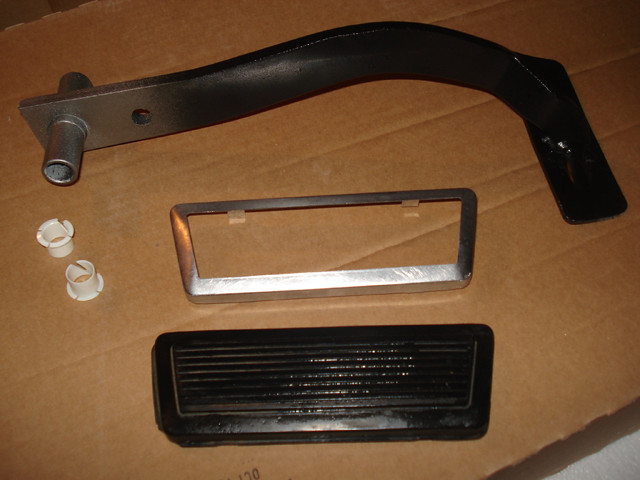 Here it is all back together, wasn't hard to do and I think I'll move on to the emergency brake next. 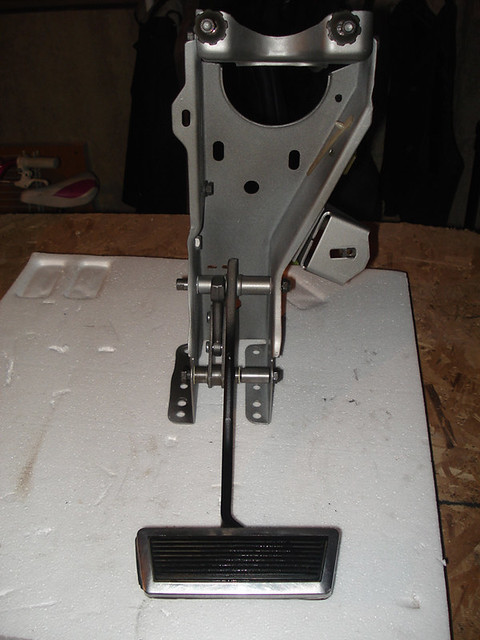 [img]https://farm5.staticflickr.com/4650/25358059067_87f38a779b_z.jpg [img]https://farm5.staticflickr.com/4650/25358059067_87f38a779b_z.jpg[/img]
Last edited by CDN72SE; 05/03/18 03:24 PM.
|
|
|
Re: 1972 Charger SE Project by CDN72SE
[Re: CDN72SE]
#834724
10/20/10 09:41 PM
10/20/10 09:41 PM
|
Joined: Mar 2004
Posts: 375
An Island in the Pacific N.W.
moopa
enthusiast
|
enthusiast
Joined: Mar 2004
Posts: 375
An Island in the Pacific N.W.
|
What a great job you are doing! Thanks for taking the time to do a step by step process with photos...alot of this info will help me with my Satellite.
Keep it up!
Mark
2015 TorRed Challenger Hellcat,A8
2013 Plum Crazy Challenger SRT8,6 Spd
2013 Black Challenger R/T Classic,auto
(2)72 Satellites, one on hold,one under resto on the rotisserie.
|
|
|
Re: 1972 Charger SE Project by CDN72SE
[Re: CDN72SE]
#834730
03/29/11 05:21 PM
03/29/11 05:21 PM
|
Joined: Aug 2010
Posts: 428
Oakville, Ontario, Canada
CDN72SE
OP
mopar
|
OP
mopar
Joined: Aug 2010
Posts: 428
Oakville, Ontario, Canada
|
Bucket SeatsMy car was originally a benchseat model, ember in colour. I replaced that soon after I got the car with a pair of mismatched buckets; drivers side is white and passenger green. Both I painted with some cheap vinyl spray, duct tape and cheap seat covers. I recently ordered some white front seat covers from Dante's. The plan is to colour match the interior with the front seats, I'll be switching the interior from black to white. Here's the seats as they sit. :'( 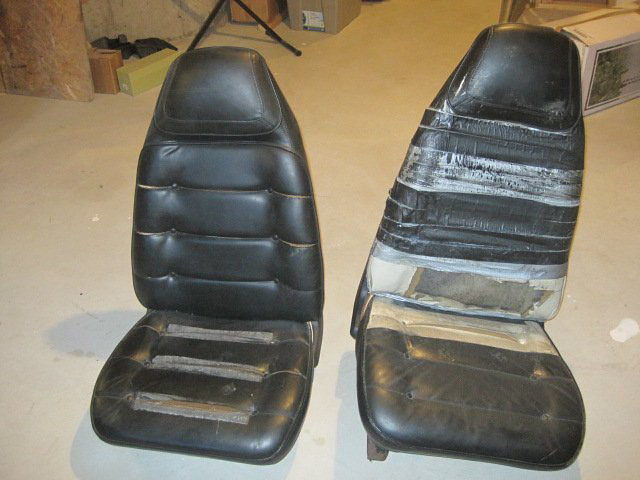 Recently received my covers from Dante, very nice Legendary covers, I'll tackle these myself a little later.  Some interior color change. I lightly went over the panels with a scotchbrite pad on some of the scratches and followed the SEM procedure, here are some of the results: 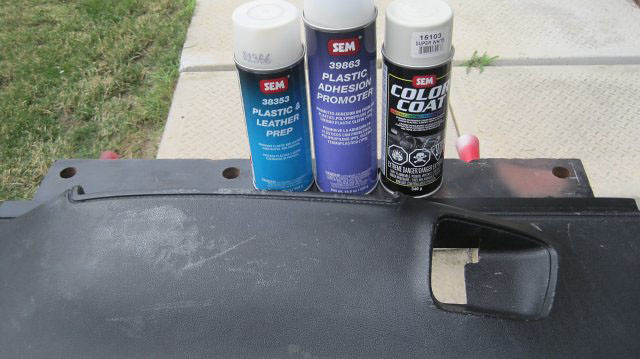 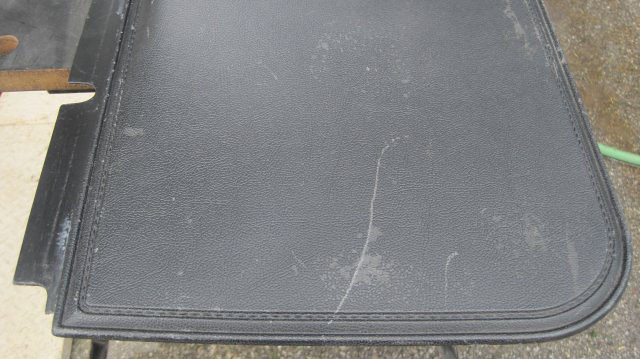 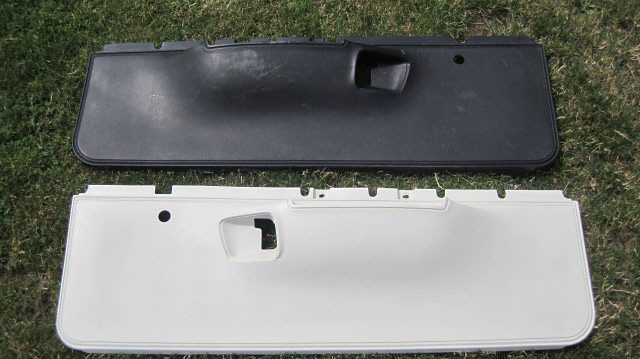 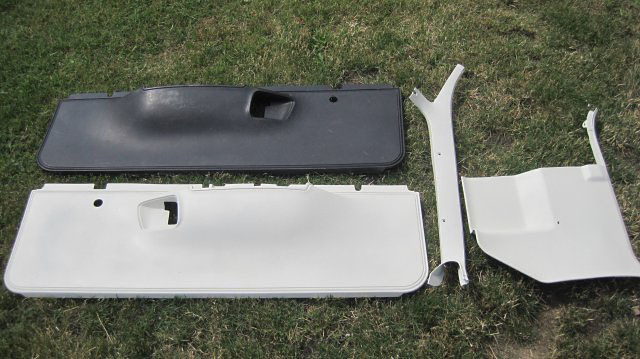
Last edited by CDN72SE; 05/03/18 03:28 PM.
|
|
|
Re: 1972 Charger SE Project by CDN72SE
[Re: CDN72SE]
#834731
04/05/11 05:11 PM
04/05/11 05:11 PM
|
Joined: Aug 2010
Posts: 428
Oakville, Ontario, Canada
CDN72SE
OP
mopar
|
OP
mopar
Joined: Aug 2010
Posts: 428
Oakville, Ontario, Canada
|
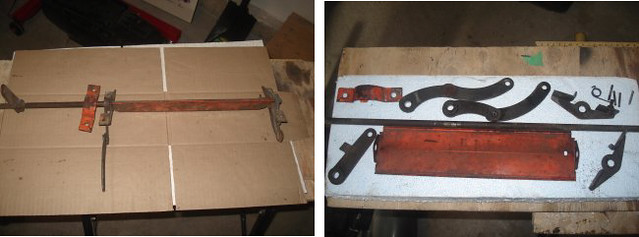
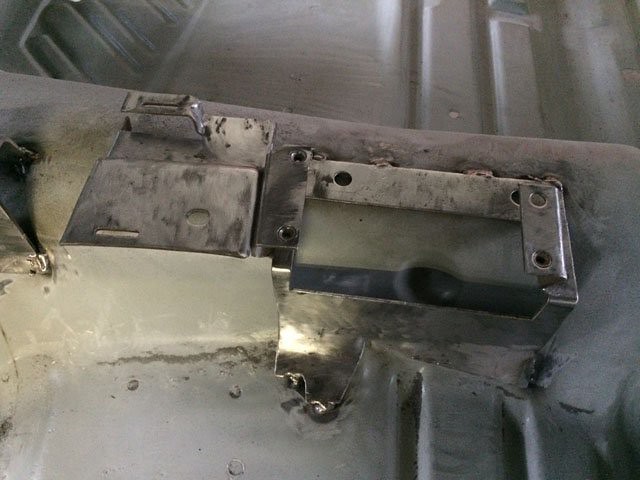
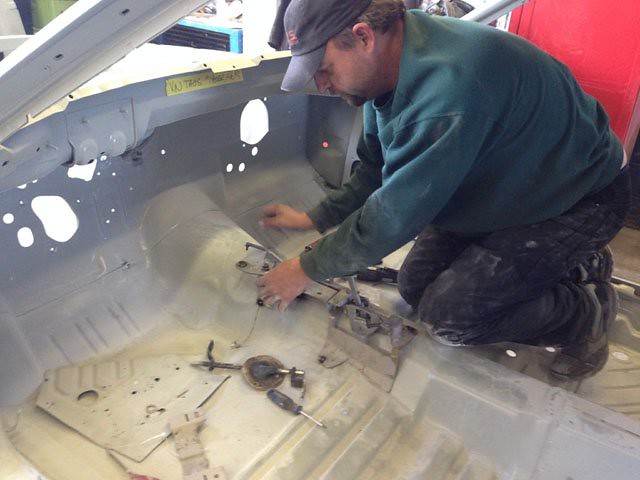
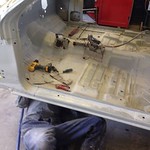
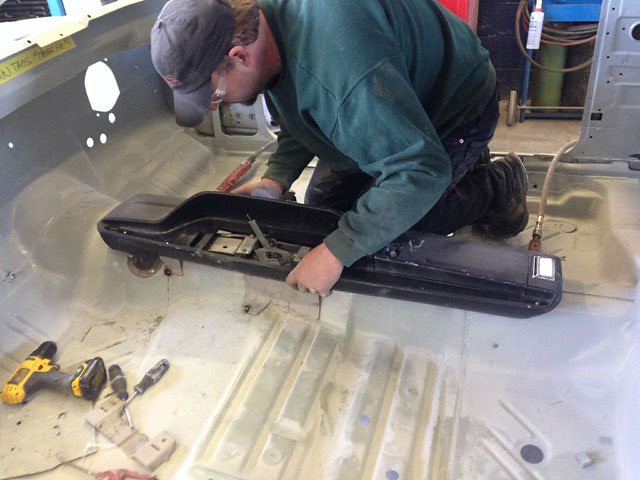
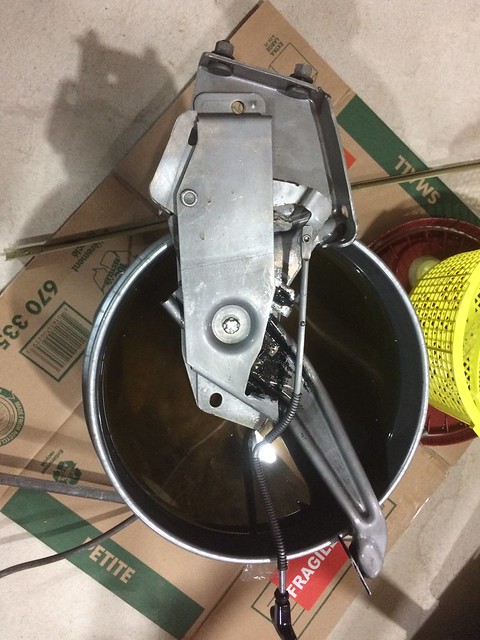
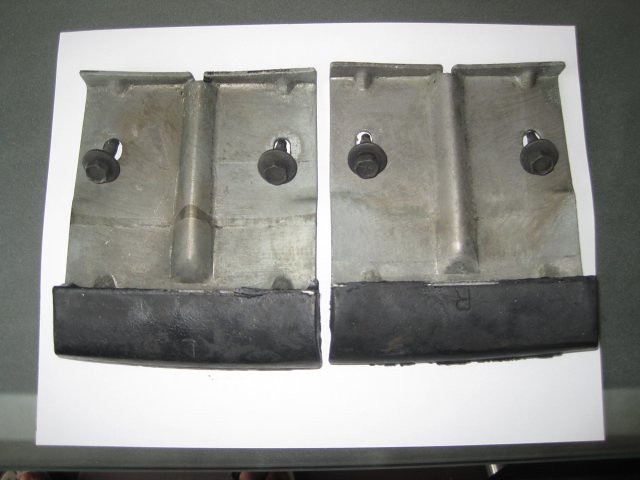
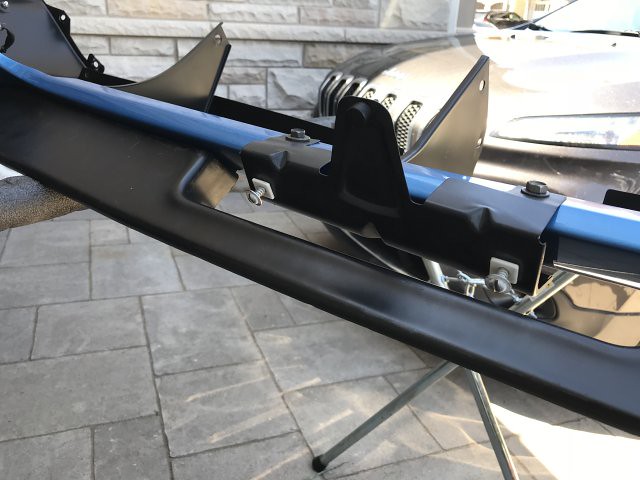
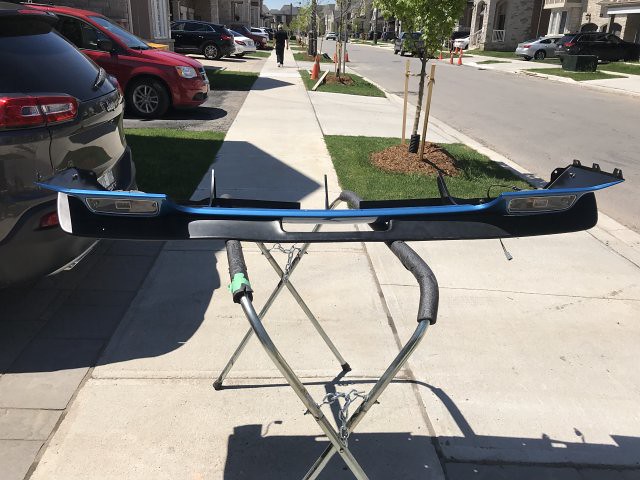
Not too much to show lately, still removing paint from around the trunk and front & rear window gutters. Not very interesting stuff so I've kind of been starting other little projects as an aside. Figured I'd take the plunge and buy a new Spectra gas tank, of course it's cheaper to buy it in the States and have it shipped to Canada, even though it's Canadian made there is not much choice as to where to purchase it here and it's more than double the price. Mine is dented quite a bit, so to avoid hassles I thought I'd purchase new. 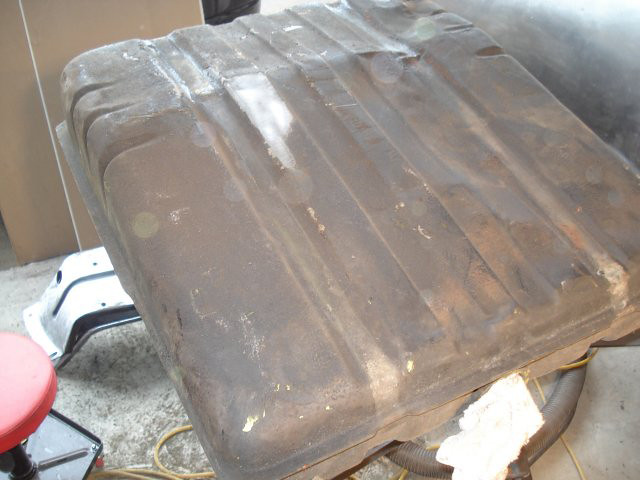 Here's my new tank, what a beauty. 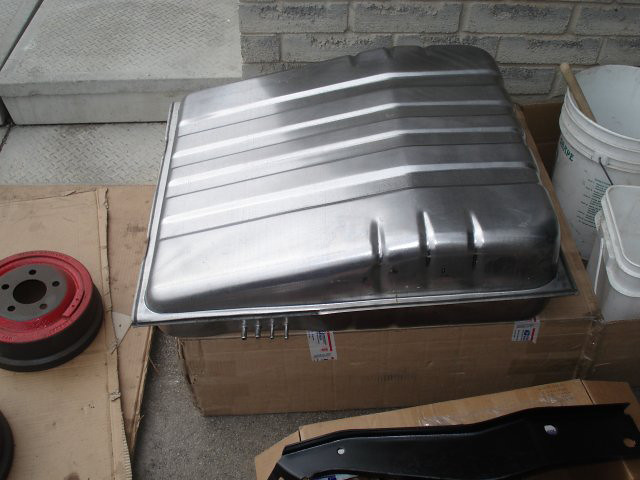 Test fit the tank: 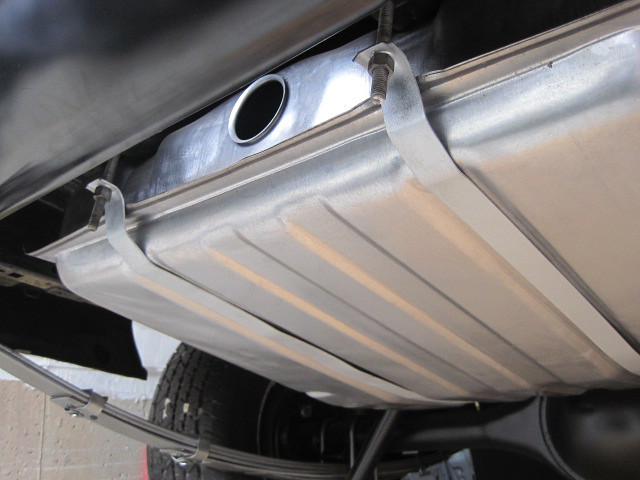 Started going through my stash of Slapstick shifter stuff, before AMD came out with theirs I purchased some original brackets off ebay. I'm going from column to floor shift. 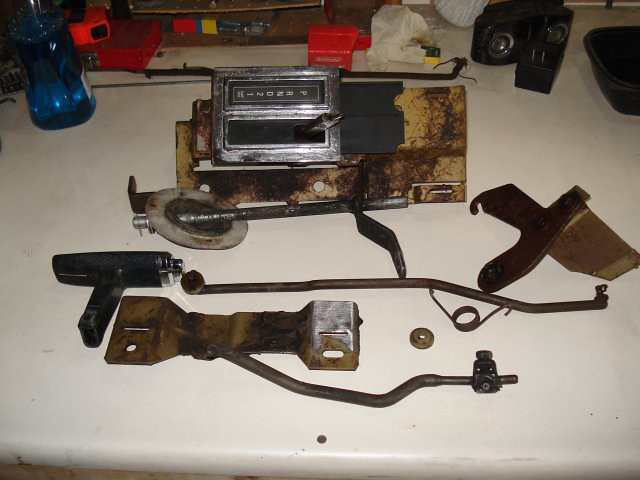 I also started stripping the front and rear bumper brackets. Will use some rust encapsulator on them followed by some eastwood's extreme chassis black. 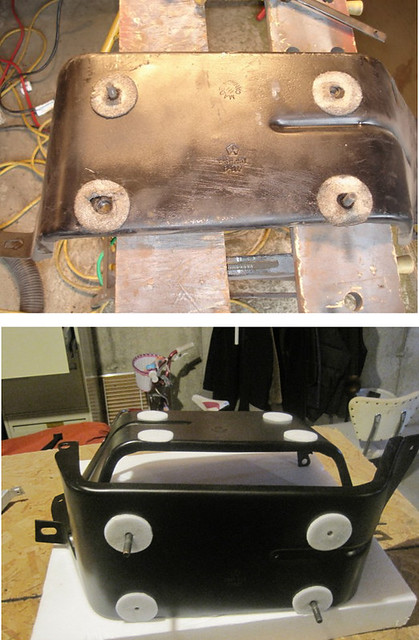 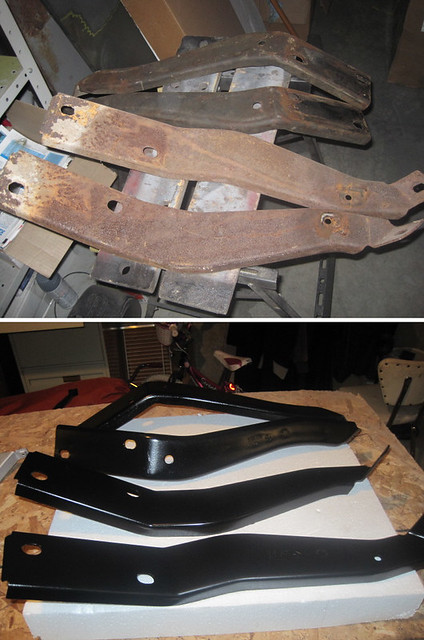  Got the rear bumper guard brackets finished up as well, one NOS and the other has some slight surface rust that I removed after soaking in Evaporust for a few hours: 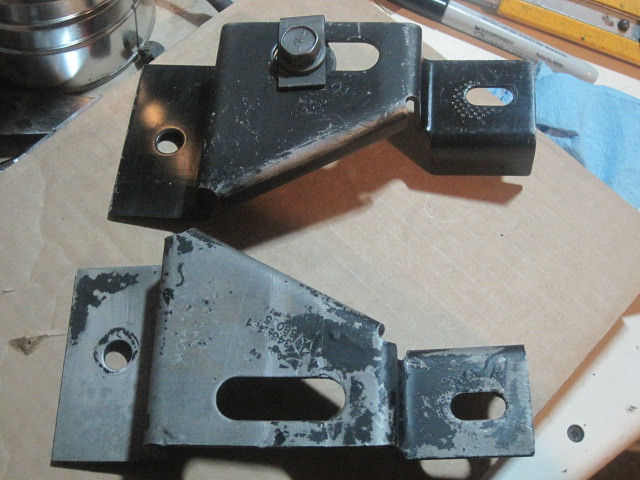 Here they are after a couple coats of Eastwood's Rust Encapsulator and Chassis Black, with original nuts and clips: 
Last edited by CDN72SE; 05/03/18 03:29 PM.
|
|
|
Re: 1972 Charger SE Project by CDN72SE
[Re: CDN72SE]
#834735
05/03/11 05:03 PM
05/03/11 05:03 PM
|
Joined: Aug 2010
Posts: 428
Oakville, Ontario, Canada
CDN72SE
OP
mopar
|
OP
mopar
Joined: Aug 2010
Posts: 428
Oakville, Ontario, Canada
|
Received my set of KYB shocks from Just Suspension, these are to replace the set I last bought in 1991. I was tempted to re-use them because the car has mostly been off it's suspension all these years. I did have to cut the two rears off so that swayed me to buy a new set. They are sort of a dark silver colour, look good but I thought I would paint them black, three more to go. I paid US$125 for the set, in 1991 I paid CAD$105 just for the front! 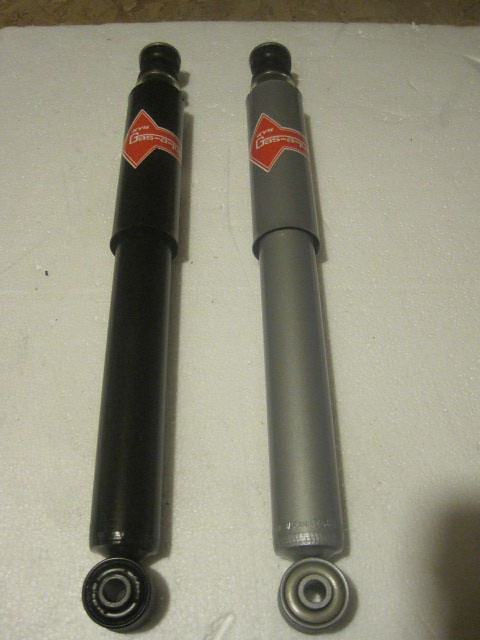
Last edited by CDN72SE; 05/03/18 03:34 PM.
|
|
|
 Re: 1972 Charger SE Project by CDN72SE
[Re: CDN72SE]
#834736
Re: 1972 Charger SE Project by CDN72SE
[Re: CDN72SE]
#834736
05/03/11 06:12 PM
05/03/11 06:12 PM
|
Joined: Jan 2003
Posts: 16,808
Between Houston & Galveston TX
SattyNoCar
Smarter than no class Flappergass by a mile
|
Smarter than no class Flappergass by a mile
Joined: Jan 2003
Posts: 16,808
Between Houston & Galveston TX
|
EXCELLENT write up!  Excellent pics too. Don't worry about the speed of the progress, as long as you're making progress! 
John
The dream is dead, long live the dream.......😥
|
|
|
Re: 1972 Charger SE Project by CDN72SE
[Re: CDN72SE]
#834743
06/06/11 02:13 PM
06/06/11 02:13 PM
|
Joined: Aug 2010
Posts: 428
Oakville, Ontario, Canada
CDN72SE
OP
mopar
|
OP
mopar
Joined: Aug 2010
Posts: 428
Oakville, Ontario, Canada
|
Rear TaillightsDecided to take a look at these this past weekend, I have one NOS black and one a nice argent taillight. The plan is to re-finish them both with the tri-colour effect, black, grey (or darker argent) and argent. I am not too concerned with them looking OEM exact. I've got so many different cans of silver, argent, aluminum, grey it's getting nuts so whatever I have on my shelf that is the closest I think I will use. Here's the black bezel. 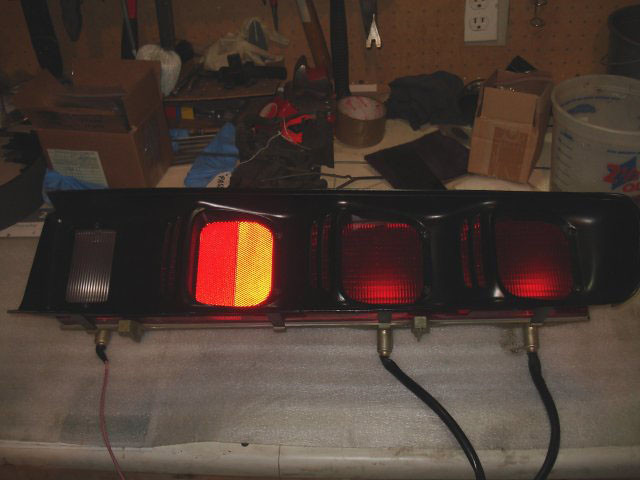 and the argent: 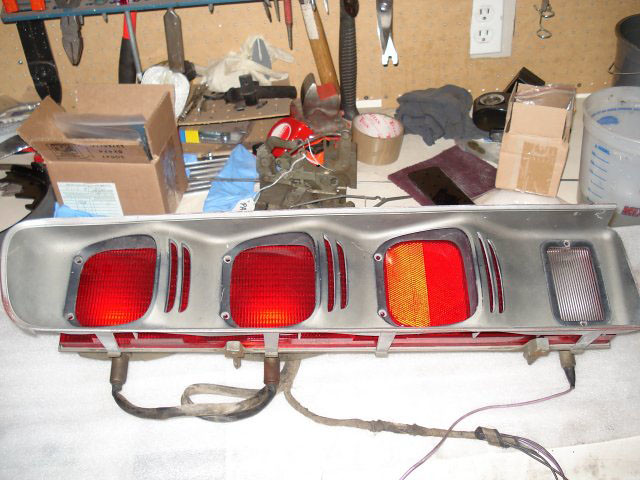 Started masking:  Got it painted: 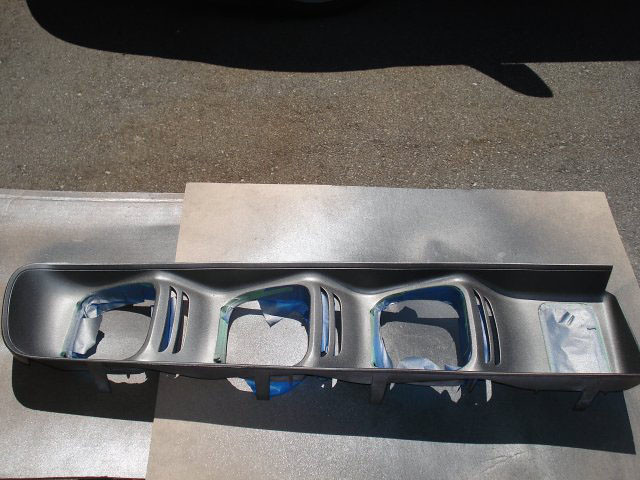 Ready to spray some argent I had kicking around for the outer part of the bezel: 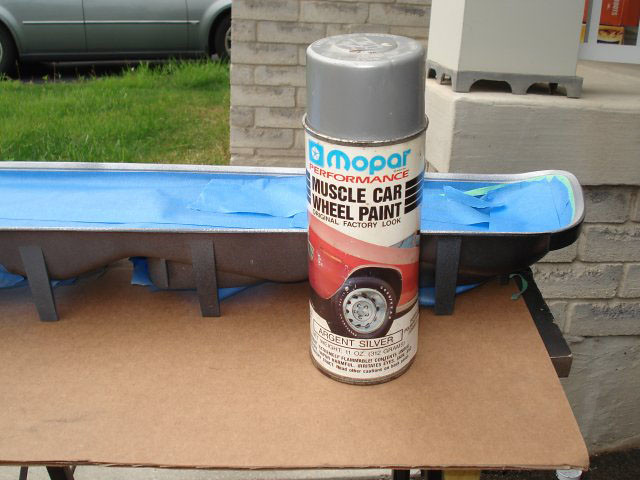 Thought I'd share my mistake, I painted these two bezels two weeks apart and somewhere along the line I mixed up the finishing paint, one I used Eastwood's Spray Gray and the other is Detail Gray. I think the top is Detail Gray, when I have made the correction I'll straighten it out. :brickwall: Well at least I have two different samples. 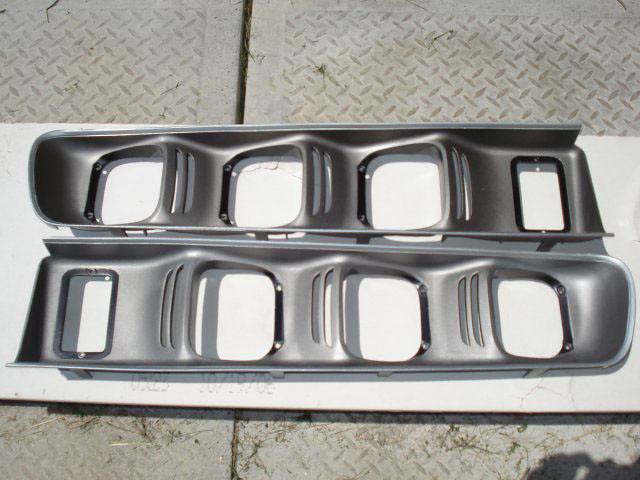 Installed: 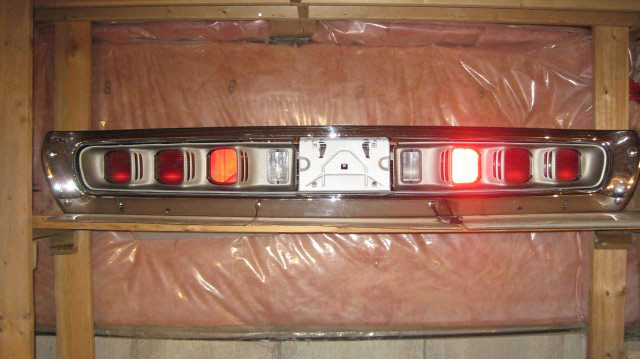 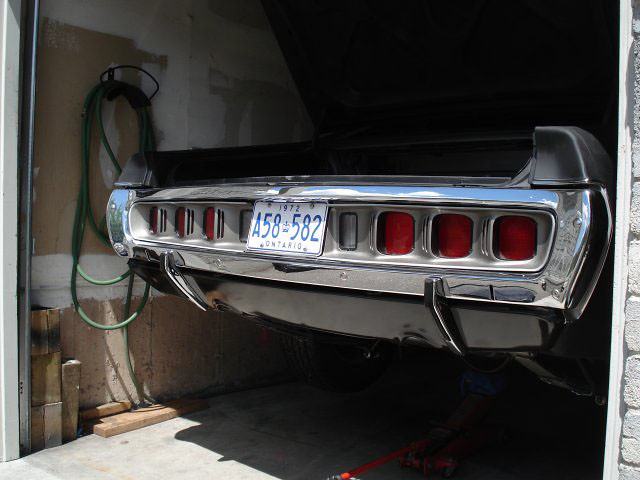
Last edited by CDN72SE; 05/03/18 03:37 PM.
|
|
|
Re: 1972 Charger SE Project by CDN72SE
[Re: crlush]
#834756
07/03/11 09:19 PM
07/03/11 09:19 PM
|
Joined: Aug 2010
Posts: 428
Oakville, Ontario, Canada
CDN72SE
OP
mopar
|
OP
mopar
Joined: Aug 2010
Posts: 428
Oakville, Ontario, Canada
|
Quote:
Hey your doing a great job, love the pics I wish I had the time to document my car like you are doing, but I never seemed to have the time. Looks like your starting off with a nice solid car, it will save you a ton of money in the long run, keep up the good work. By the way what color are you painting it.
Thanks, much appreciated. I only have the time because I probably won't have body and paint done for at least another year so I'm taking my time with the small things. I'm going back and forth on color but I'm leaning toward B5 Blue or Y9 Tawney Gold Poly.
|
|
|
Re: 1972 Charger SE Project by CDN72SE
[Re: CDN72SE]
#834758
09/18/14 03:41 PM
09/18/14 03:41 PM
|
Joined: Aug 2010
Posts: 428
Oakville, Ontario, Canada
CDN72SE
OP
mopar
|
OP
mopar
Joined: Aug 2010
Posts: 428
Oakville, Ontario, Canada
|
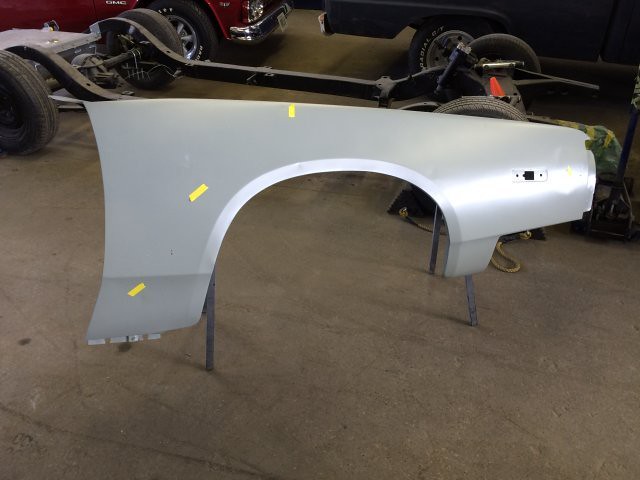
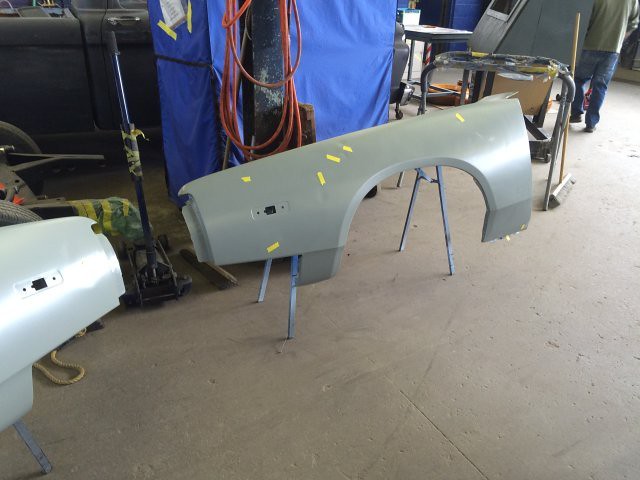
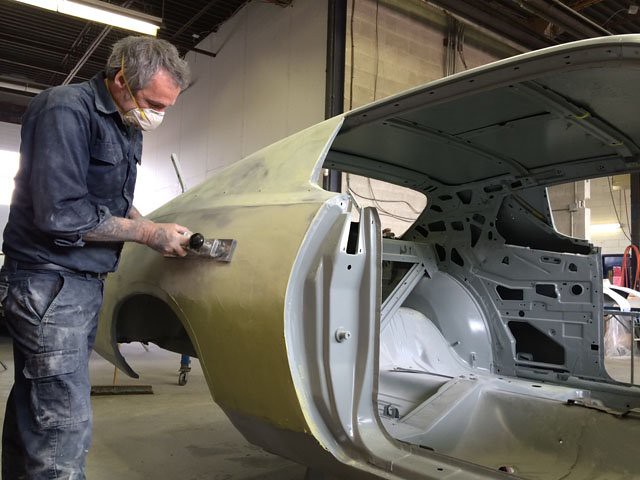
Did a little fender clean up as well. old Walmart primer which wasn't the best idea: 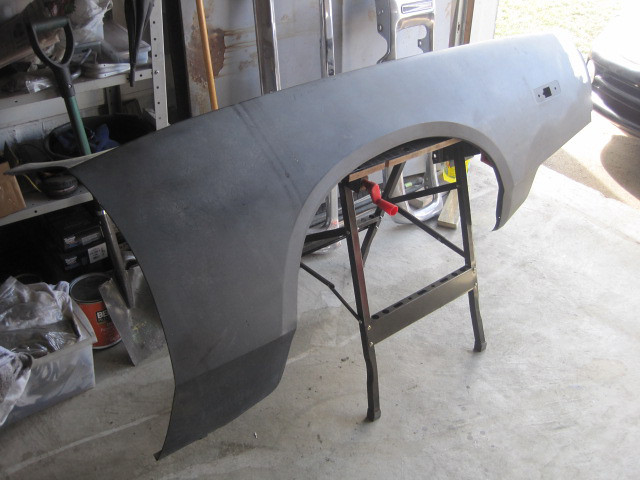 Not looking too bad: 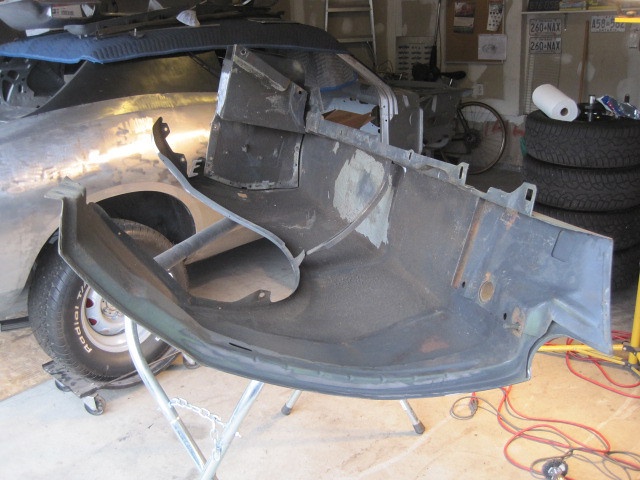 Fun stuff, not too bad to get off and the metal is perfect underneath: 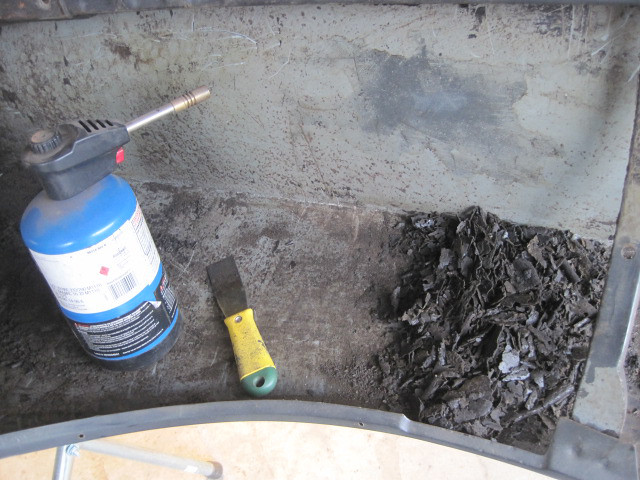 Fast foward and I realize that I will not be able to get into all the nooks and crannies so I decide to take my pair of fenders to Technostrip ( www.technostrip) which is close by here in Brampton, Ontario. $300 for the pair, came out really nicely and just so nice to see so clean. Here are a few shots: First: 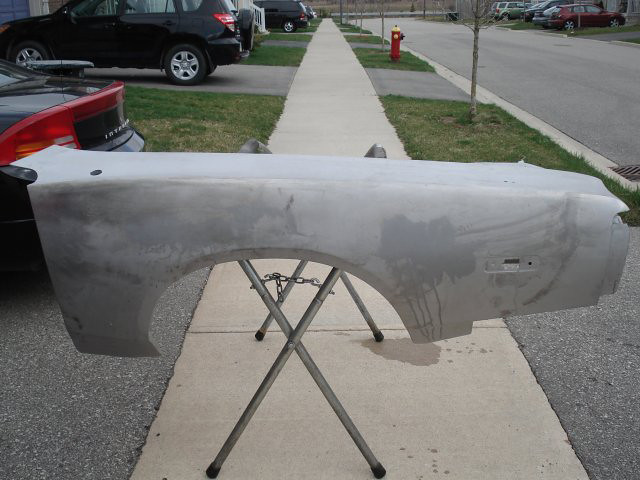 Second:  Last: 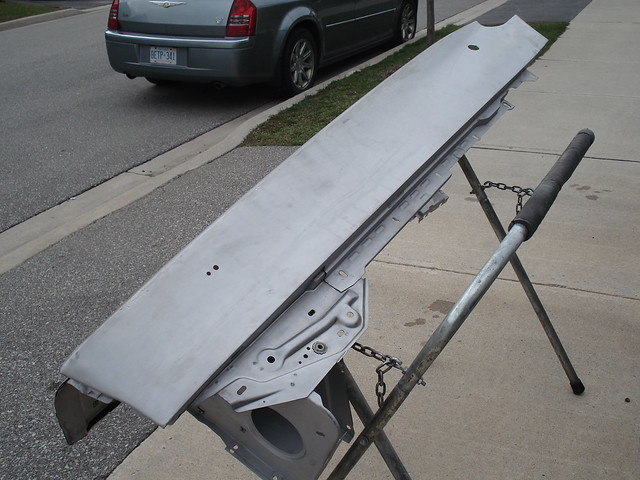
Last edited by CDN72SE; 05/03/18 03:42 PM.
|
|
|
Re: 1972 Charger SE Project by CDN72SE
[Re: CDN72SE]
#2054393
04/14/16 06:32 PM
04/14/16 06:32 PM
|
Joined: Aug 2010
Posts: 428
Oakville, Ontario, Canada
CDN72SE
OP
mopar
|
OP
mopar
Joined: Aug 2010
Posts: 428
Oakville, Ontario, Canada
|
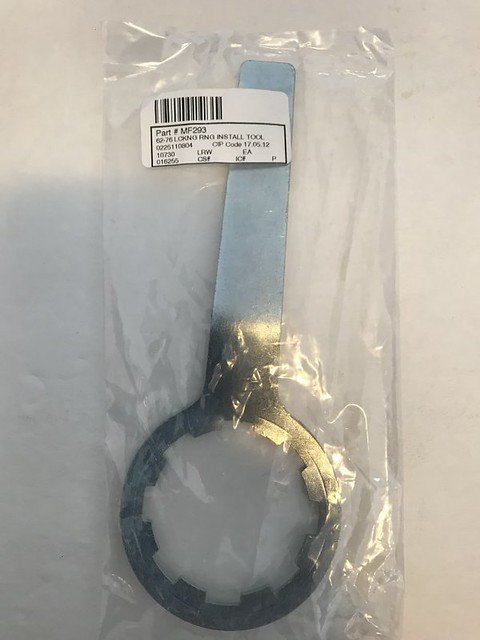
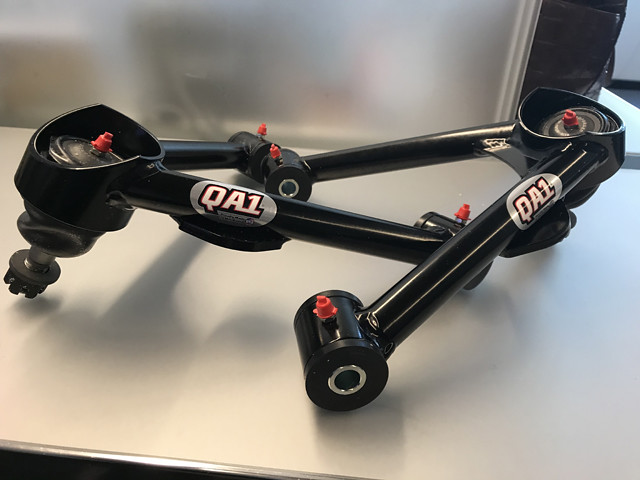
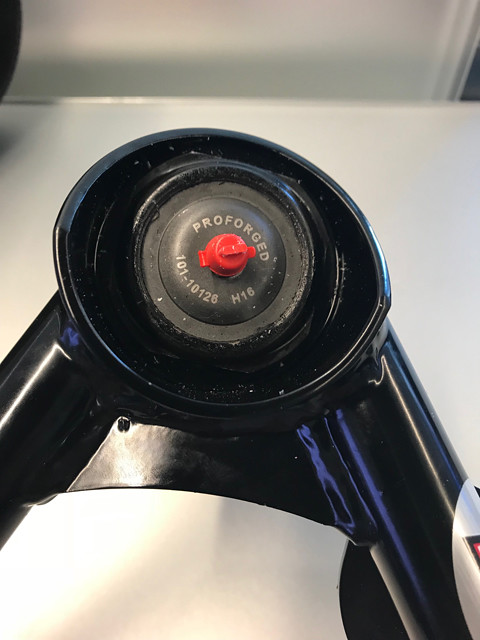
Have the k-frame kicking around the garage so I thought I would start sprucing it up a bit. Unfortunately I did not loosen the front nuts on the strut rod when they were attached to the LCA's and on the car. This makes it a bit more difficult to keep the rod from spinning when turning the nut. 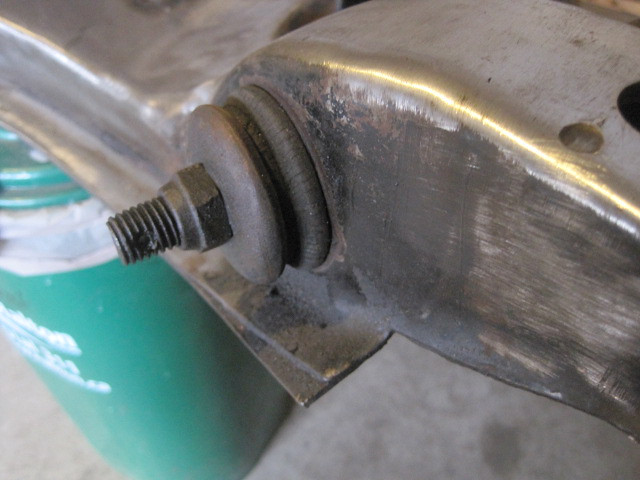 Did a search on the topic and read about the idea of using a torsion bar tool, have one of those, now I have a second use for it.  Tightened it and stepped on it with my 245lbs and turned. Success 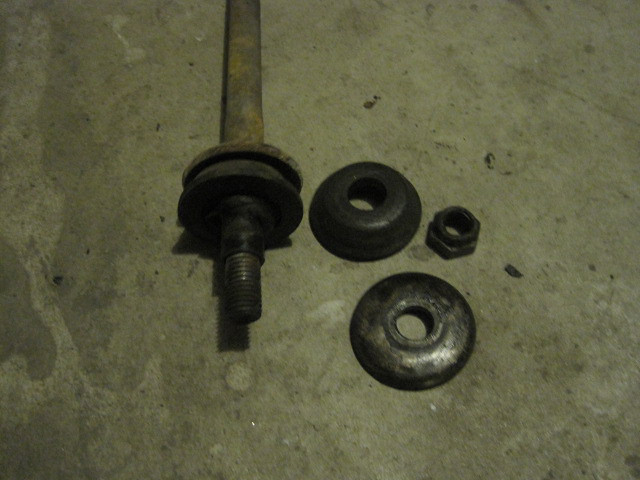 I purchased Moog kit K7026, but I think I may end up just buying the bushings and re-use my original parts. Yes these are the originals that were on there.
Last edited by CDN72SE; 05/03/18 03:43 PM.
|
|
|
Re: 1972 Charger SE Project by CDN72SE
[Re: CDN72SE]
#2054394
04/14/16 06:33 PM
04/14/16 06:33 PM
|
Joined: Aug 2010
Posts: 428
Oakville, Ontario, Canada
CDN72SE
OP
mopar
|
OP
mopar
Joined: Aug 2010
Posts: 428
Oakville, Ontario, Canada
|
Door HingesMy door's have never closed (hinged) correctly and I was never really sure what part(s) I may be missing for the hinges. One side had a roller the other didn't, one side had the little piece the roller rolls on and the other didn't and the hinges were just loose. Many years ago I bought the door pin and bushing repair kit from the local parts store (Canadian Tire) and had it laying around, then I thought I may need something better. so I purchased the Door Hinge Pin Kit you see on the right in the first picture. 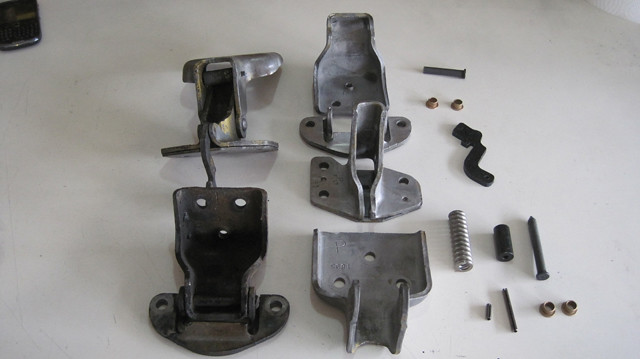 Bought the drill bit and gave it a shot, had a hard time with the drill bit and then gave up. Figured I would bite the bullet and get the hinges rebuilt instead of buying the new AMD hinges. Searched around with what others were saying and decided on SMS. 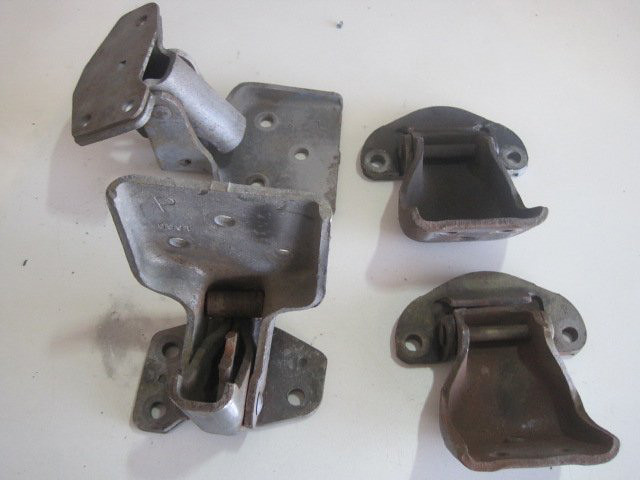 Here they are cleaned up and lubed and the rods and rollers look very solid, better than originals. When received:  lower hinges:  Upper hinges:  Close up of pin: 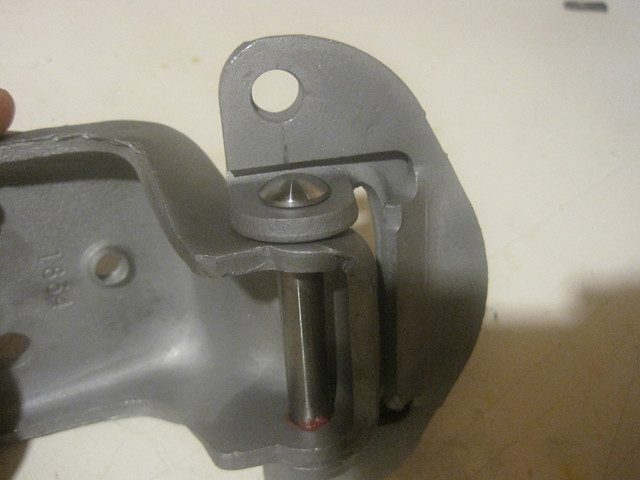 Another view:  Lower installed: 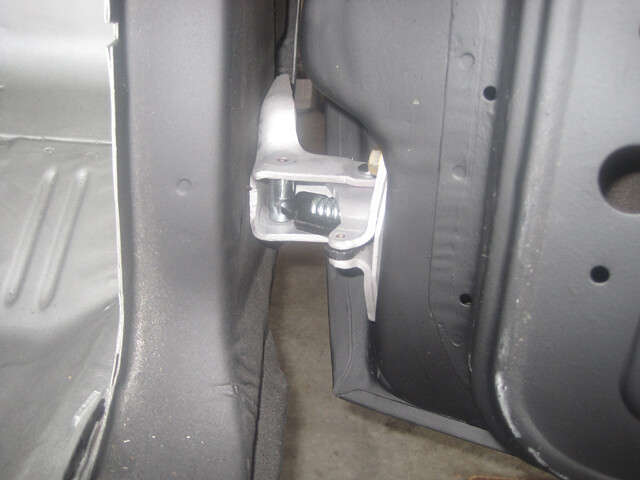 Upper installed: 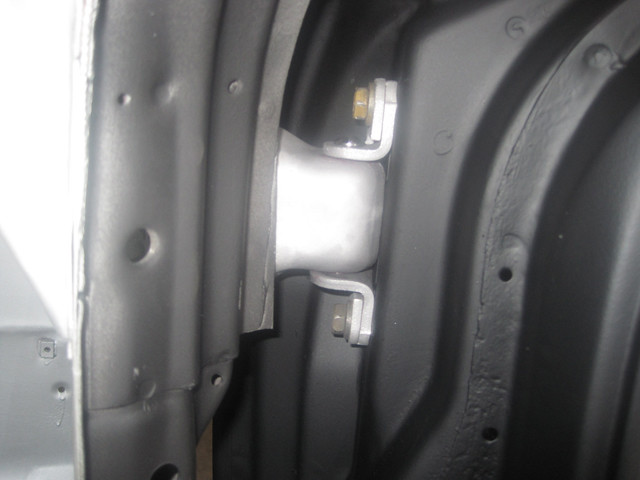 My car is nowhere near ready and I only installed the doors to get them out of the way but it's nice to see the doors open and stay open and close smoothly.
Last edited by CDN72SE; 05/03/18 03:44 PM.
|
|
|
Re: 1972 Charger SE Project by CDN72SE
[Re: CDN72SE]
#2054396
04/14/16 06:33 PM
04/14/16 06:33 PM
|
Joined: Aug 2010
Posts: 428
Oakville, Ontario, Canada
CDN72SE
OP
mopar
|
OP
mopar
Joined: Aug 2010
Posts: 428
Oakville, Ontario, Canada
|
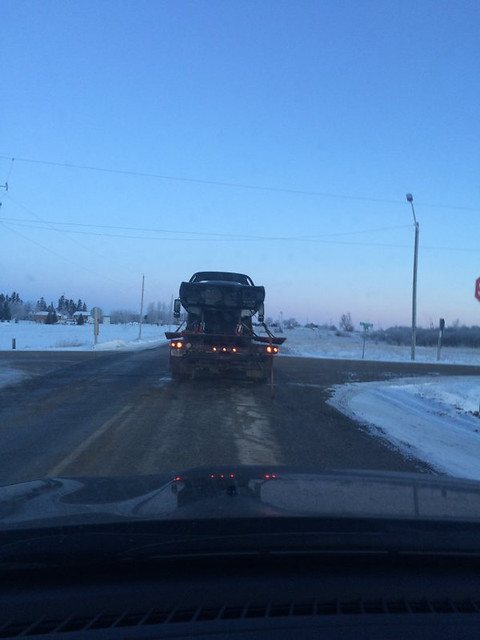
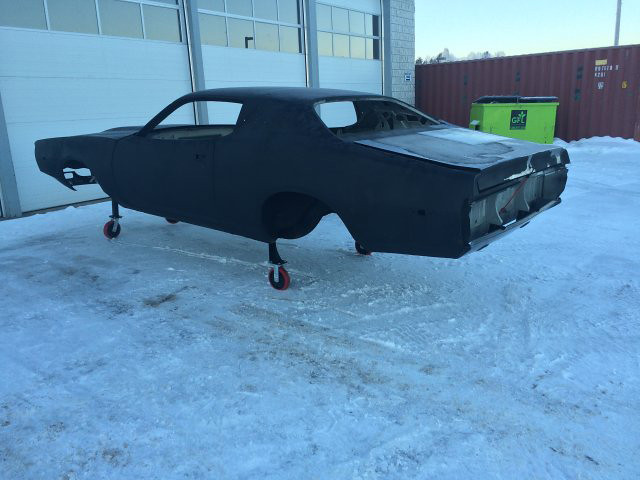
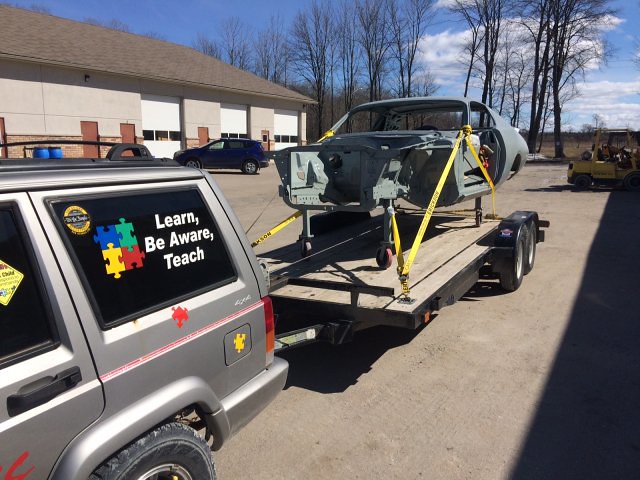
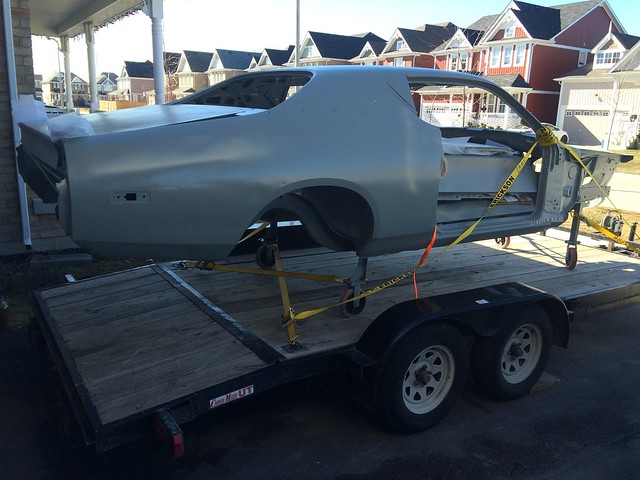
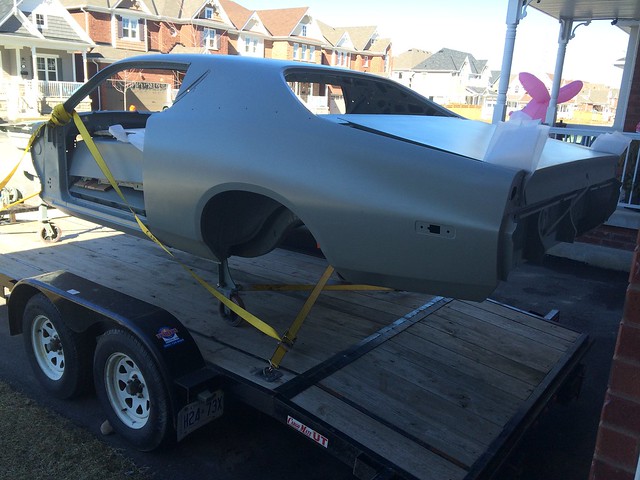
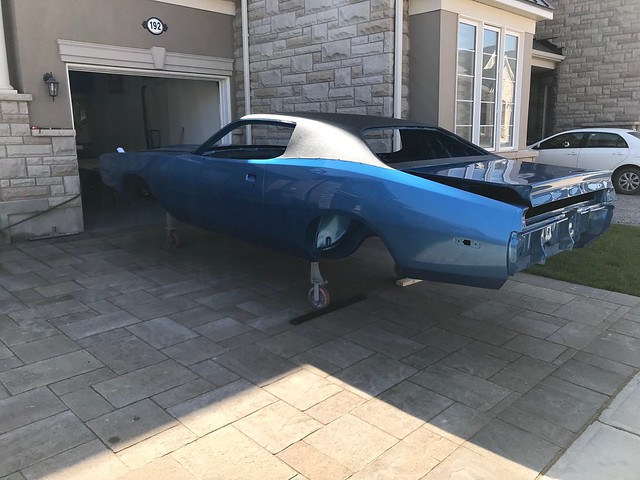
Here is the car on the way to our new downsized house. Where am I gonna put everything, lol.  Arriving, was fun watching it "drive" down the road.  Currently looking for someone local to take the car on for body work and paint, finding it a bit challenging. Will talk to a couple of shops next week before the Canadian long weekend Thanksgiving.
Last edited by CDN72SE; 05/03/18 03:46 PM.
|
|
|
Re: 1972 Charger SE Project by CDN72SE
[Re: CDN72SE]
#2054403
04/14/16 06:35 PM
04/14/16 06:35 PM
|
Joined: Aug 2010
Posts: 428
Oakville, Ontario, Canada
CDN72SE
OP
mopar
|
OP
mopar
Joined: Aug 2010
Posts: 428
Oakville, Ontario, Canada
|
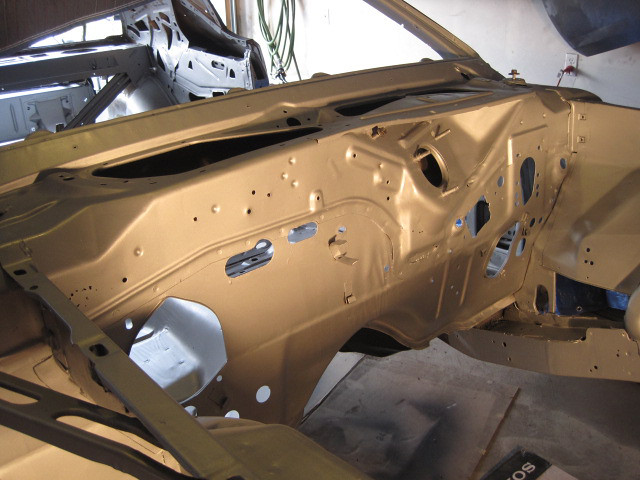
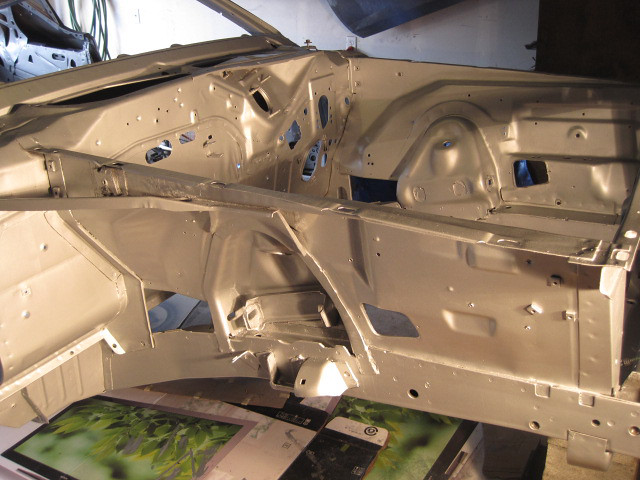
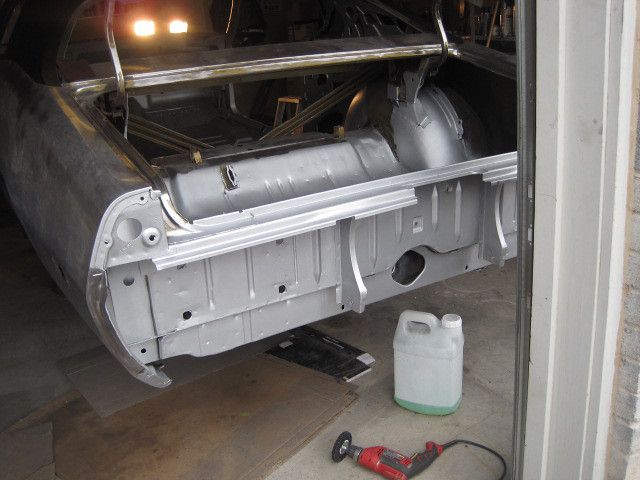
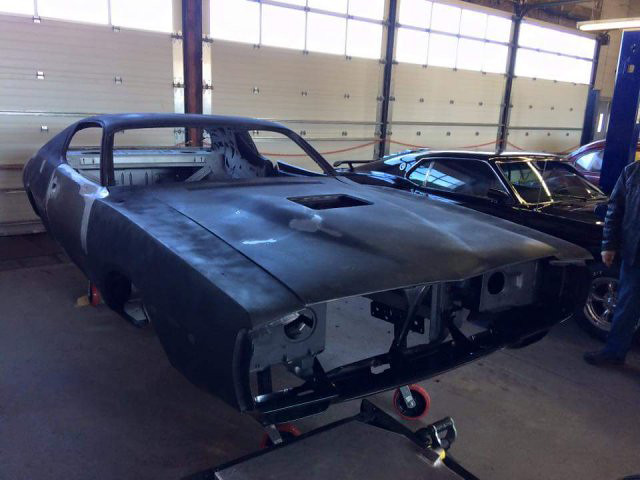
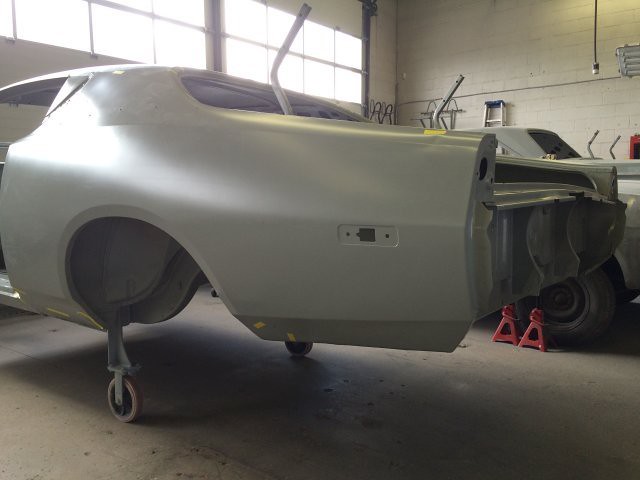
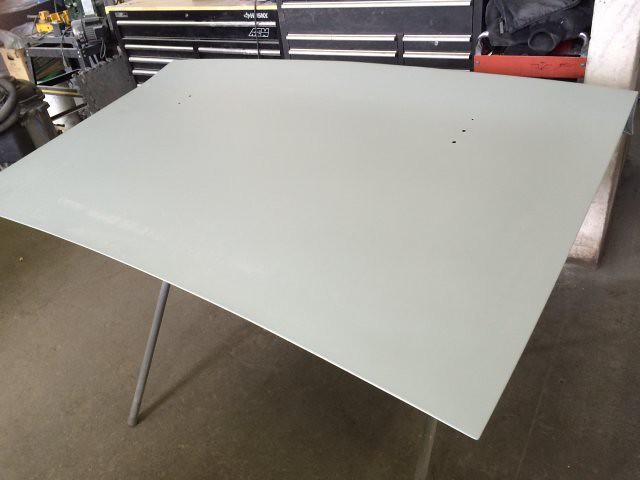
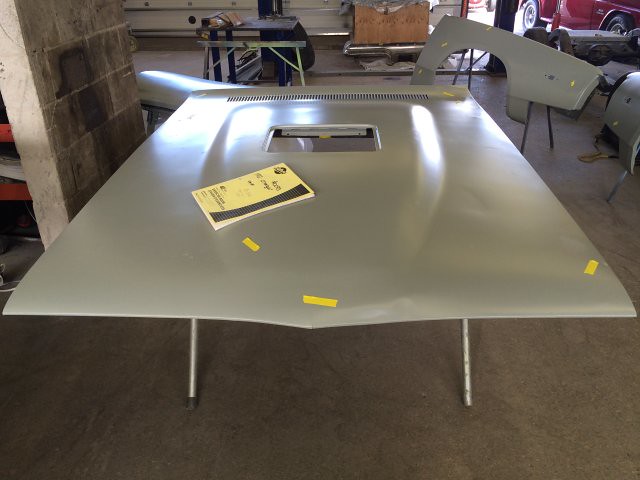
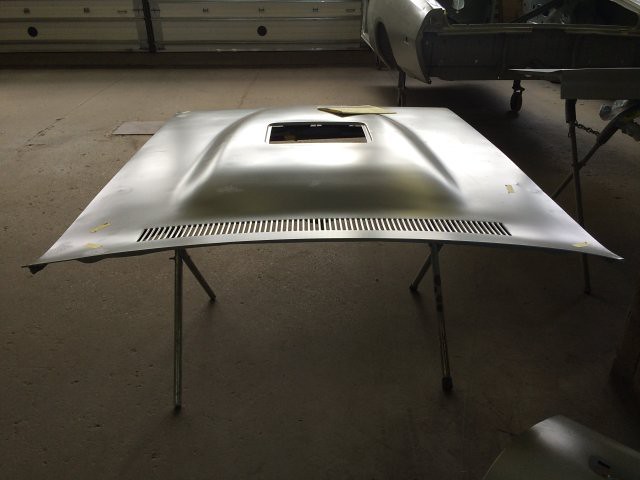
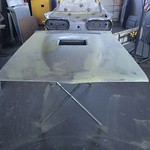
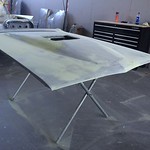
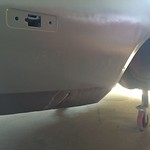
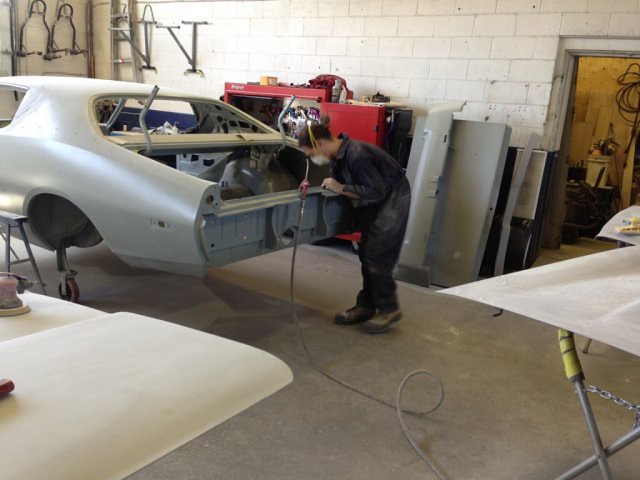
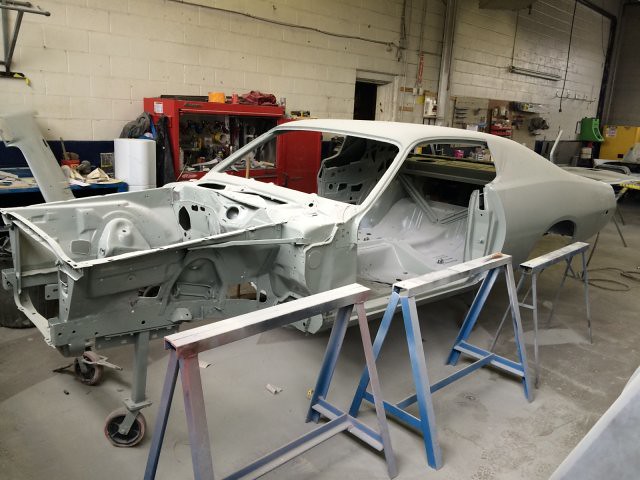
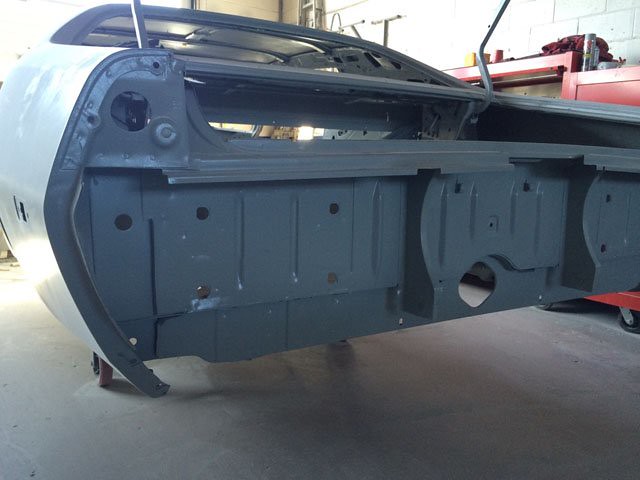
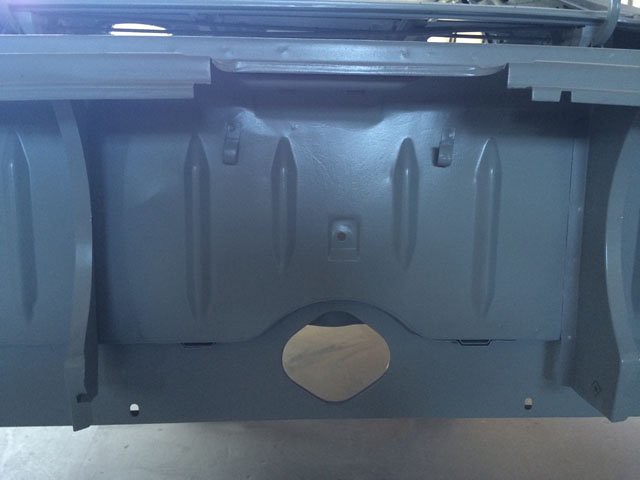
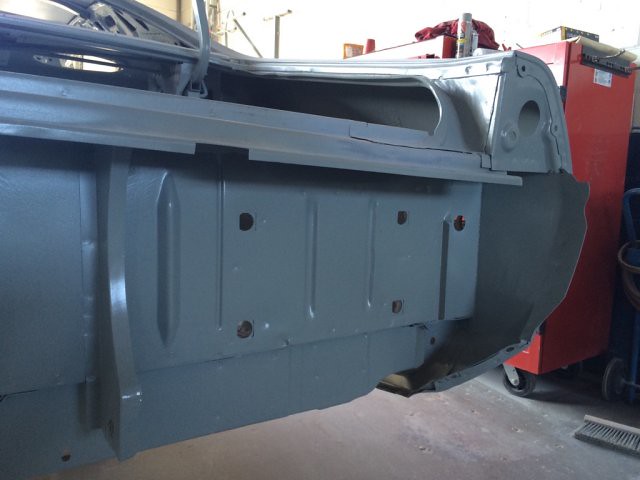
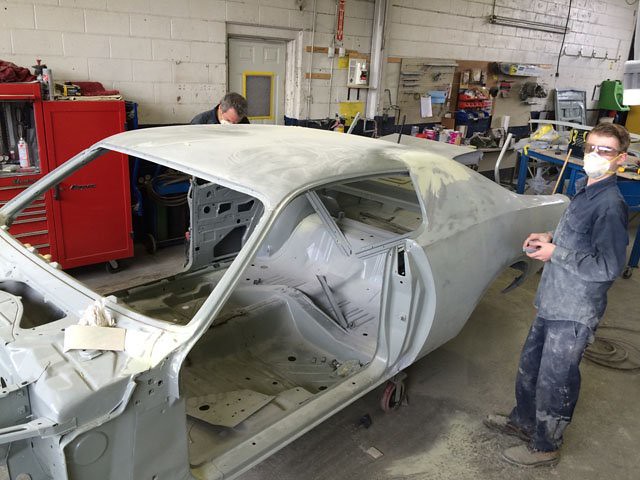
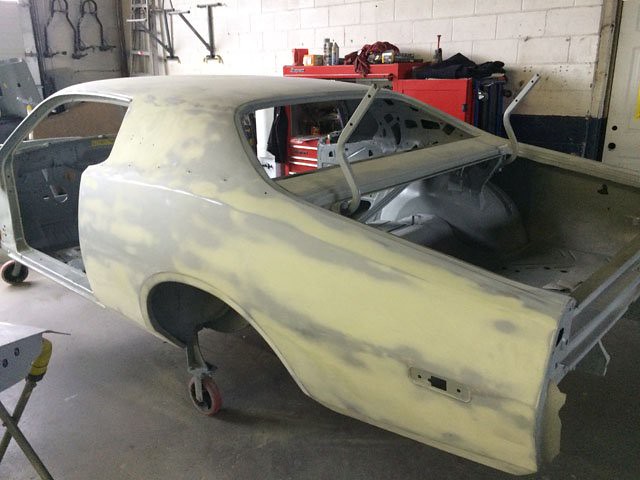
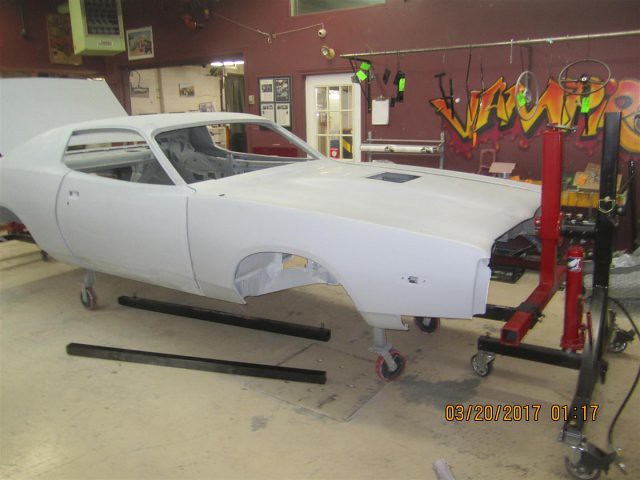
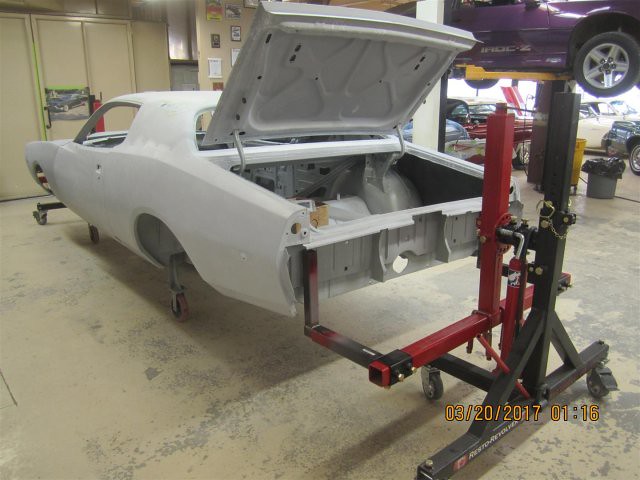
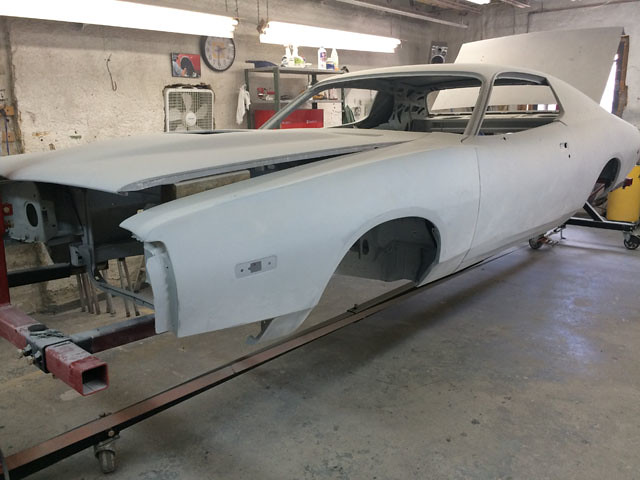
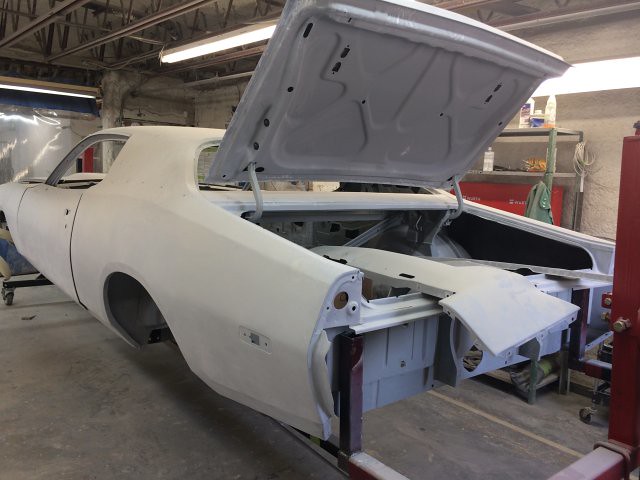
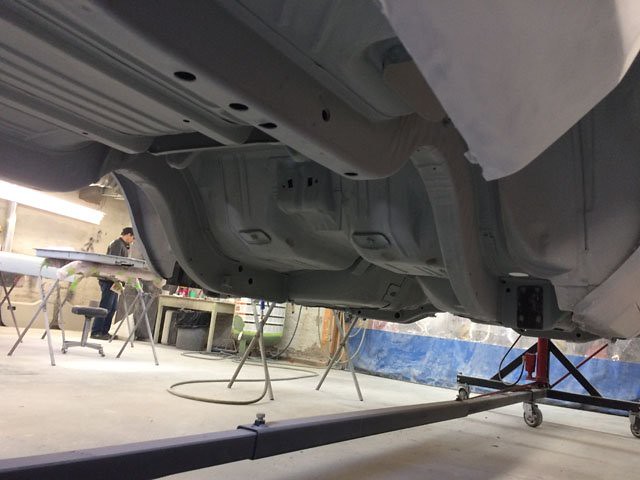
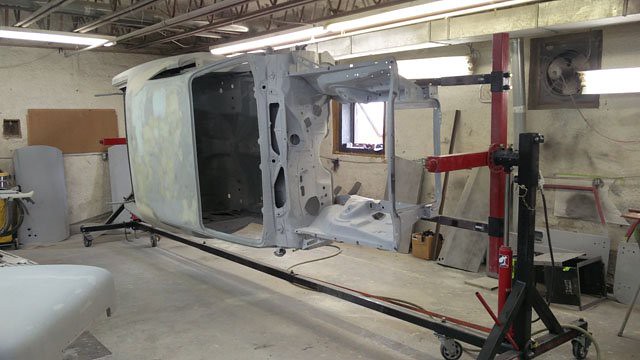
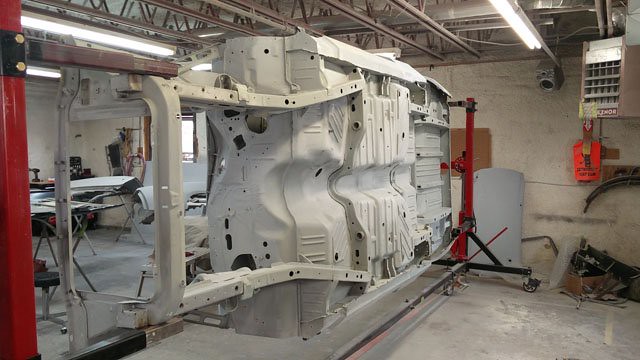
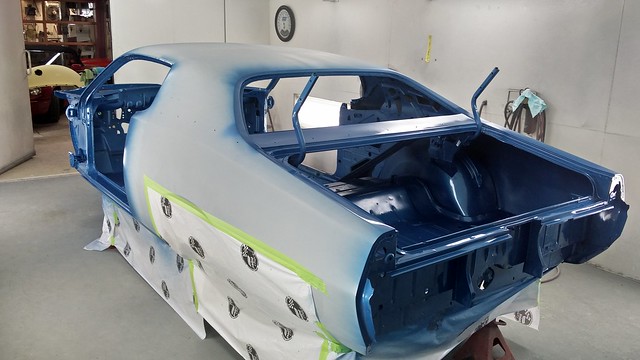
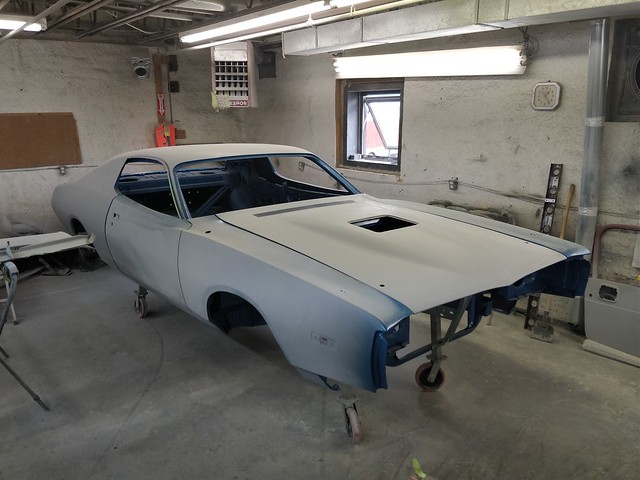
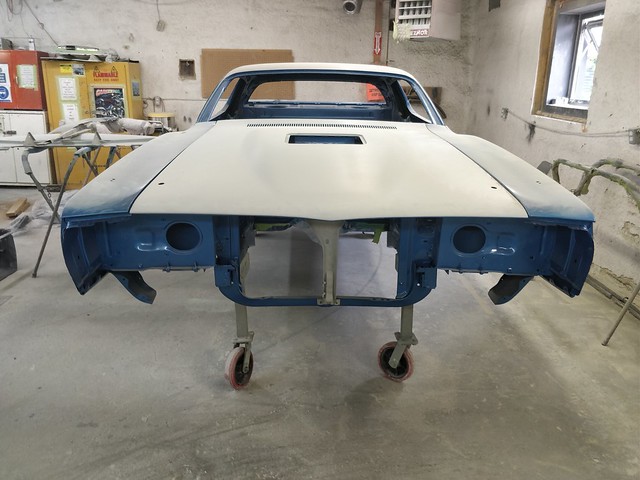
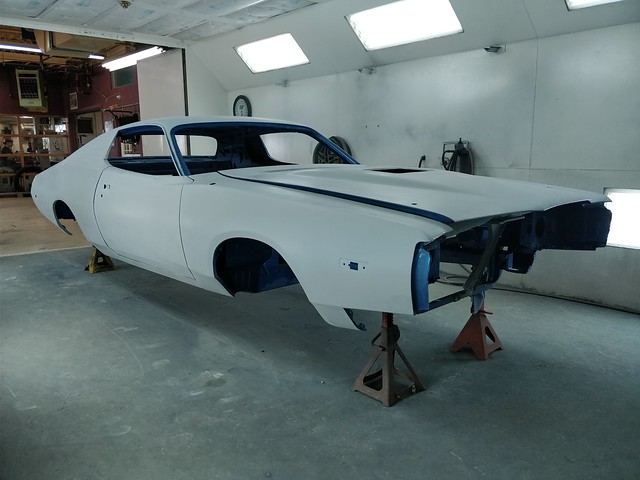
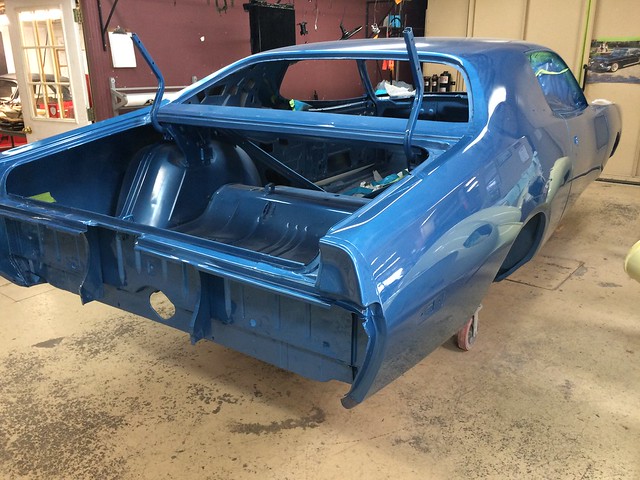
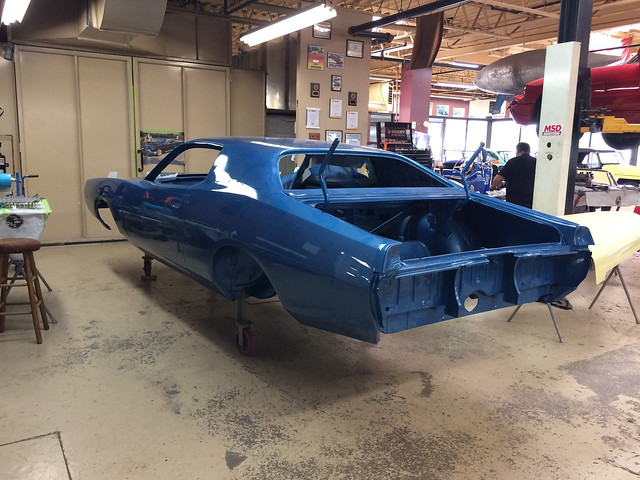
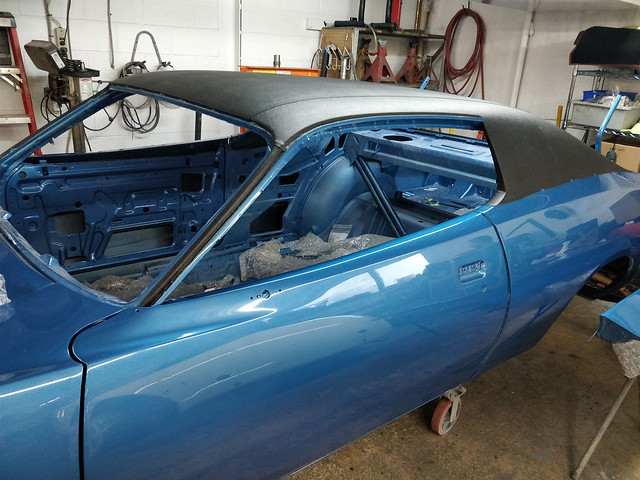
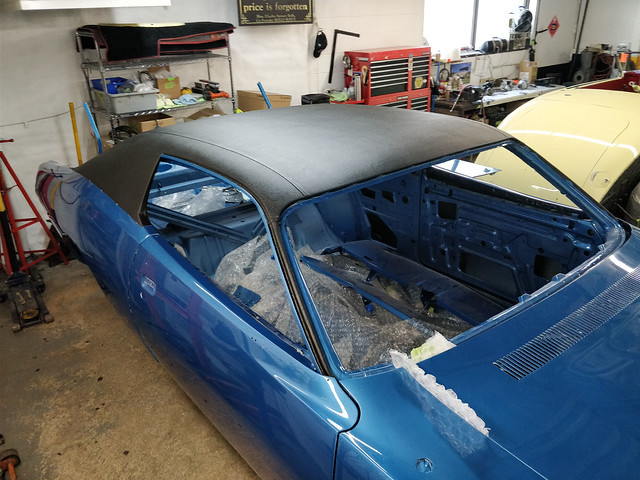
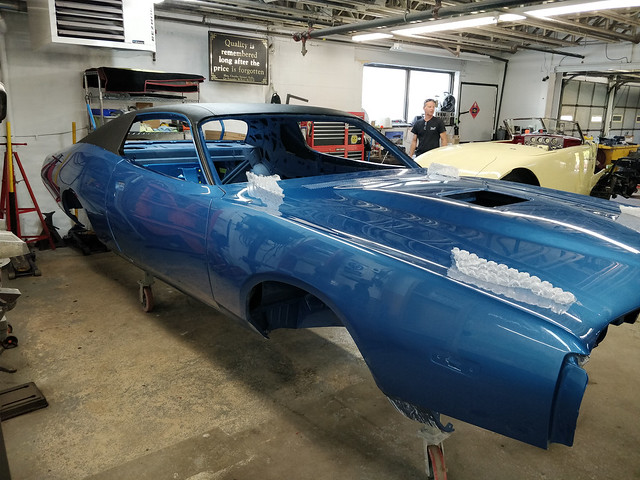
First day of spring, thought I'd take a trip out to the shop. Here she is sitting next to a rare Ford. 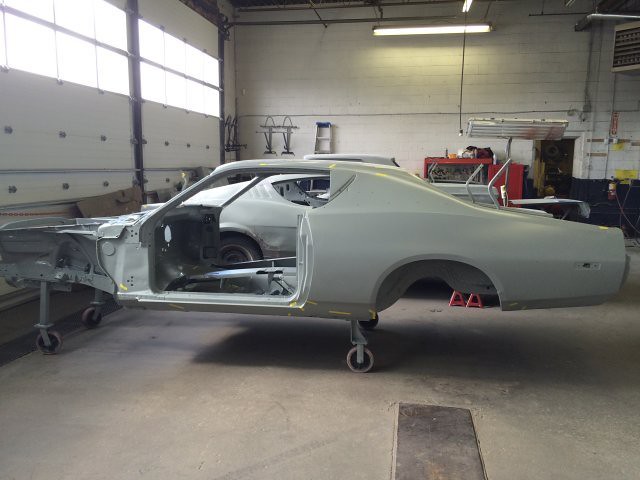 Primered inside and out, bottom stripped of all undercoating (what was left) and primered. 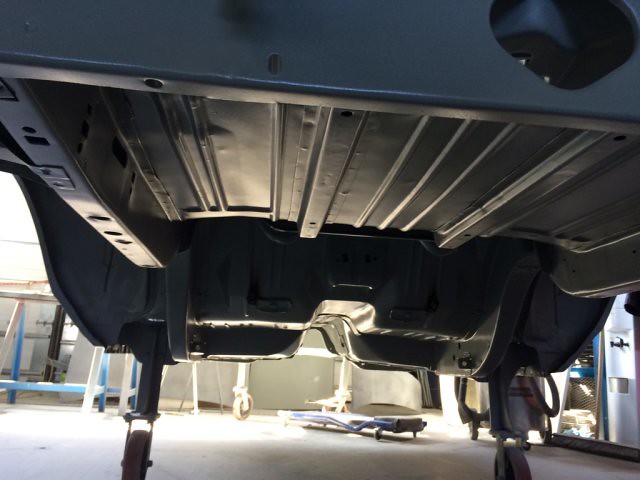
Last edited by CDN72SE; 05/03/18 03:49 PM.
|
|
|
Re: 1972 Charger SE Project by CDN72SE
[Re: CDN72SE]
#2054408
04/14/16 06:36 PM
04/14/16 06:36 PM
|
Joined: Aug 2010
Posts: 428
Oakville, Ontario, Canada
CDN72SE
OP
mopar
|
OP
mopar
Joined: Aug 2010
Posts: 428
Oakville, Ontario, Canada
|
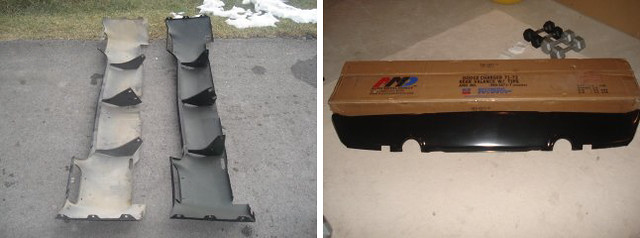
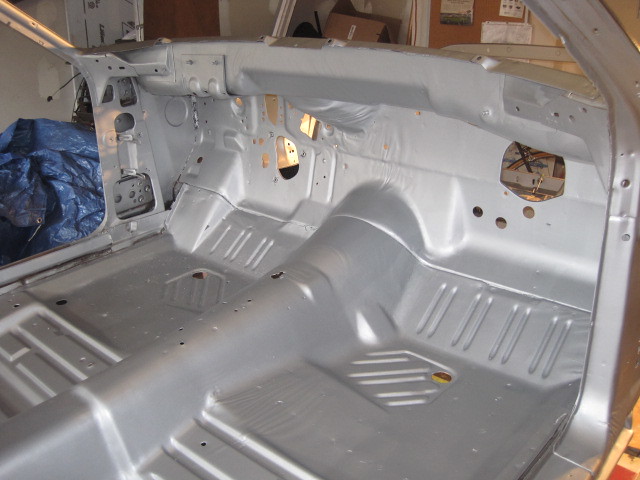
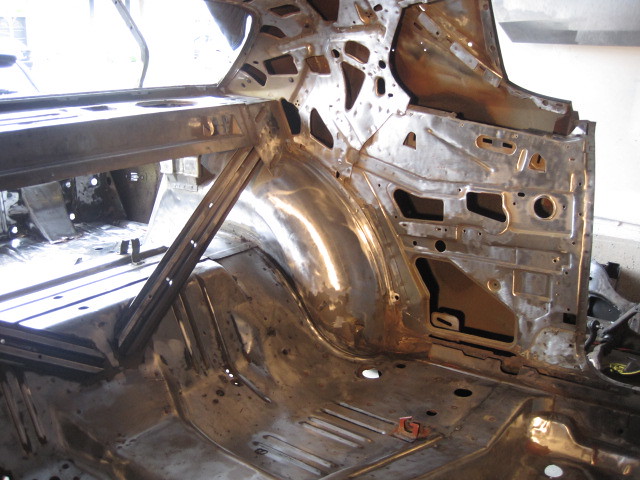
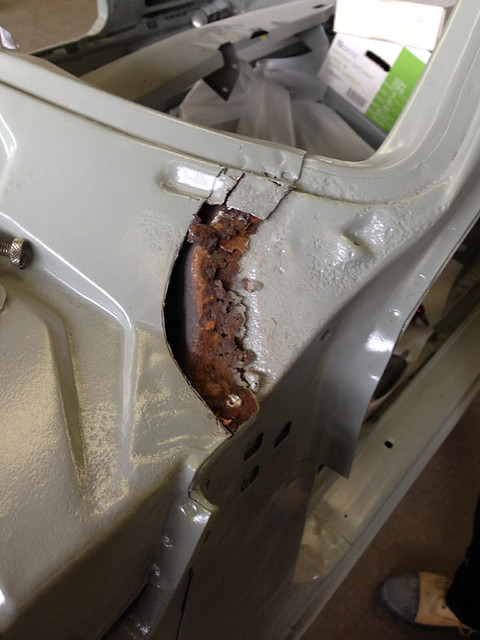
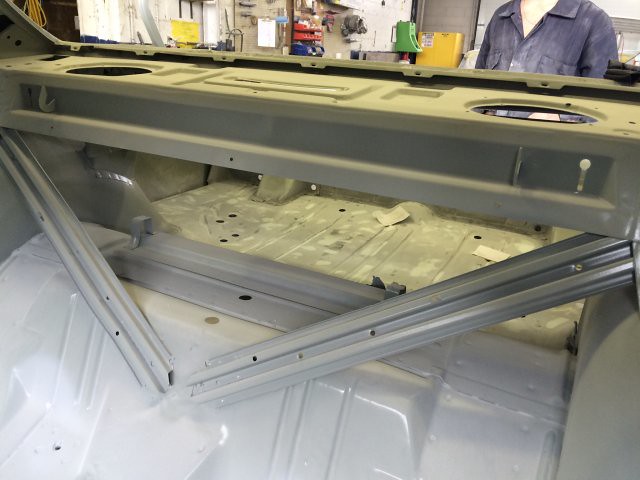
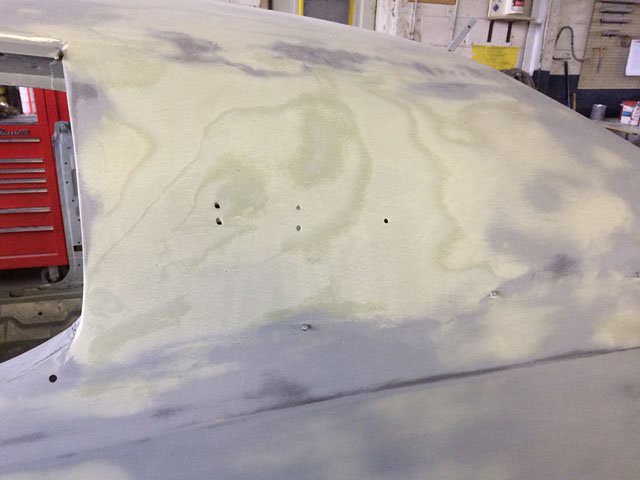
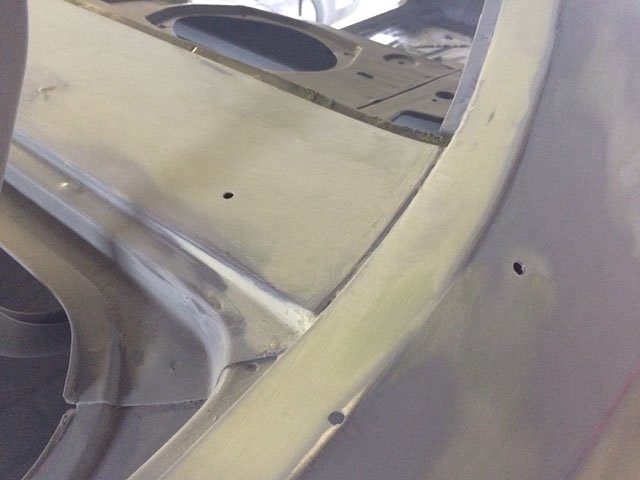
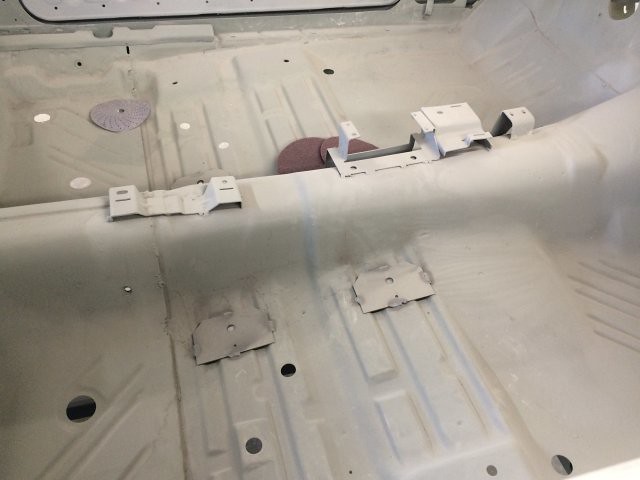
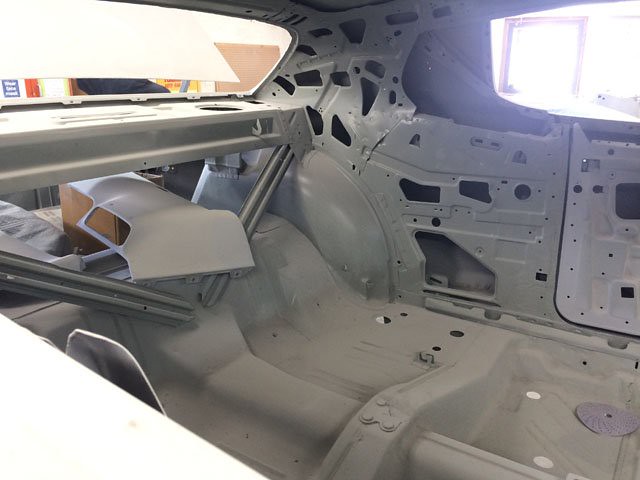
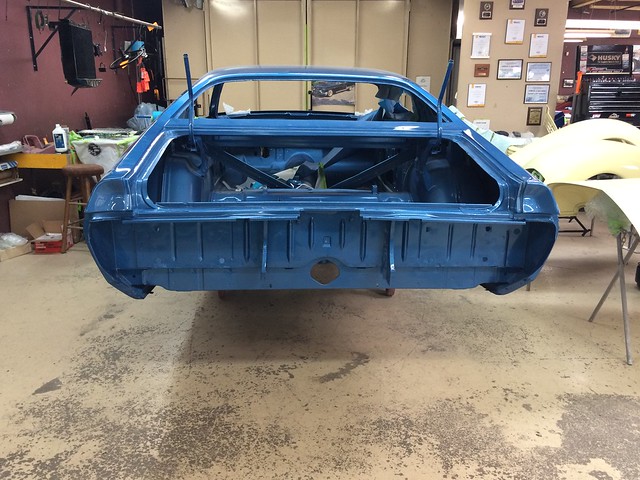
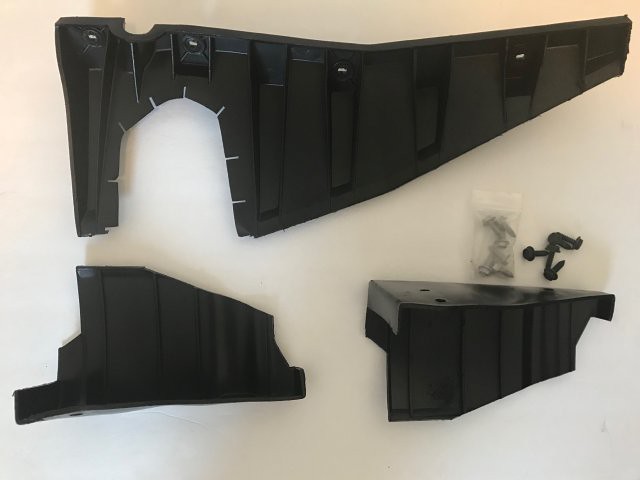
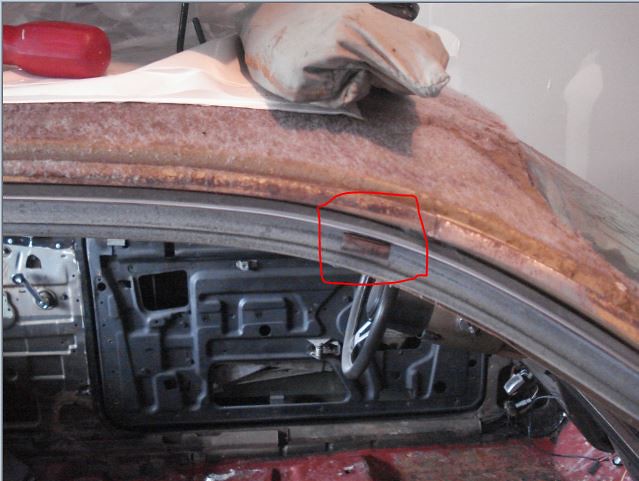
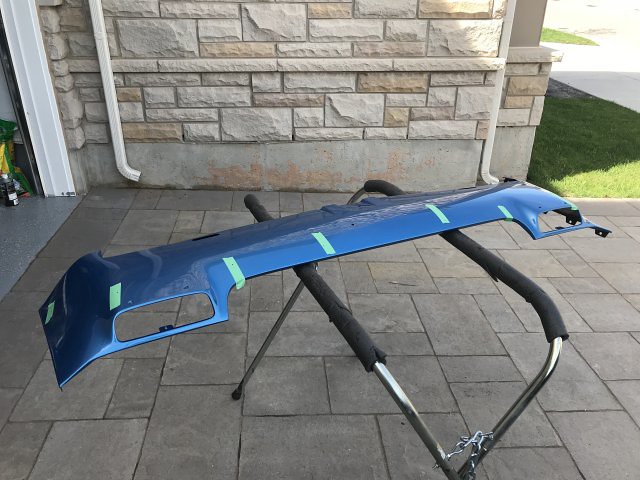
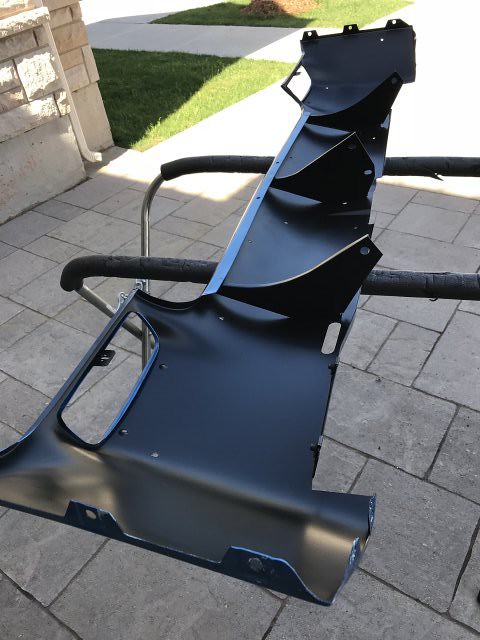
Interior shot, some pin holes on the drivers side floor, not bad at all, also my AMD front and rear valences sitting inside. 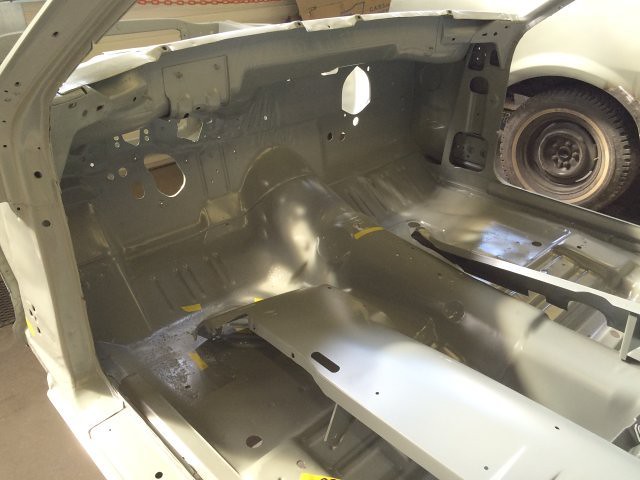 Have to figure how to treat the corner part that has had some rust damage near the bottom of the window. 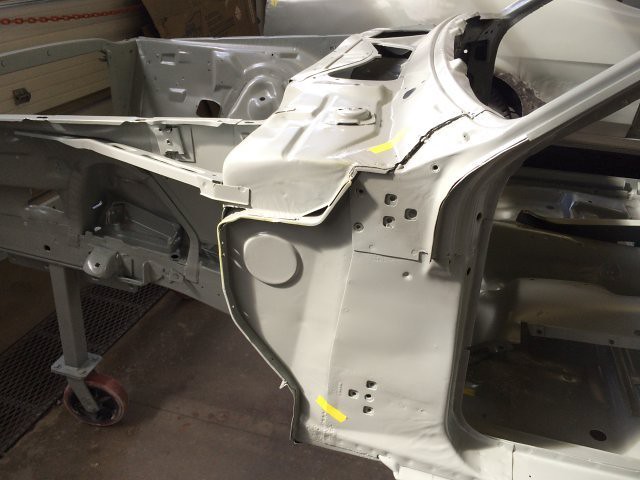 Blasting cleaned this area up better than I did. 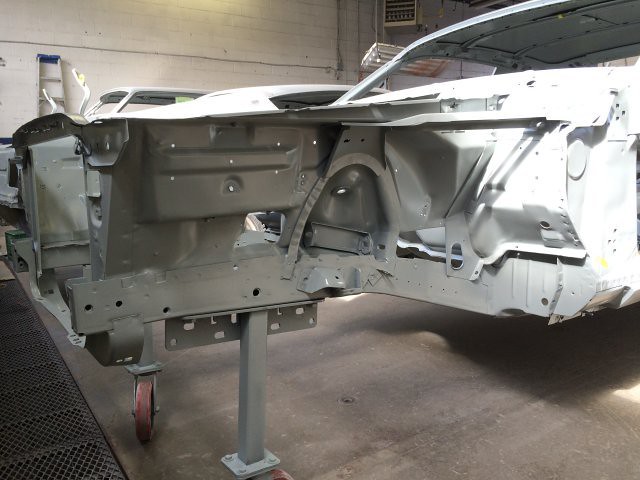 The three tape references say it all, not bad. 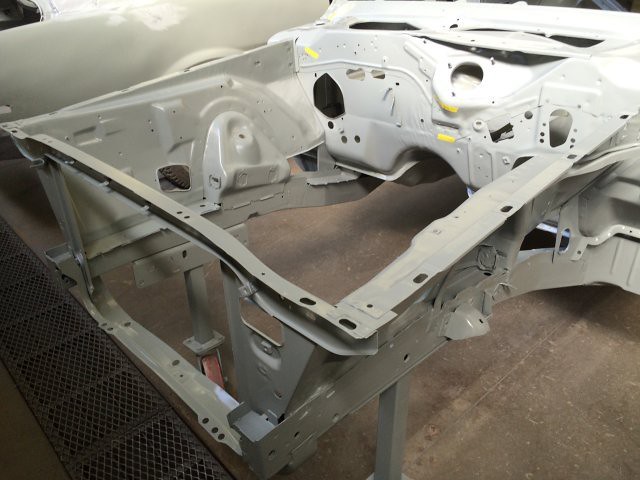
Last edited by CDN72SE; 05/03/18 03:52 PM.
|
|
|
Re: 1972 Charger SE Project by CDN72SE
[Re: CDN72SE]
#2054410
04/14/16 06:37 PM
04/14/16 06:37 PM
|
Joined: Aug 2010
Posts: 428
Oakville, Ontario, Canada
CDN72SE
OP
mopar
|
OP
mopar
Joined: Aug 2010
Posts: 428
Oakville, Ontario, Canada
|
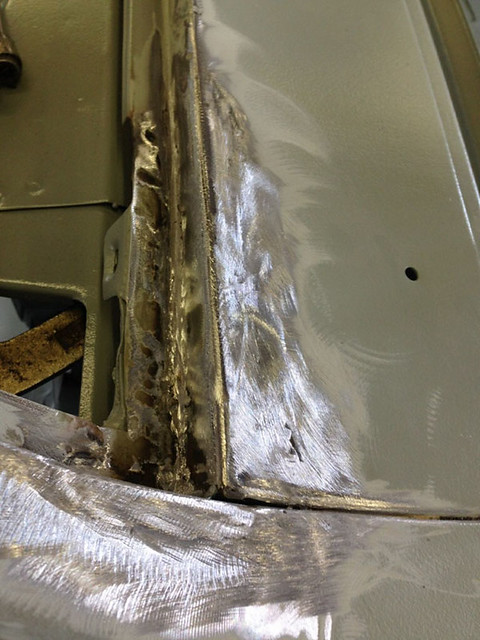
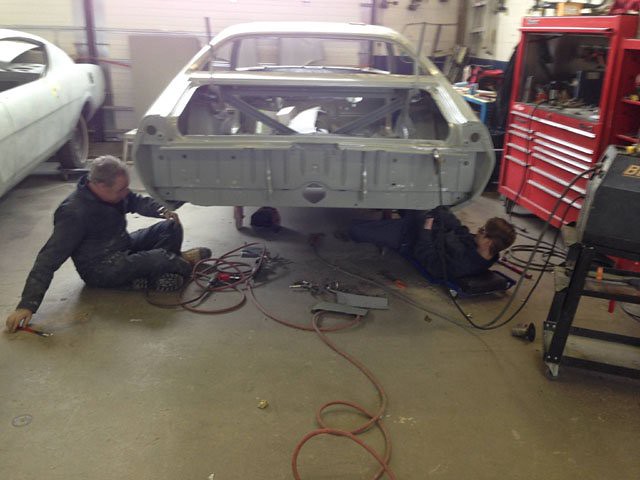
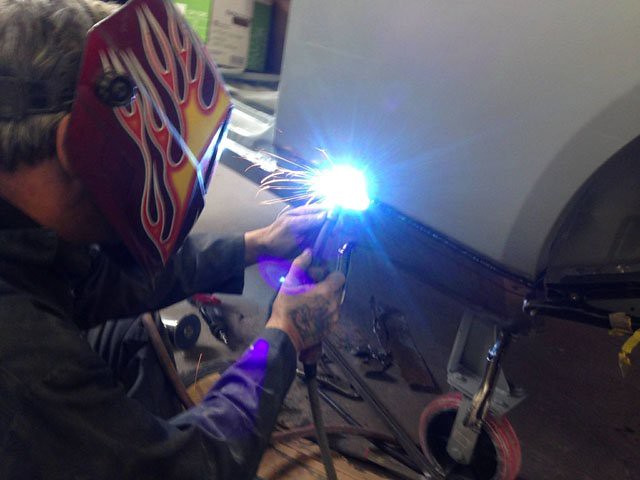
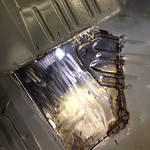
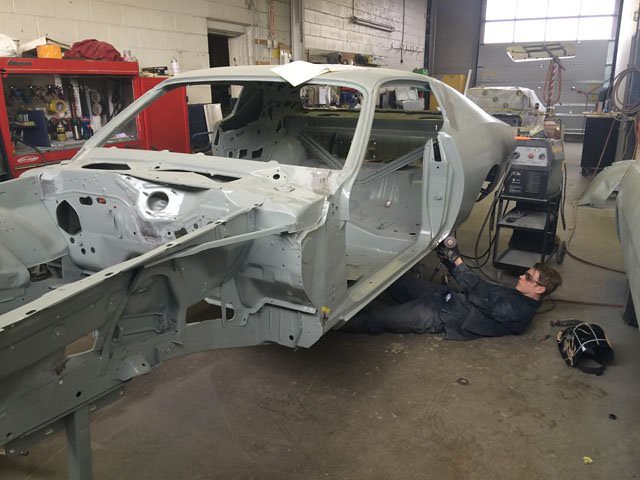
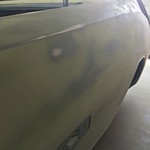
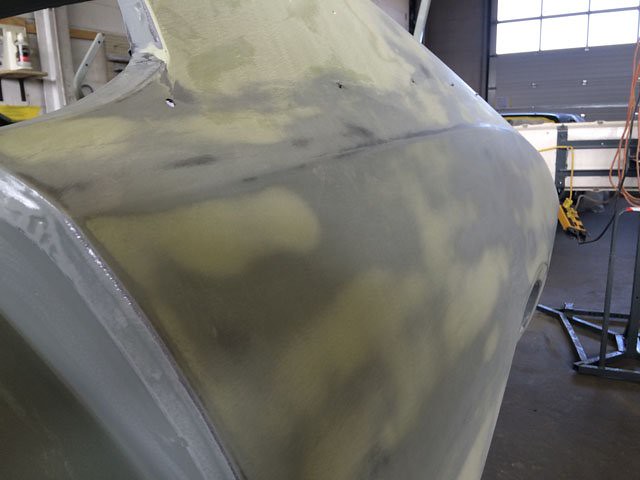
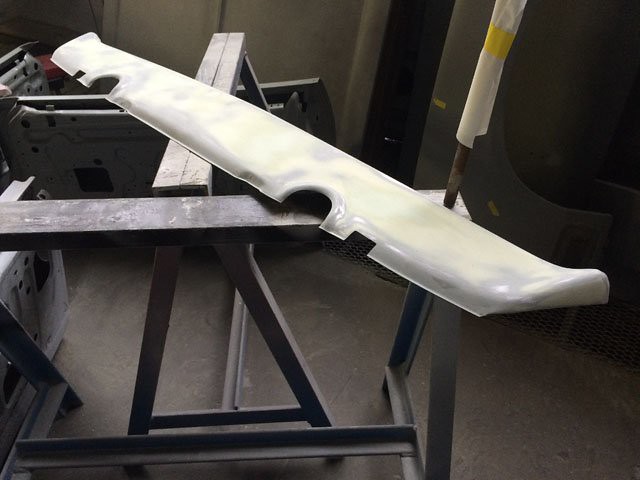
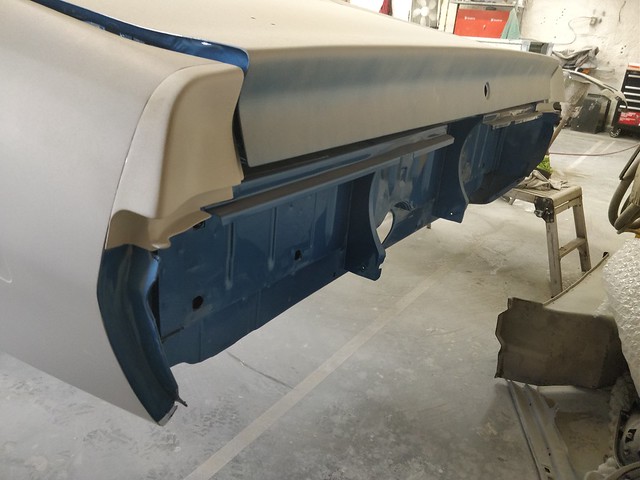
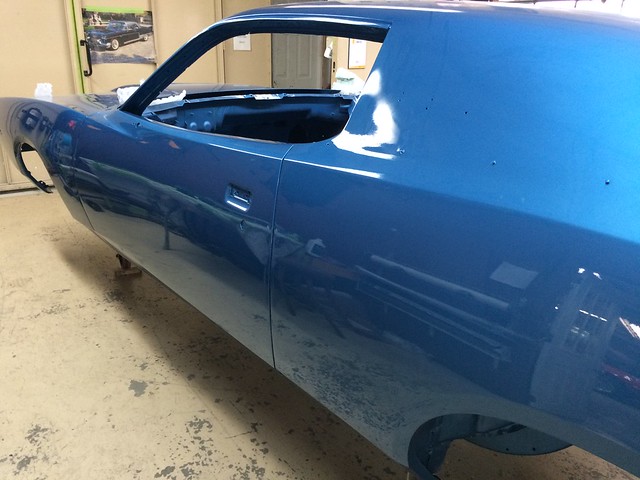
The repairs have started! 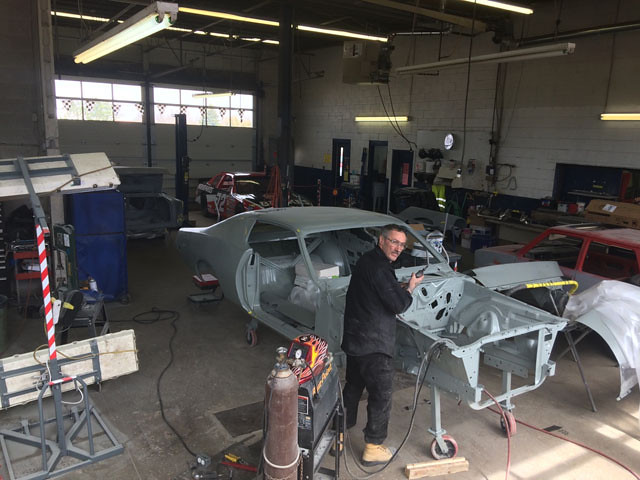 Common rust area, will be fixed right, passenger side lower windshield. 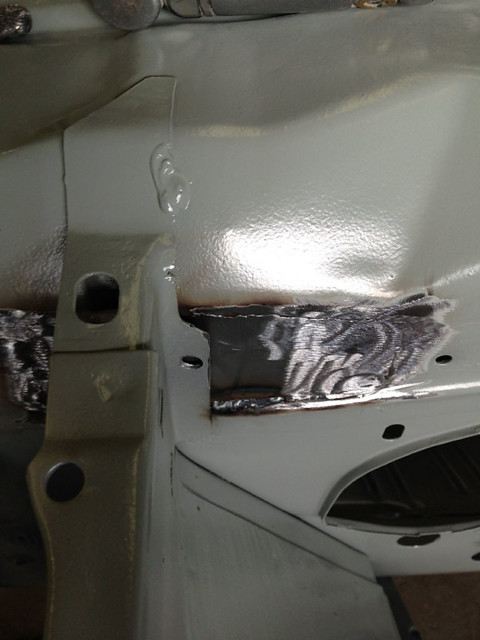 Area previously stripped: 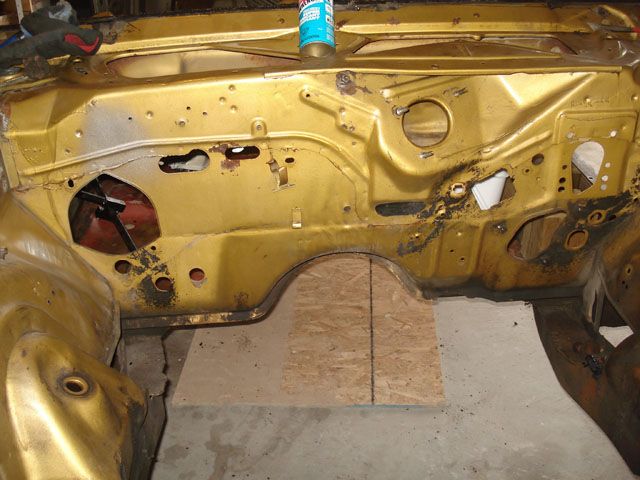 [/url] The extent to any cowl damage, just some pinholes, again on the passengers side:  [/url] Passenger fender was a little thin, needed a fix: 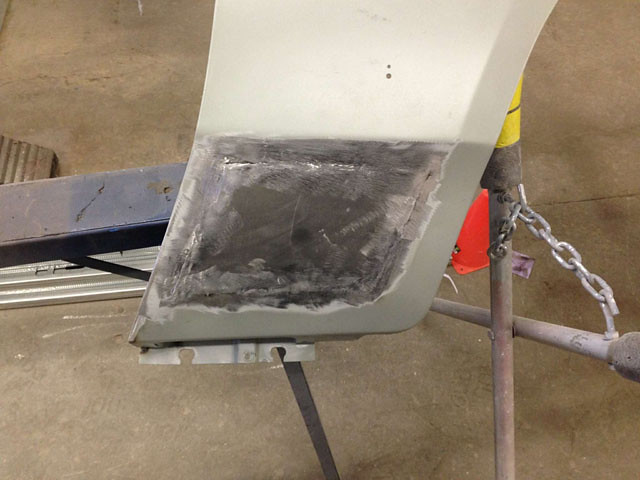
Last edited by CDN72SE; 05/03/18 03:53 PM.
|
|
|
Re: 1972 Charger SE Project by CDN72SE
[Re: CDN72SE]
#2054414
04/14/16 06:38 PM
04/14/16 06:38 PM
|
Joined: Aug 2010
Posts: 428
Oakville, Ontario, Canada
CDN72SE
OP
mopar
|
OP
mopar
Joined: Aug 2010
Posts: 428
Oakville, Ontario, Canada
|
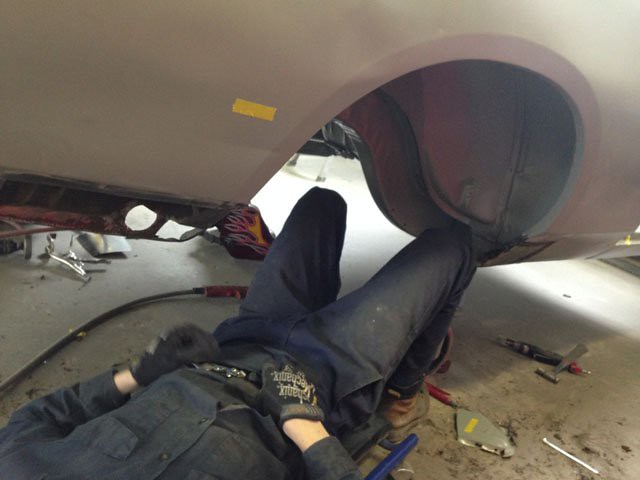
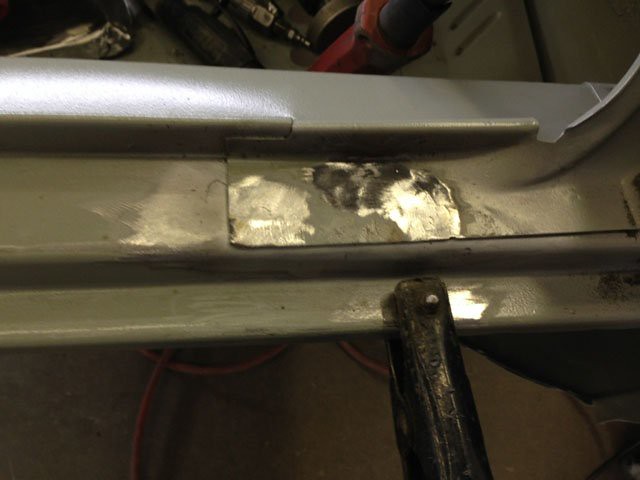
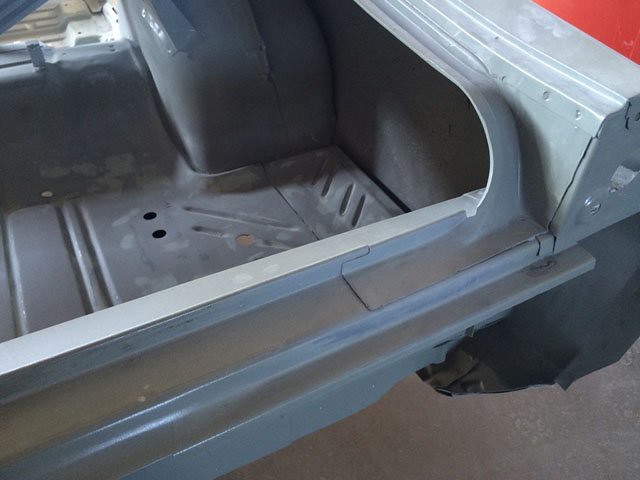
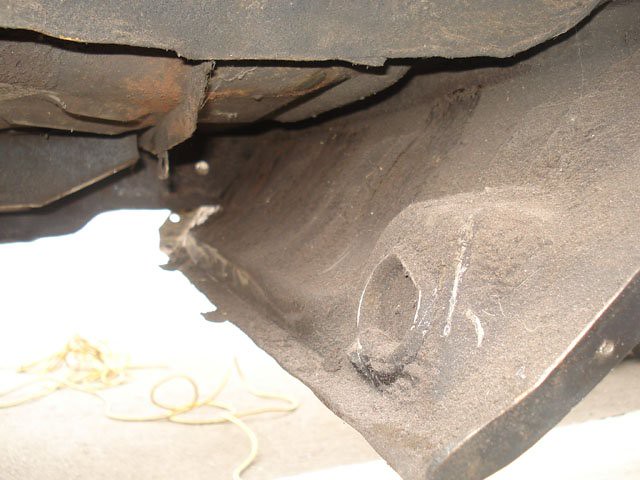
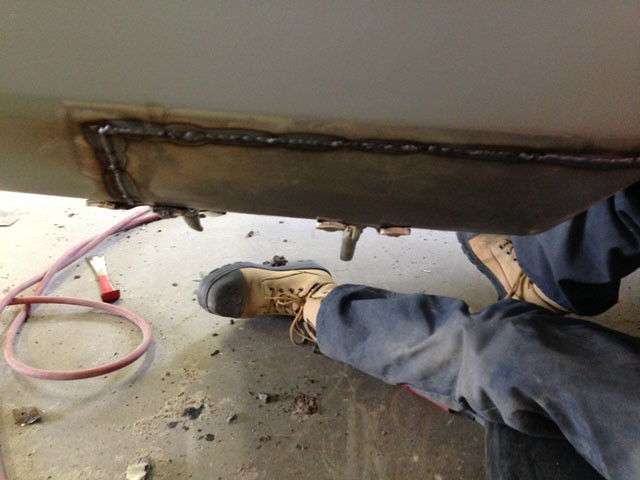
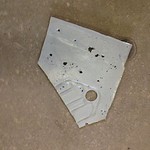
Been wondering what was behind this rocker panel.  Time to cut it out: 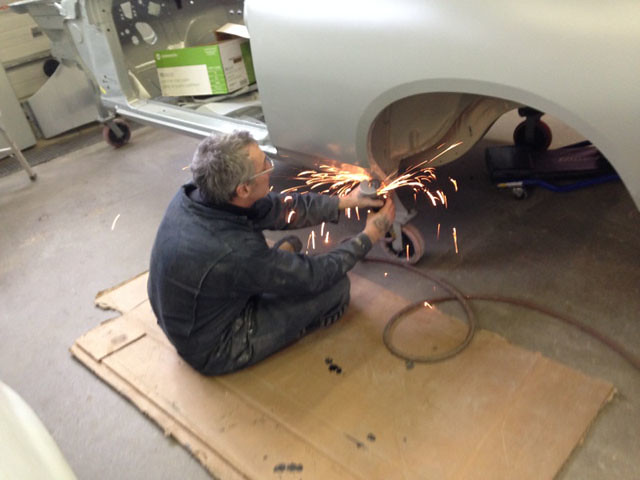 So this is what we have: 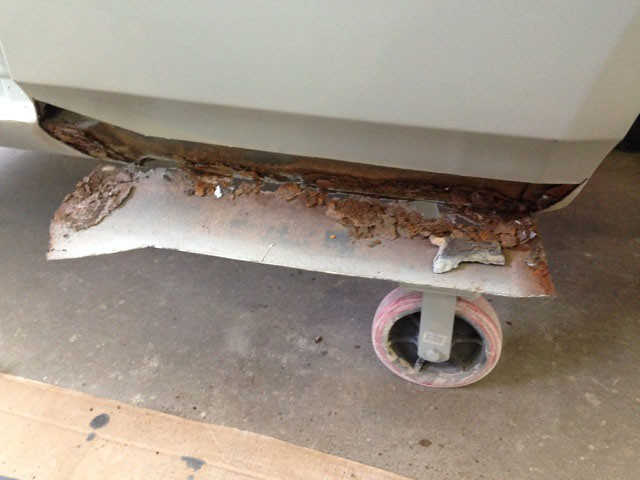 Cleaned up and primed: 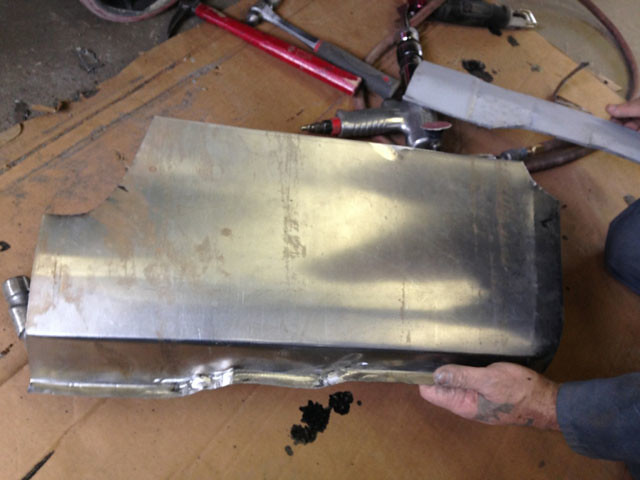 Template made for new hand crafted part: 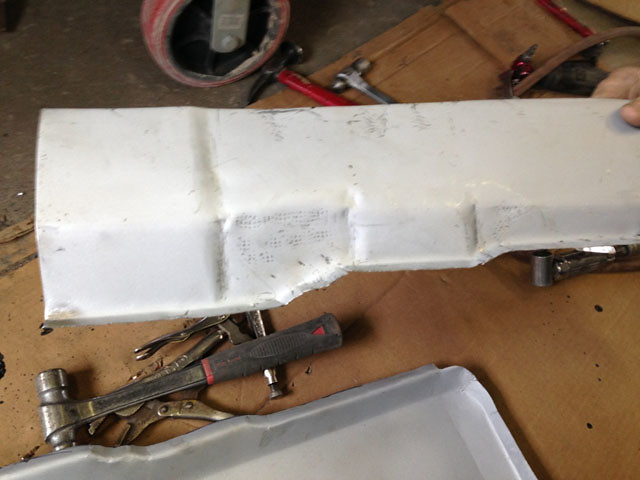 The new piece with 20 gauge metal: 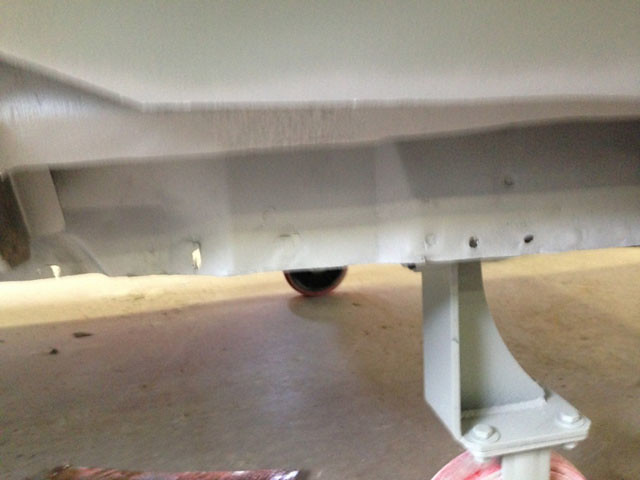
Last edited by CDN72SE; 05/03/18 03:58 PM.
|
|
|
Re: 1972 Charger SE Project by CDN72SE
[Re: CDN72SE]
#2054432
04/14/16 06:43 PM
04/14/16 06:43 PM
|
Joined: Aug 2010
Posts: 428
Oakville, Ontario, Canada
CDN72SE
OP
mopar
|
OP
mopar
Joined: Aug 2010
Posts: 428
Oakville, Ontario, Canada
|
Turning my attention to the gauge cluster, my original had the clock and cut-out for some 80's cassette deck I had in there. 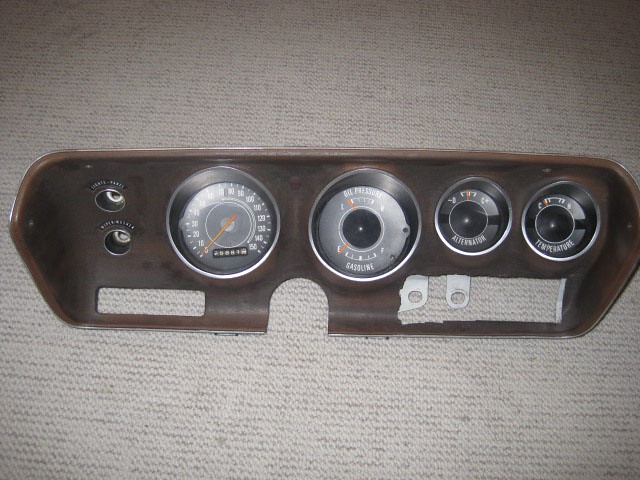 Installed a new tachometer from Charger Specialties in place of the clock, also changed the lens to one without the hole for the clock thingy. 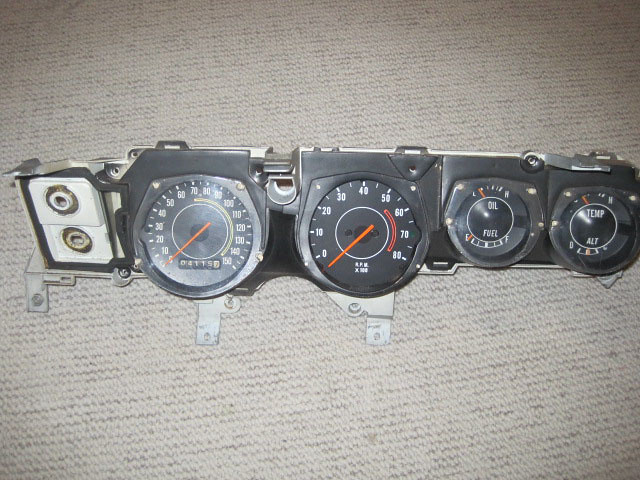 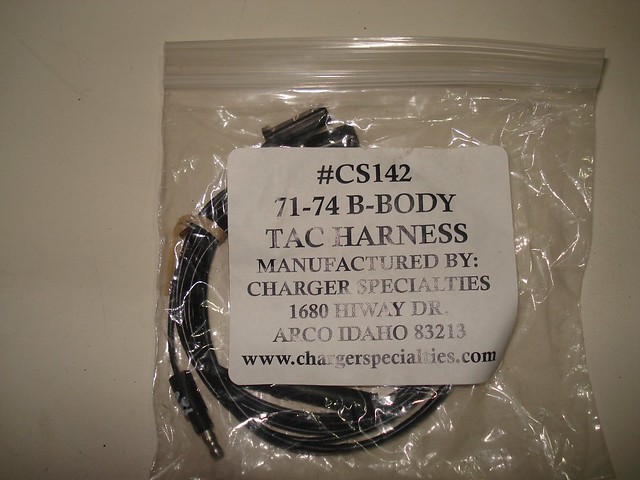 Next I used a silver craft paint pen to go around the edges to make things look better. 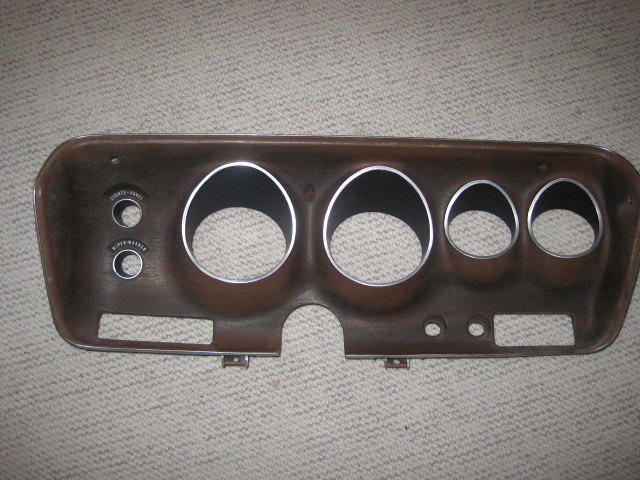 Put back together: 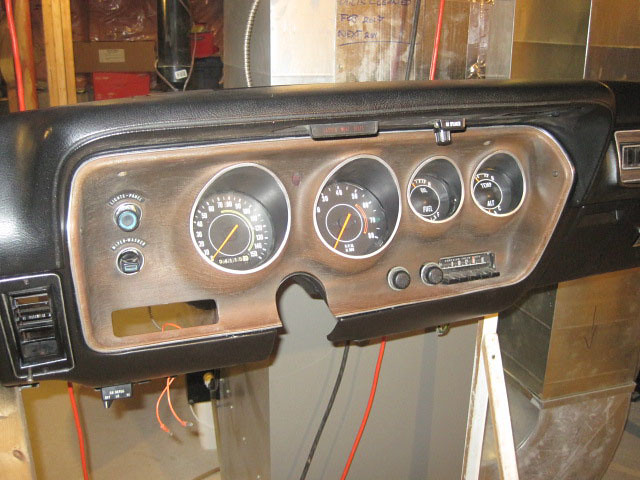 Also went over the surrounding and the Charger SE emblem with the same pen.  Since I had the pen out I did the dash vent as well. 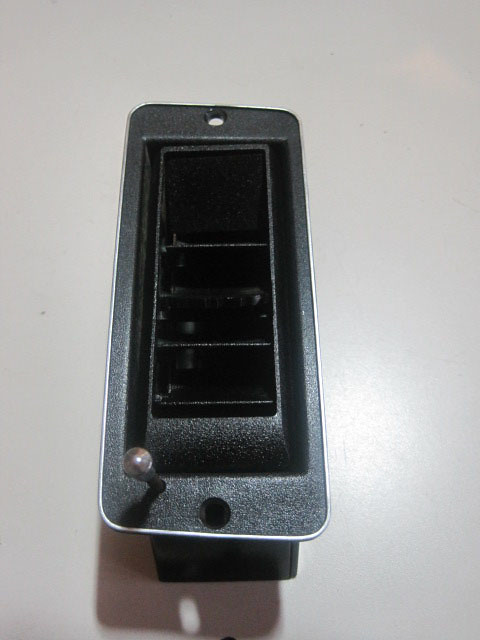
Last edited by CDN72SE; 05/03/18 04:05 PM.
|
|
|
Re: 1972 Charger SE Project by CDN72SE
[Re: CDN72SE]
#2054452
04/14/16 06:48 PM
04/14/16 06:48 PM
|
Joined: Aug 2010
Posts: 428
Oakville, Ontario, Canada
CDN72SE
OP
mopar
|
OP
mopar
Joined: Aug 2010
Posts: 428
Oakville, Ontario, Canada
|
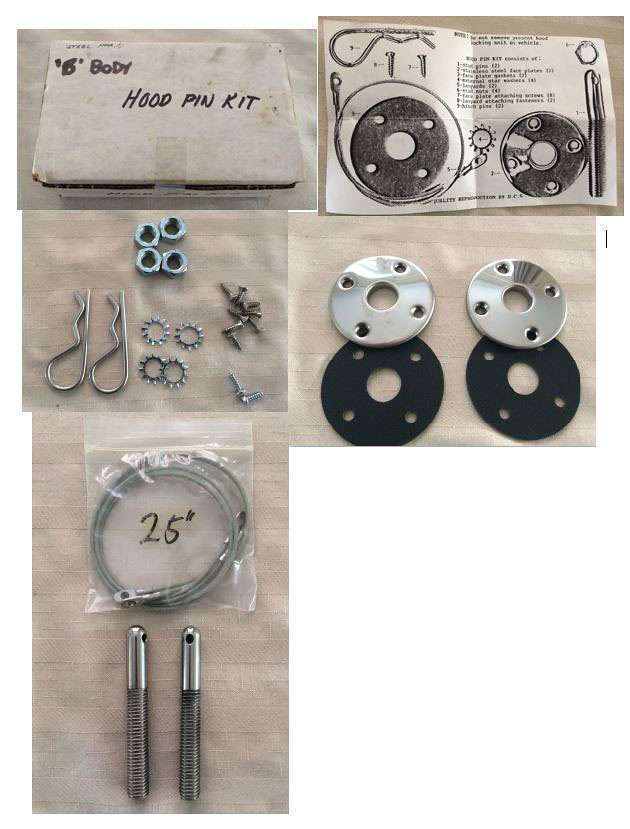
Some purchases from MegaParts. Don't think I actually need the door body plugs as I can't see where I can actually use them. Also don't need the spoiler brackets as they do not work with my spoiler that I had bought in the late 80's. And still debating about the headlight decal. 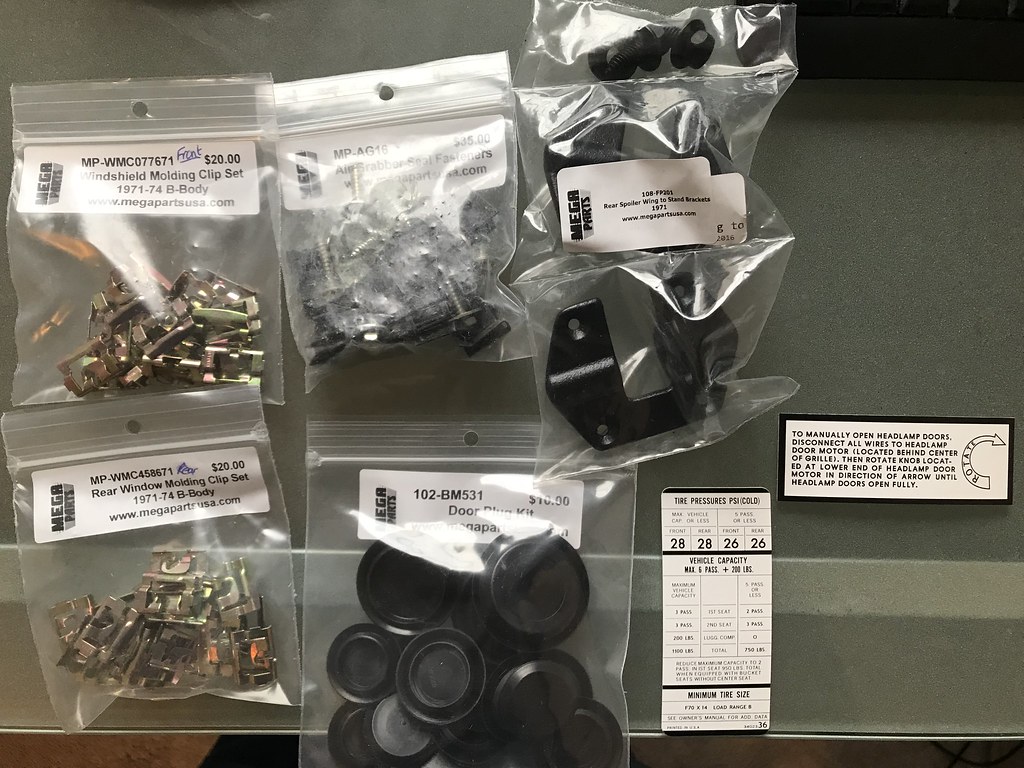 Then I placed an order with Year One, haven't purchased from them in years, thanks to the 30% off I purchased the following: Door weatherstrip was from Metro - Supersoft The Jack sticker and Hidden Headlight decal (wanted the green one) both came from Dale's Cuda Shop. [url=https://flic.kr/p/GUvdcz] 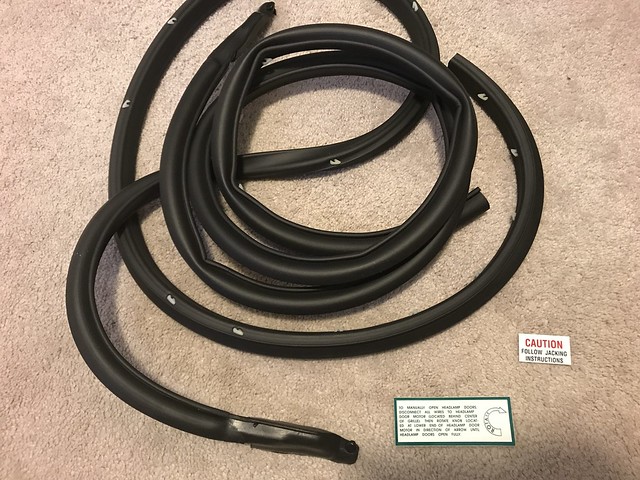
Last edited by CDN72SE; 05/03/18 04:14 PM.
|
|
|
Re: 1972 Charger SE Project by CDN72SE
[Re: CDN72SE]
#2491569
05/03/18 04:19 PM
05/03/18 04:19 PM
|
Joined: Aug 2010
Posts: 428
Oakville, Ontario, Canada
CDN72SE
OP
mopar
|
OP
mopar
Joined: Aug 2010
Posts: 428
Oakville, Ontario, Canada
|
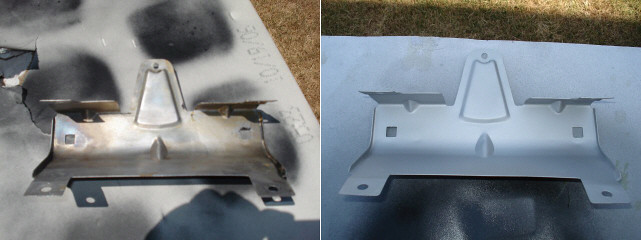
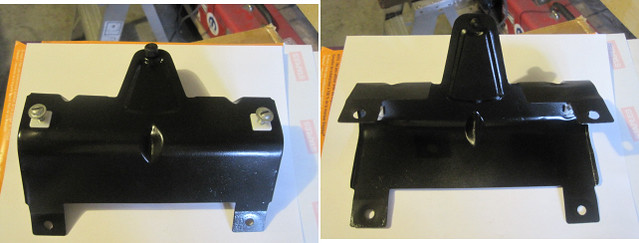
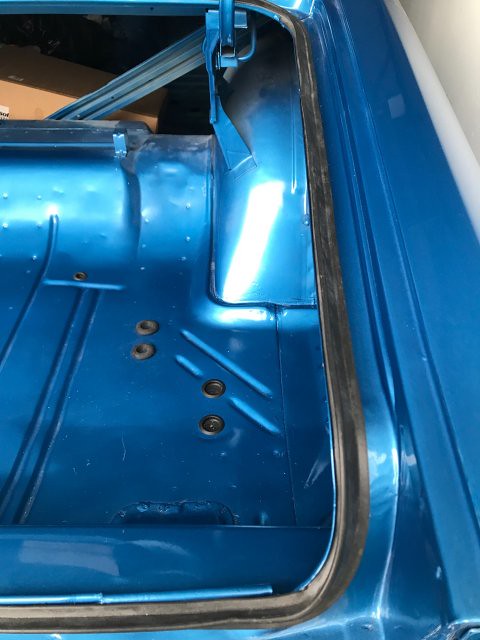
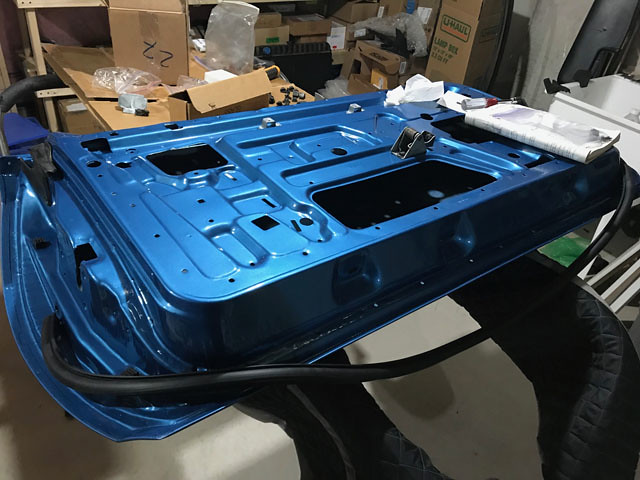
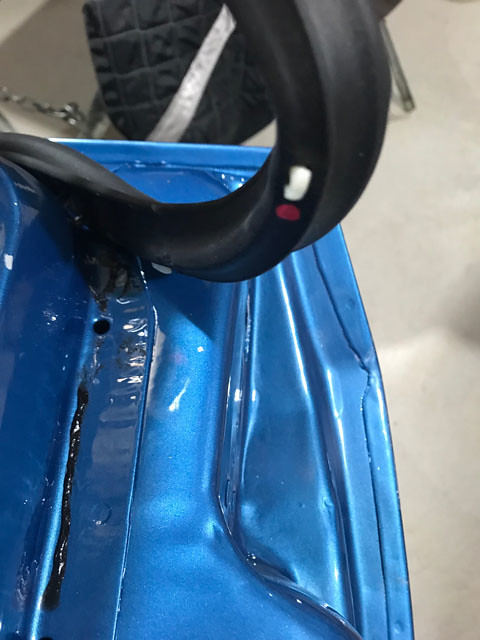
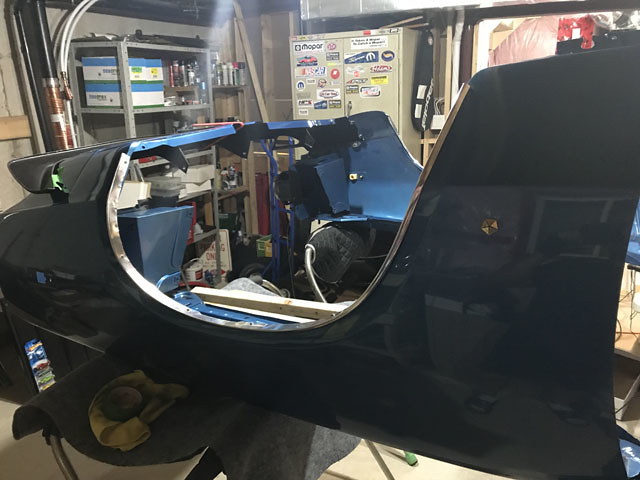
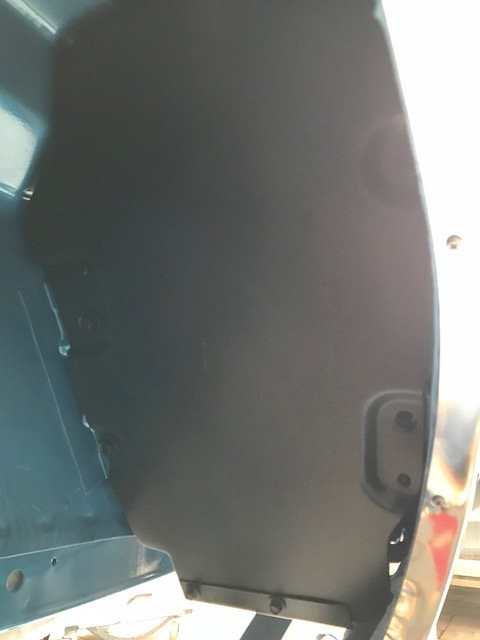
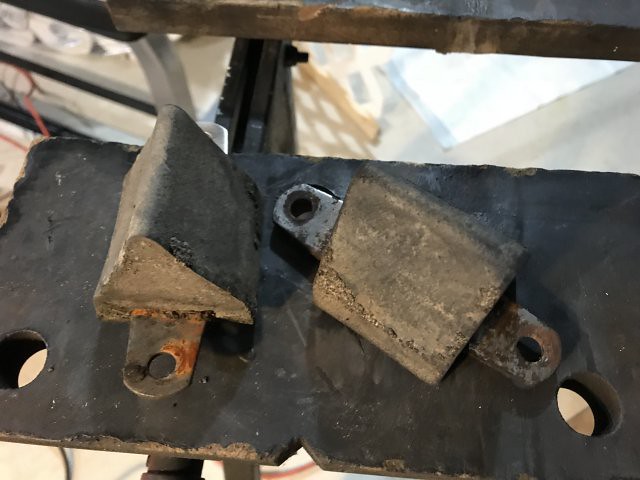
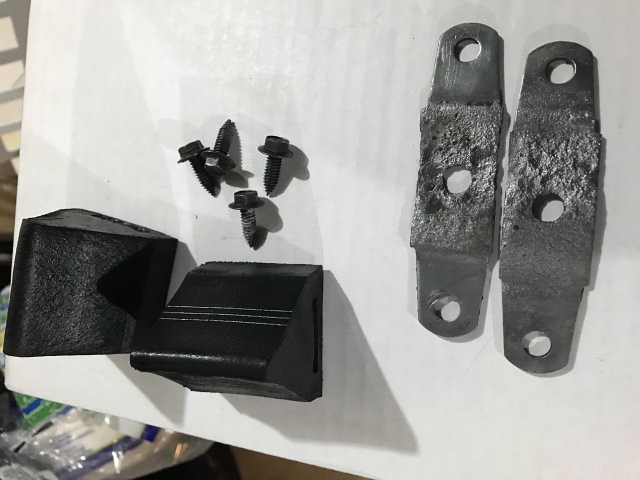
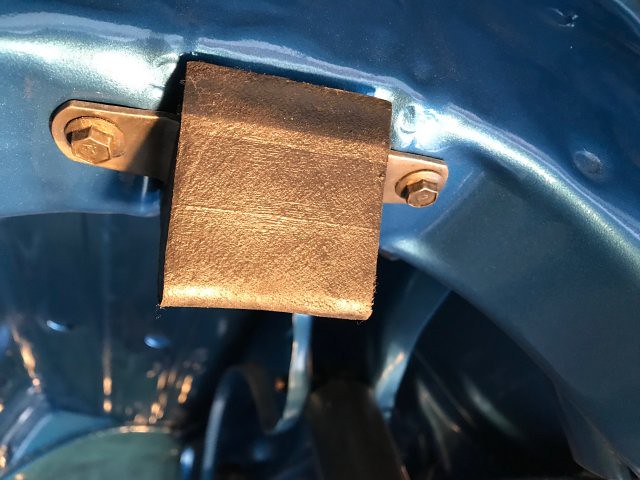
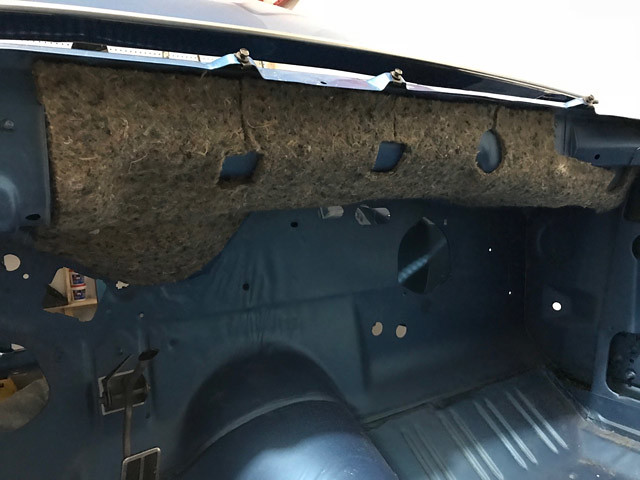
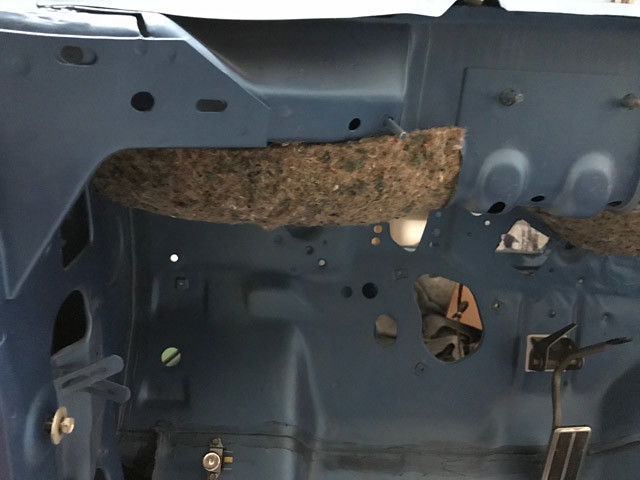
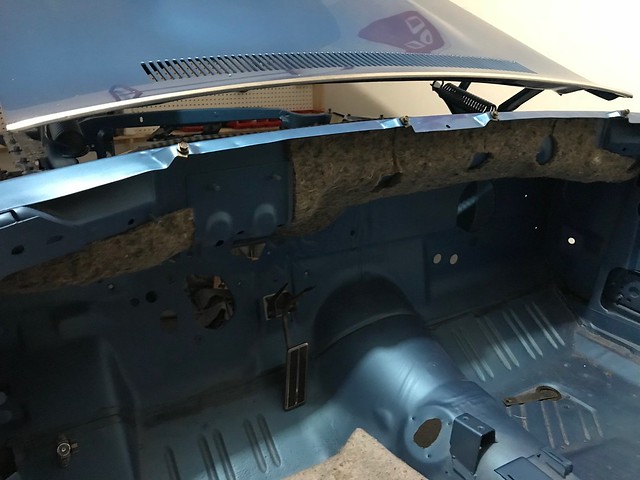
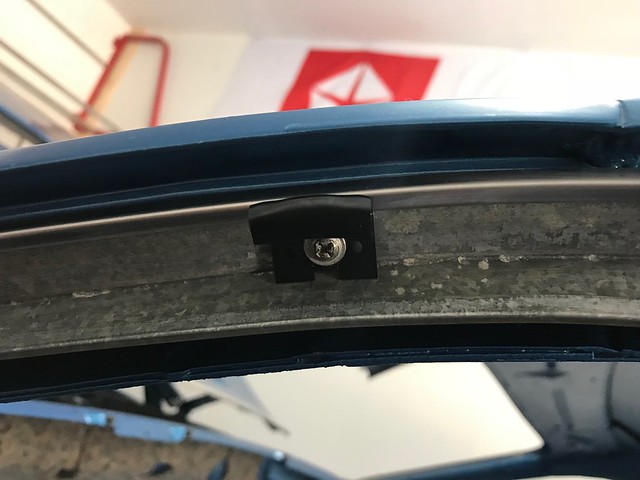
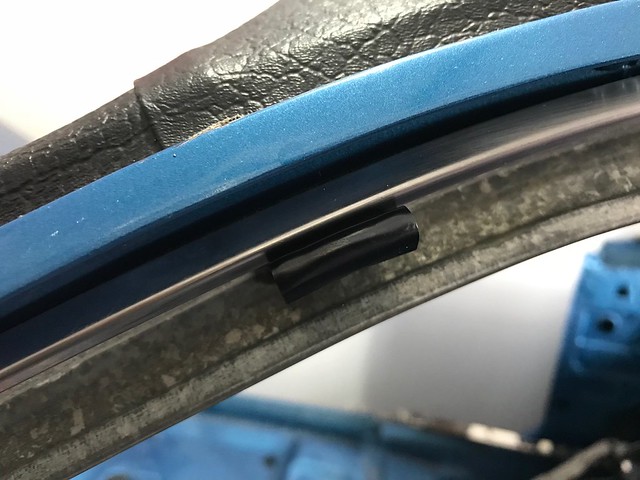
Interior Rear Quarter interior panel and support:Or whatever it is called. :scratchchin: 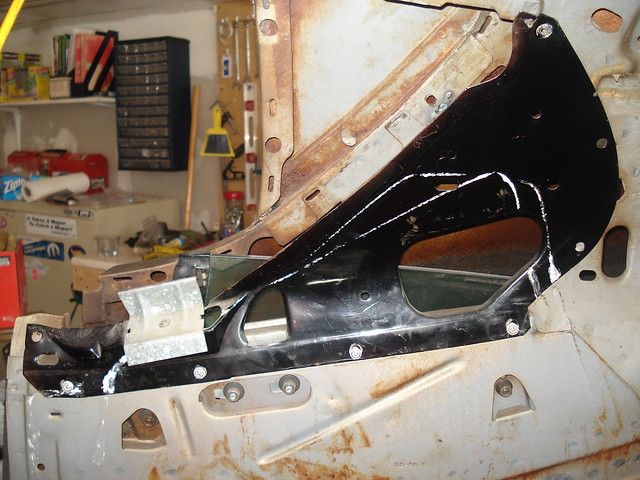 Cleaned up the panels and sprayed them with some gloss black paint: 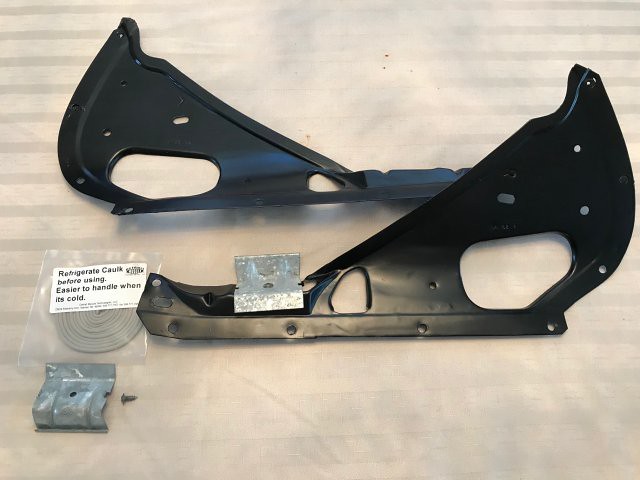 And applied some of that caulk from DMT to replace what was there, think it was there so the panel and the support didn't make any rattling noise. 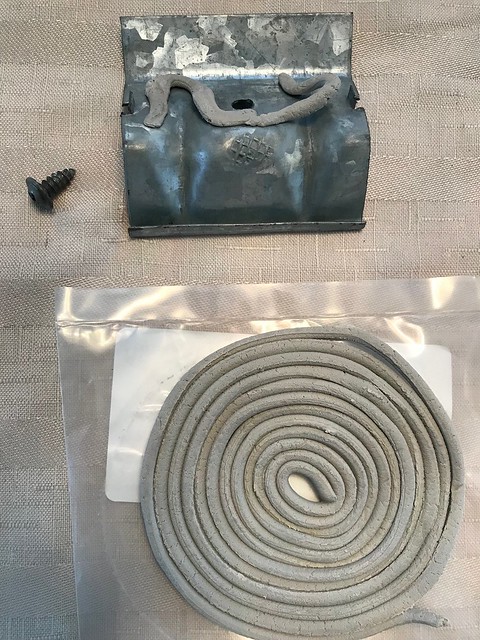 I'll install them after I get the rear quarter windows in.
|
|
|
Re: 1972 Charger SE Project by CDN72SE
[Re: CDN72SE]
#2492968
05/06/18 11:03 PM
05/06/18 11:03 PM
|
Joined: Sep 2011
Posts: 1,487
STL
cdstl
pro stock
|
pro stock
Joined: Sep 2011
Posts: 1,487
STL
|
Beautiful.
A word of advice. I would remove any and ALL RPM that you put onto your metal parts and PAINT them with something that will resemble their factory appearance. RPM is just that, rust PREVENTION and it will be MAJIC if they don't re-rust inside of a year.
If you plan on driving your car and not leaving it in a climate controlled bubble, your parts WILL rust again.
1972 Cuda 340 4 speed, 2001 Ram CTD 4x4 6 speed, 1970 Duster 408 4 speed, 1996 Ram 5.9 2x4 auto, 1965 Coronet 500
|
|
|
Re: 1972 Charger SE Project by CDN72SE
[Re: CDN72SE]
#2513230
06/25/18 09:26 PM
06/25/18 09:26 PM
|
Joined: Feb 2003
Posts: 2,810
Sobieski Wi
bee1971
master
|
master
Joined: Feb 2003
Posts: 2,810
Sobieski Wi
|
Wow
Wow
Wow
Just Beautiful!!!
1971 Dodge Charger Superbee
2011 Ram Sport 1500 Quad Cab Deep Water Blue Loaded
Siberian Huskies
|
|
|
|
|

 .
. 


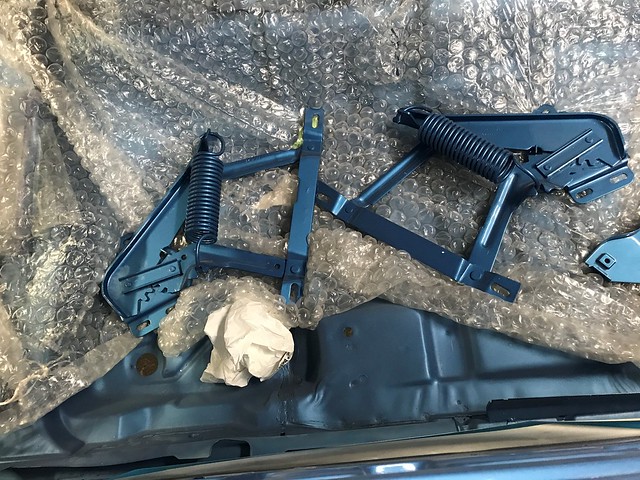
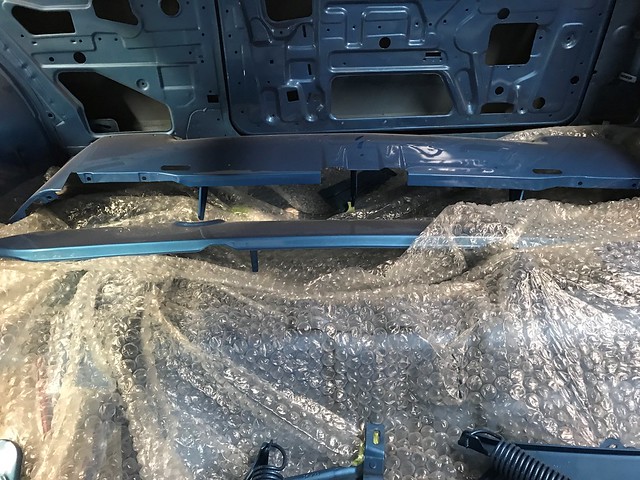


![[Linked Image]](https://farm2.staticflickr.com/1768/42019090665_0be44cfaa9_z.jpg)
![[Linked Image]](https://farm2.staticflickr.com/1784/42019091575_bed6108d0f_z.jpg)
![[Linked Image]](https://farm2.staticflickr.com/1836/42123971525_965865b997_z.jpg)
![[Linked Image]](https://farm2.staticflickr.com/1810/42123971635_0eedb46883_z.jpg)
![[Linked Image]](https://farm2.staticflickr.com/1766/29154056128_108e4070af_z.jpg)
![[Linked Image]](https://farm2.staticflickr.com/1790/43297005972_204c64333a_z.jpg)
![[Linked Image]](https://farm2.staticflickr.com/1768/29476325948_443f2a2ea4_z.jpg)
![[Linked Image]](https://farm1.staticflickr.com/837/42442233365_3da279c381_z.jpg)
![[Linked Image]](https://farm8.staticflickr.com/7898/33619768438_792d8d96b7_z.jpg)
![[Linked Image]](https://farm8.staticflickr.com/7824/33619768338_05ef9b24a9_z.jpg)
![[Linked Image]](https://farm8.staticflickr.com/7828/33619768288_360b084db6_z.jpg)
![[Linked Image]](https://farm8.staticflickr.com/7926/33619768228_18f9a46212_z.jpg)
![[Linked Image]](https://farm8.staticflickr.com/7880/33619768178_e8ec4a6df1_z.jpg)