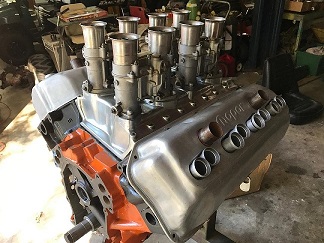
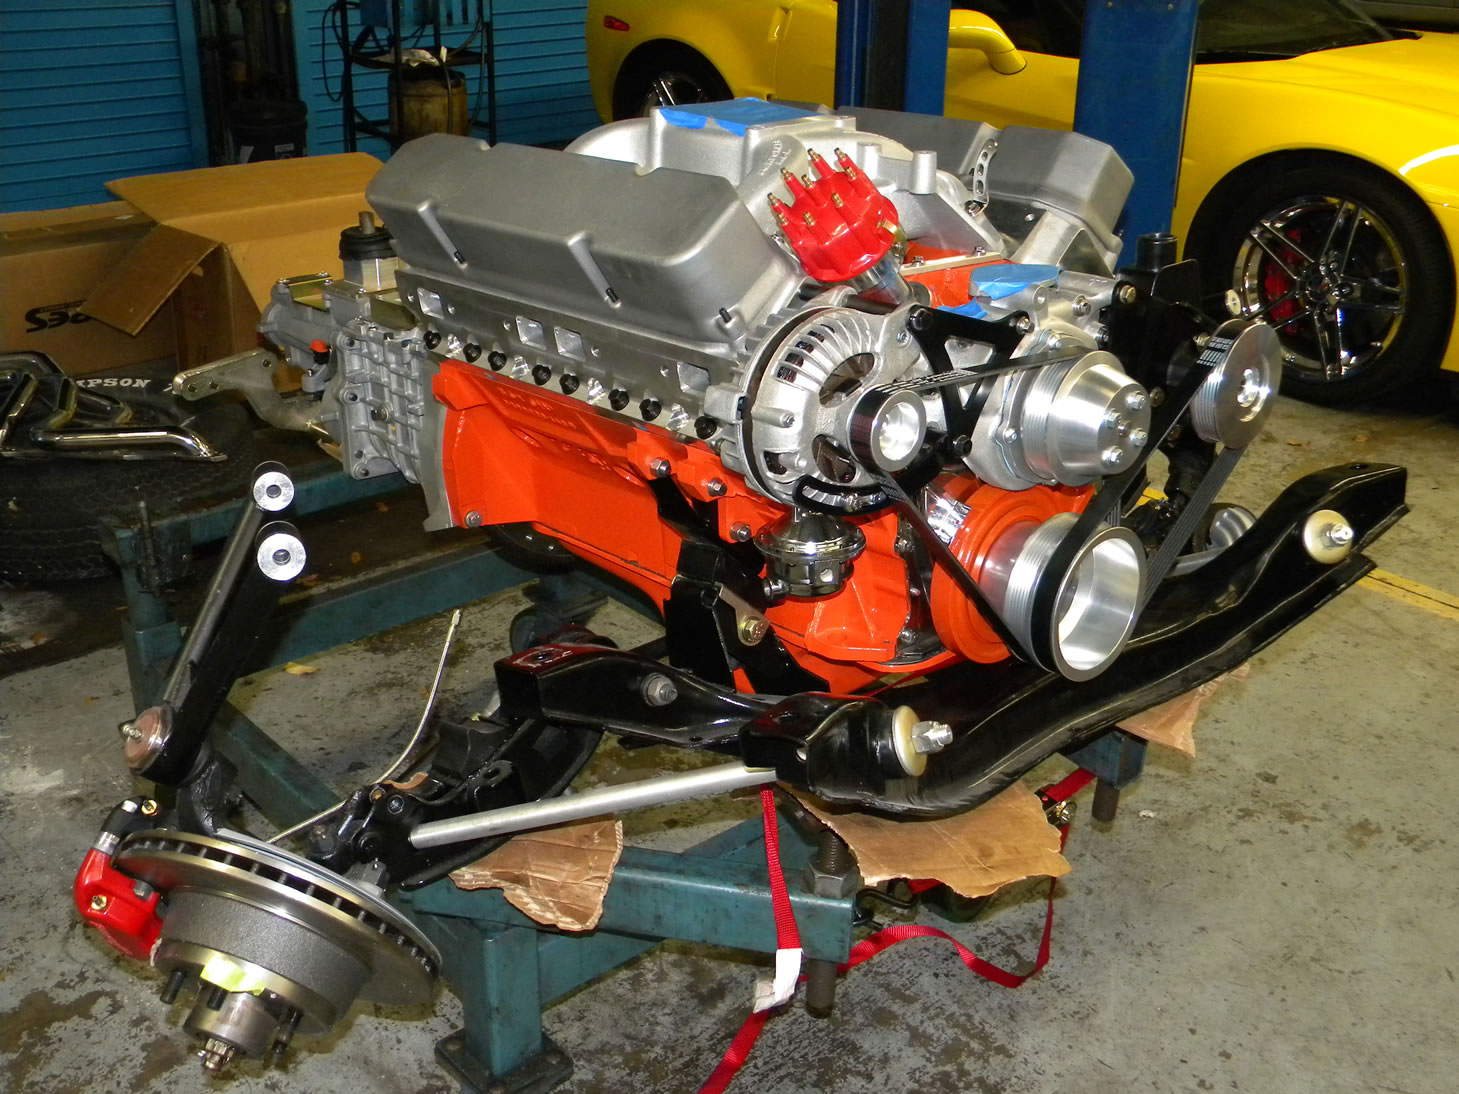
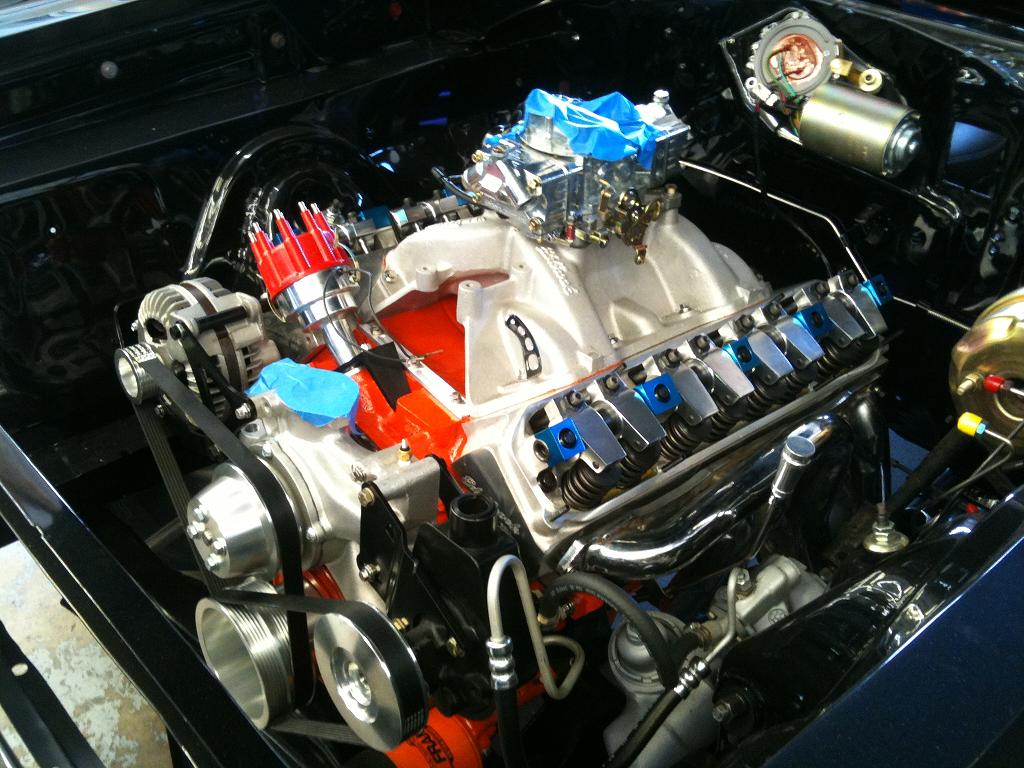
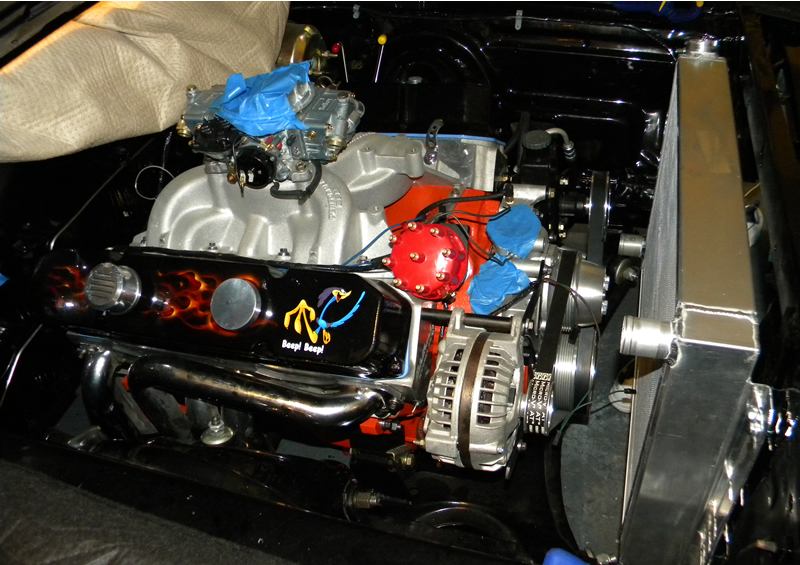
So I am starting a new thread to sort of keep everything centralized on my moparts posting. I'm in the process of finally assembling my convertible after having it sit, painted, for over 3 years. I've been busting my hump getting things done, today I finally mated the engine and trans and have them resting on a cradle, ready to lower the car onto it (working at a dealership is great! hello lift-access!)
And here's another angle. on Monday while on my breaktime at work, I'm going to install the power steering lines, headers, and carb. And the day after I'll get the valves adjusted, oil pump primed, and distributor properly set into position. Little details here and there to button up. I've got to get it in position so I can mark where to make the hole for the shifter (keisler 5 speed conversion kit)
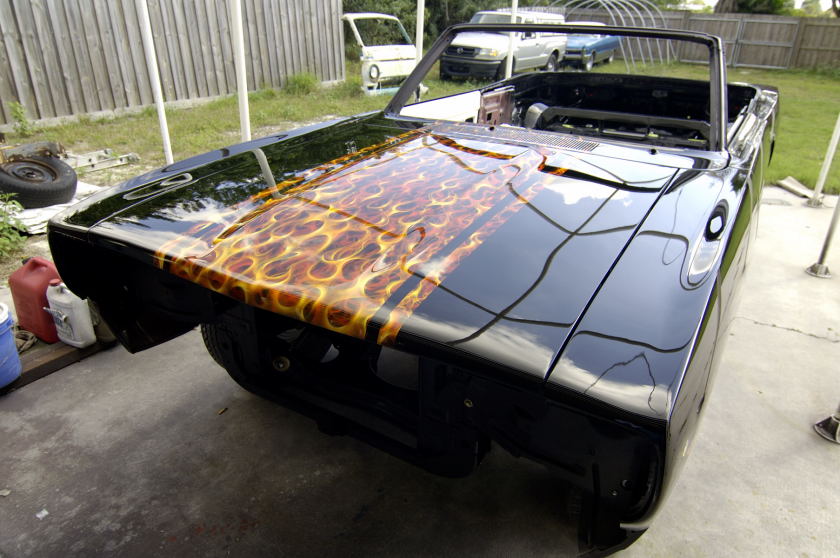
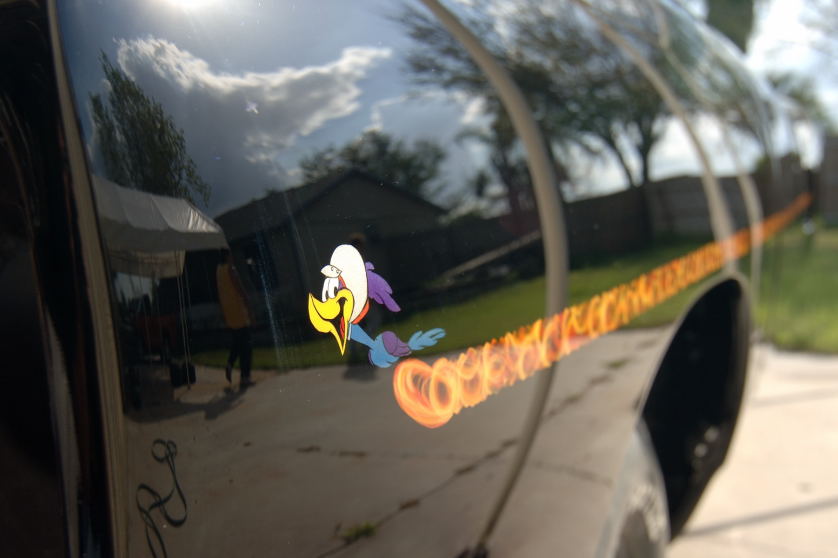
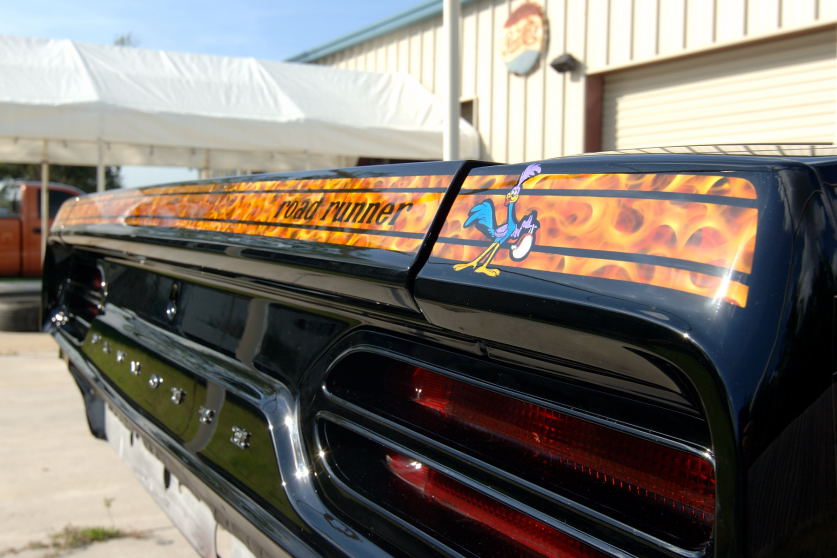
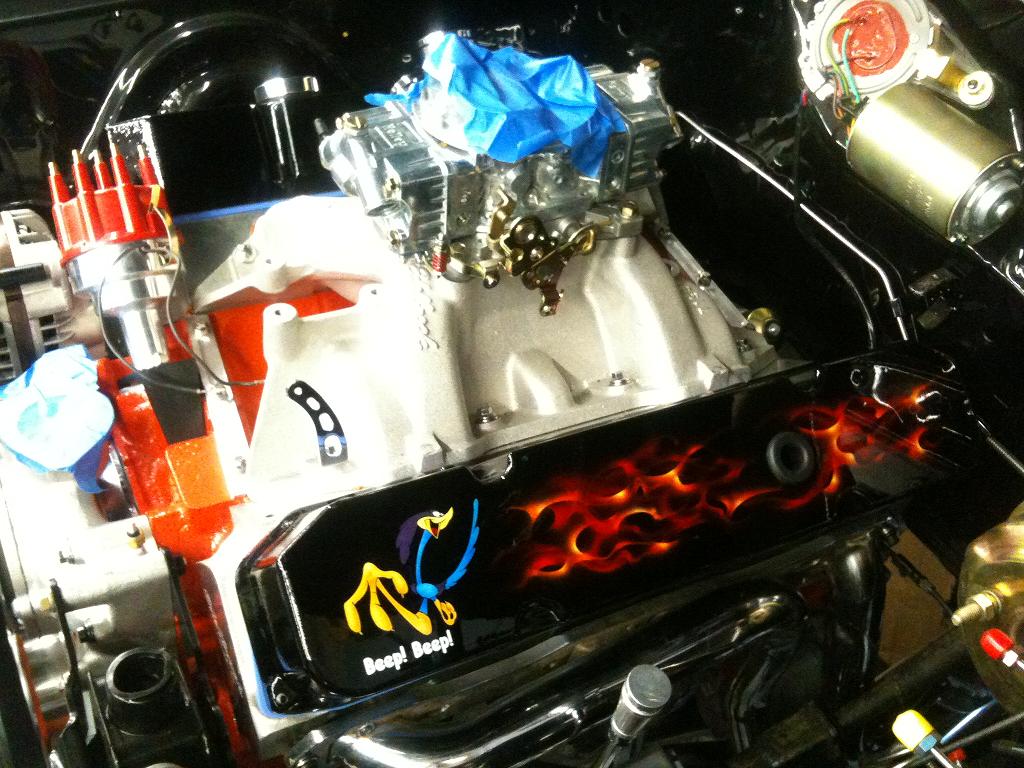
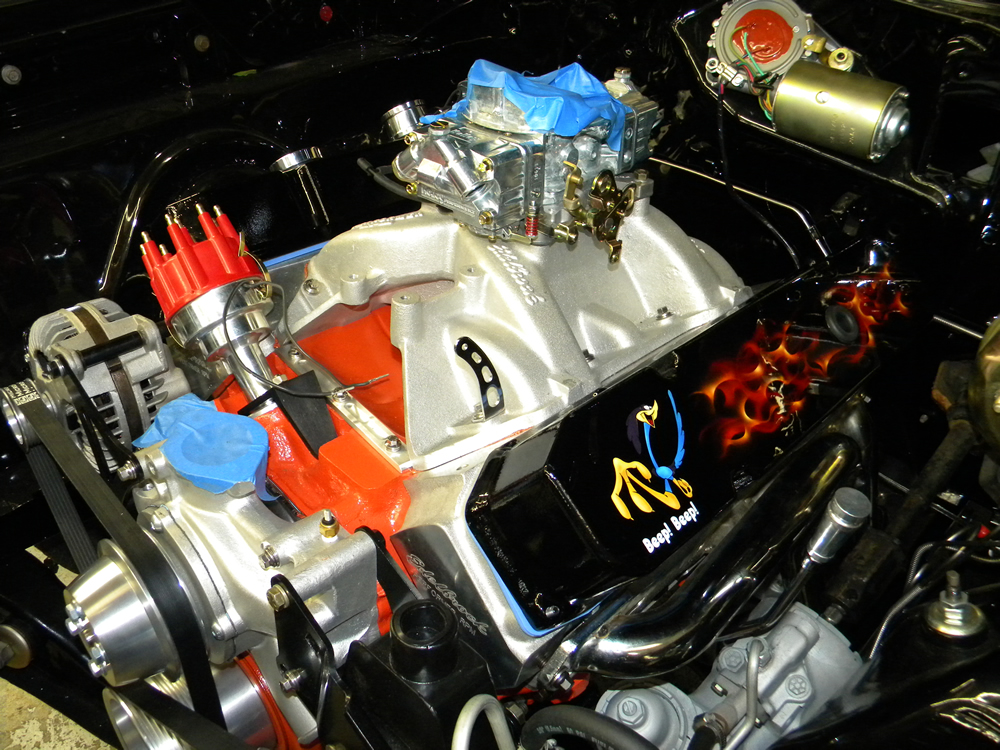
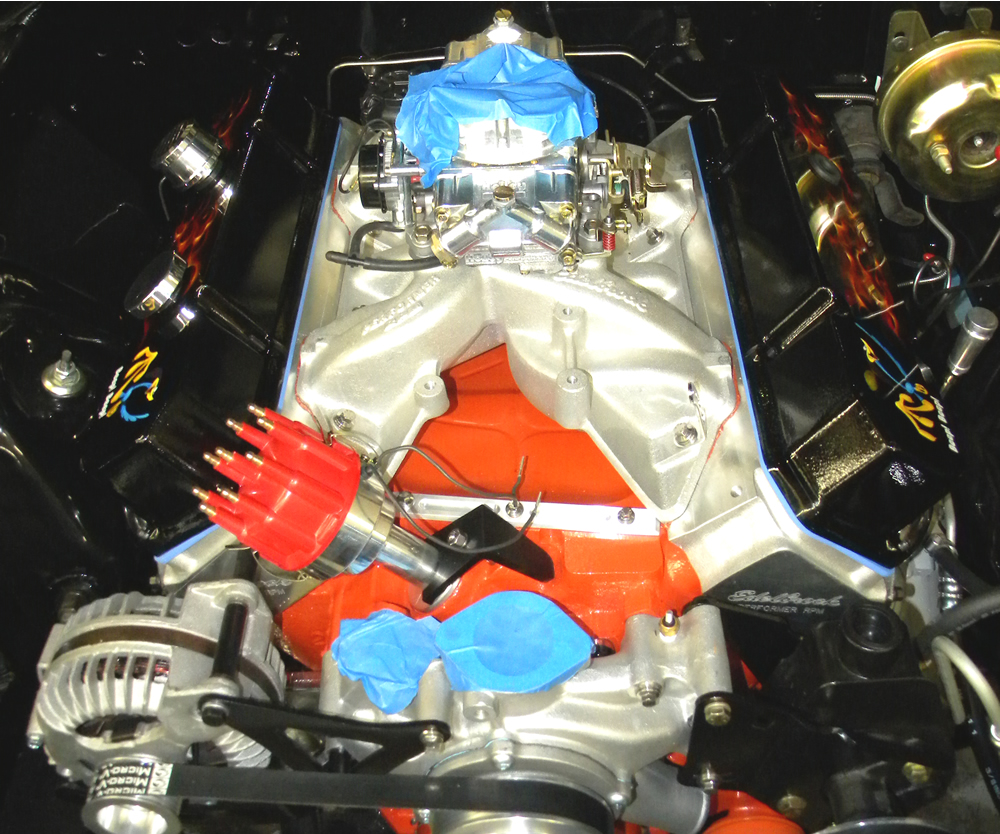
For those who haven't seen it, here's a few shots of the paintwork.
As you can see, we went full custom with the paint. Everything we did started with "You know what would look cool?" The fire on the hood and the more cartoon-like bird was my idea, the fire dust trail was my painter's idea.
It's close to being able to run. Just about 10 minutes ago I lowered the car onto the engine/trans (well, real close anyways) so I can check fore/aft alignment and mark where I need to make the hole for the shifter.
Tomorrow I'll take the seats out, and cut the hole, and then work on that little plate that keisler provides.
I'm hoping to be able to fire it here in a few weeks.
Running/driving, and only needing trim work by the end of the summer.
-Jarrod Pilone '70 Plymouth RR Convertible with amazing custom paint(Tribute/Recreation/Whateveryouwannacallit) My Project Thread
Quote: Haha! I knewwwww what it was before I opened the thread!!!!! I've seen it before and still like it just as much as the first time I saw it. Awesome.
Thanks man, it just feels great to work on the car and make this kind of progress.
Unemployment, Divorce, Bankruptcy, and Depression got in the way of this project (not necessarily in that order).
-Jarrod Pilone '70 Plymouth RR Convertible with amazing custom paint(Tribute/Recreation/Whateveryouwannacallit) My Project Thread
AWESOME is an understatement. I too like the realistic style flames. It is amazing how guys can do that {stencils or not}. I'm surprised you say you won't do the install that way again. I thought it was the easiest way when I had my Barracuda. Don't haveta worry about the paint job either.
You are doing a GREAT job with this ride. I can't wait to see it finished either..Keep at it..
When you decide to quit, THAT is the moment when you would've succeeded..
Looks bitchin and its great to see progress again! Its good to know you and the car made it through some tough times together. I'm sure seeing it come together is the best therapy you can find. Keep up the great work, that car will be in several magazines once its finishined!
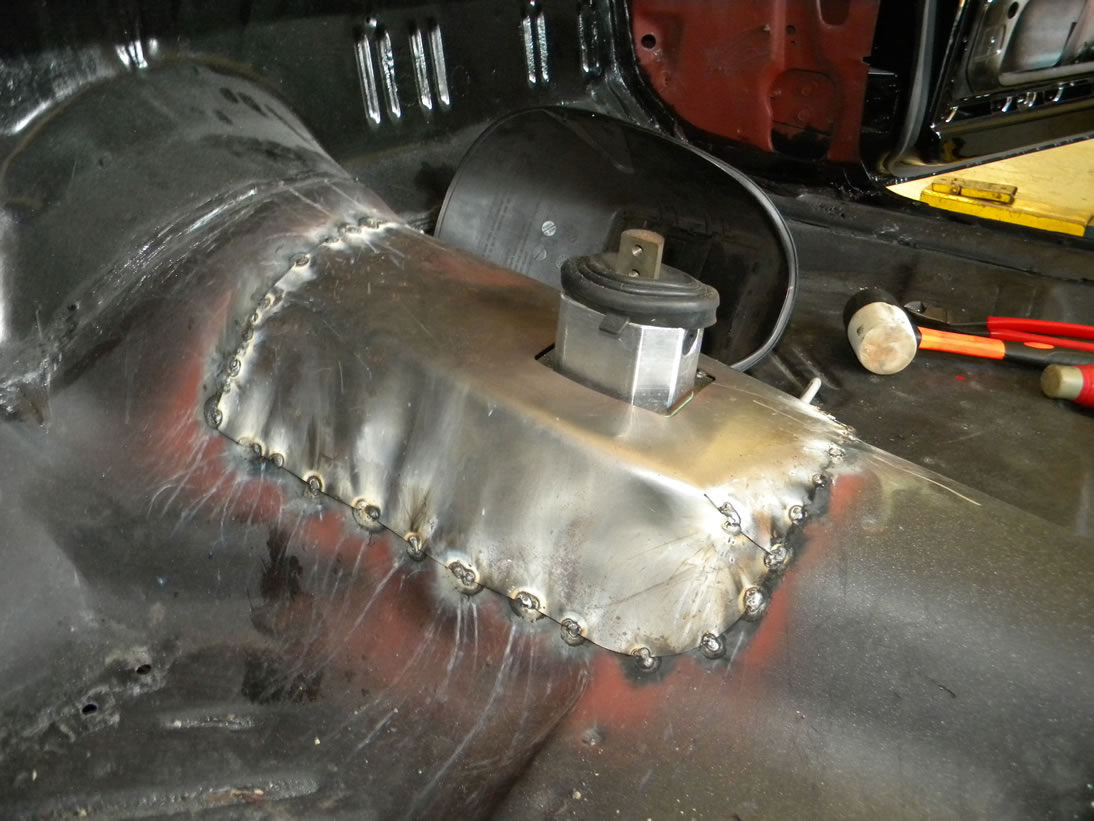
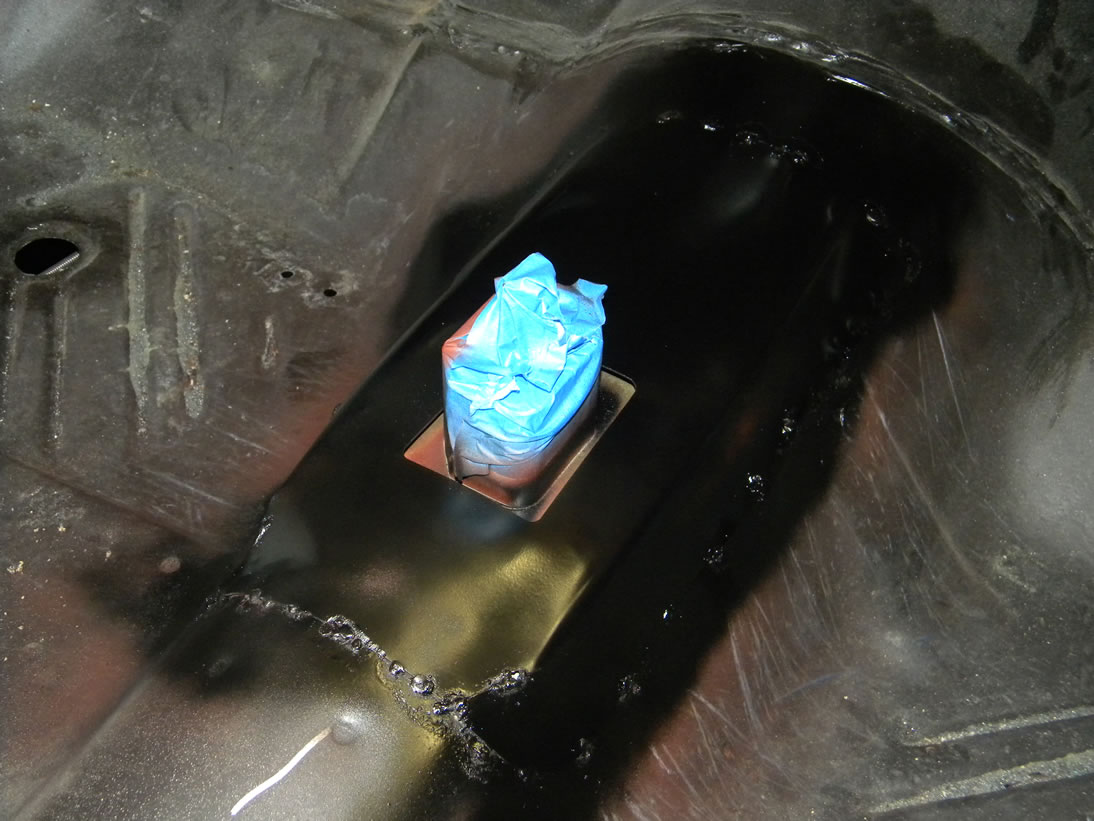
Took lots of bending, smacking, more bending, and testing, bending, testing again, etc. and I finally got the keisler patch panel spotted in place. I sprayed it with weld through primer, but actually painted the bottom of the panel with some black paint so I wouldn't have to go back in a touch it up.. made life much easier
And finally got some paint on it, I'll go back over it tomorrow on top and bottom with seam sealer to finish it off.
I also painted and installed the factory-missing (cause it didn't have dual exhaust from the factory) left side exhaust hanger for the left muffler. That was an easy one, the dimples for the holes were already in the floor!
Haven't gotten much done in the last few days, except working on getting my gas tank painted and ready to install. The inside of it is super clean. Under the tank pad I found a mopar sticker dated 1996, so I guess that answered the question if the tank was original or not. And I'm glad it was an OEM tank and not an aftermarket replacement.
I also pulled out the shifter, and just had to bolt it in place, so I can dream of
Quote: Your car is turning out awesome man! I am so glad to see that you are able to keep it and things are working out for you! Paul.
Me too man!
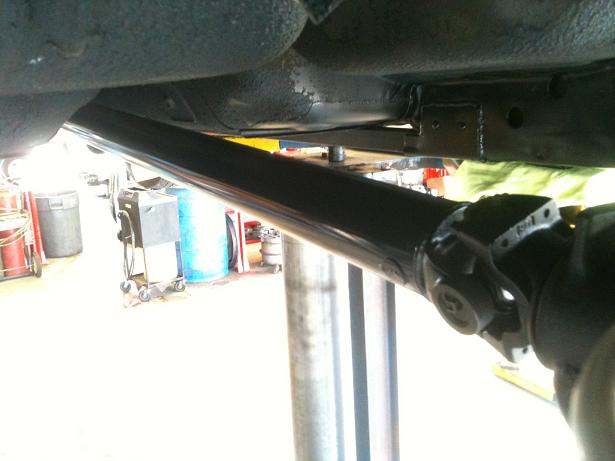
The driveshaft showed up yesterday (from keisler). I'm gonna pull the 3rd member tomorrow and put in a new seal, and get that buttoned up, and put the driveshaft in, and start mocking the exhaust up (got a cool stainless steel exhaust!)
-Jarrod Pilone '70 Plymouth RR Convertible with amazing custom paint(Tribute/Recreation/Whateveryouwannacallit) My Project Thread
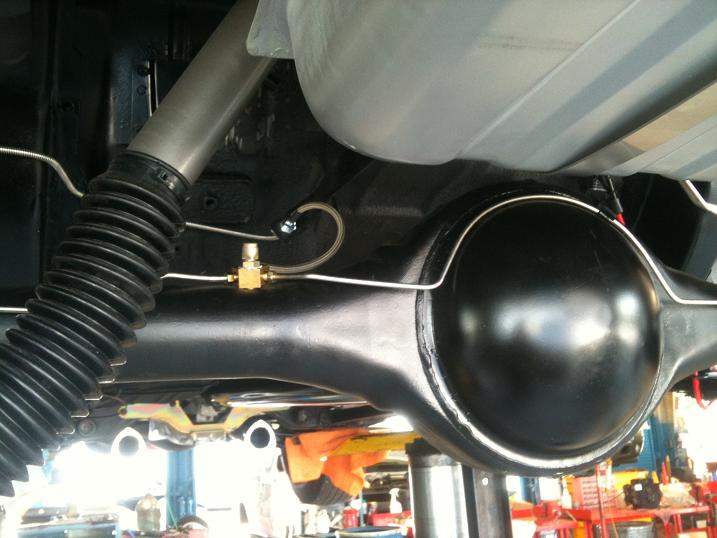
Been a little while since I posted any updates. I've got the gas tank cleaned, painted, and installed (with new stainless steel straps). Also removed the 3rd member for cleaning and inspecting and reinstalled with a new gasket
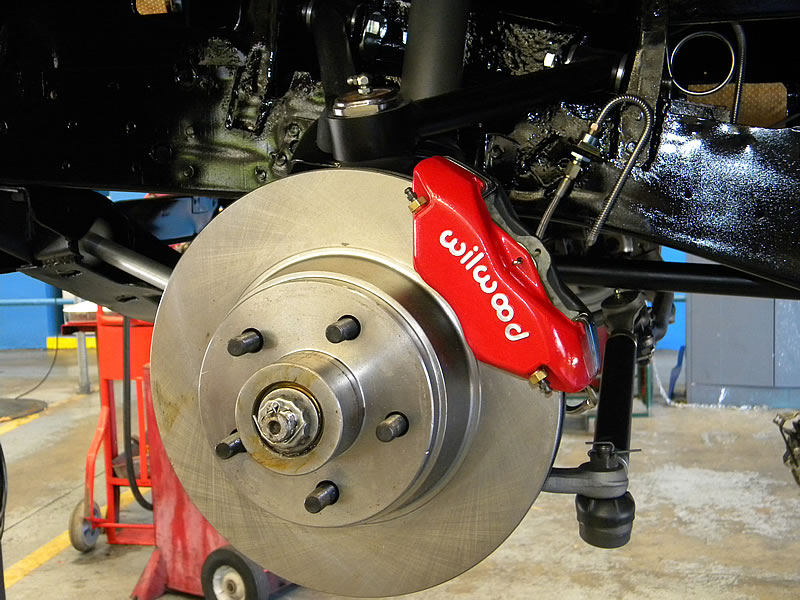
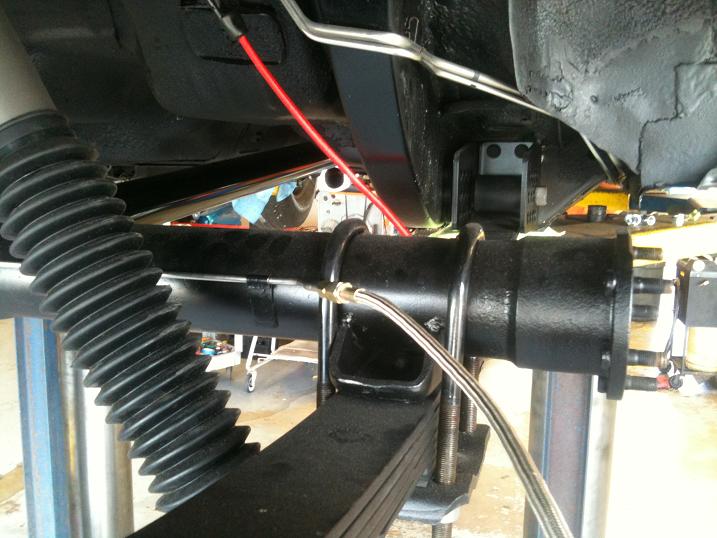
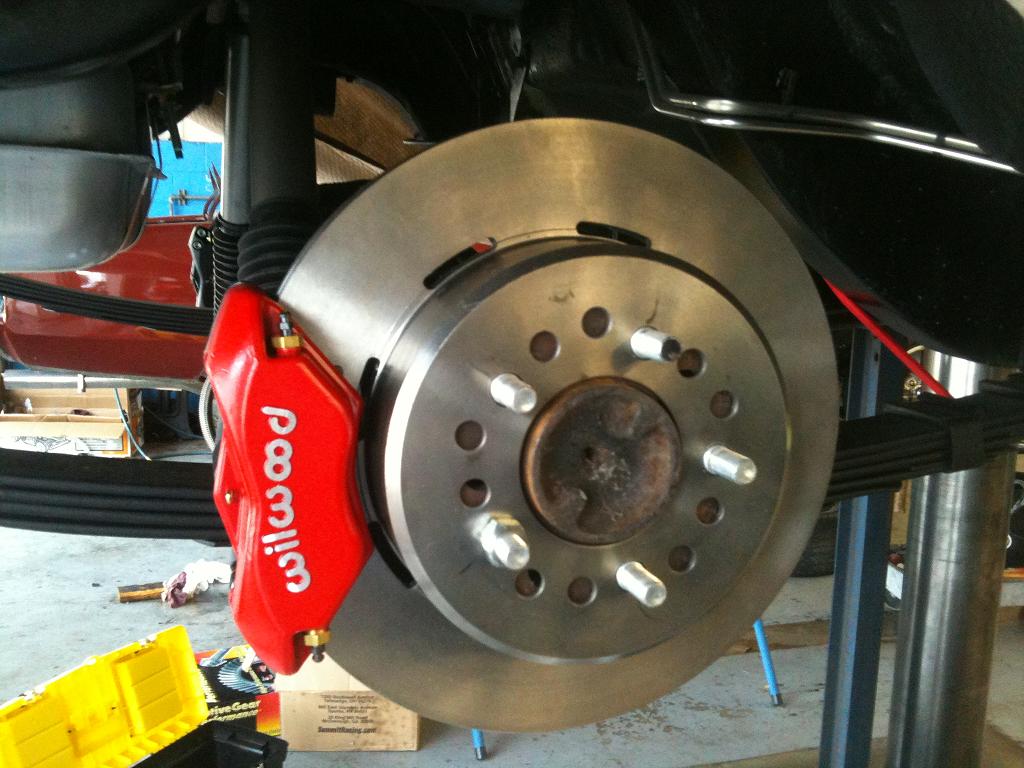
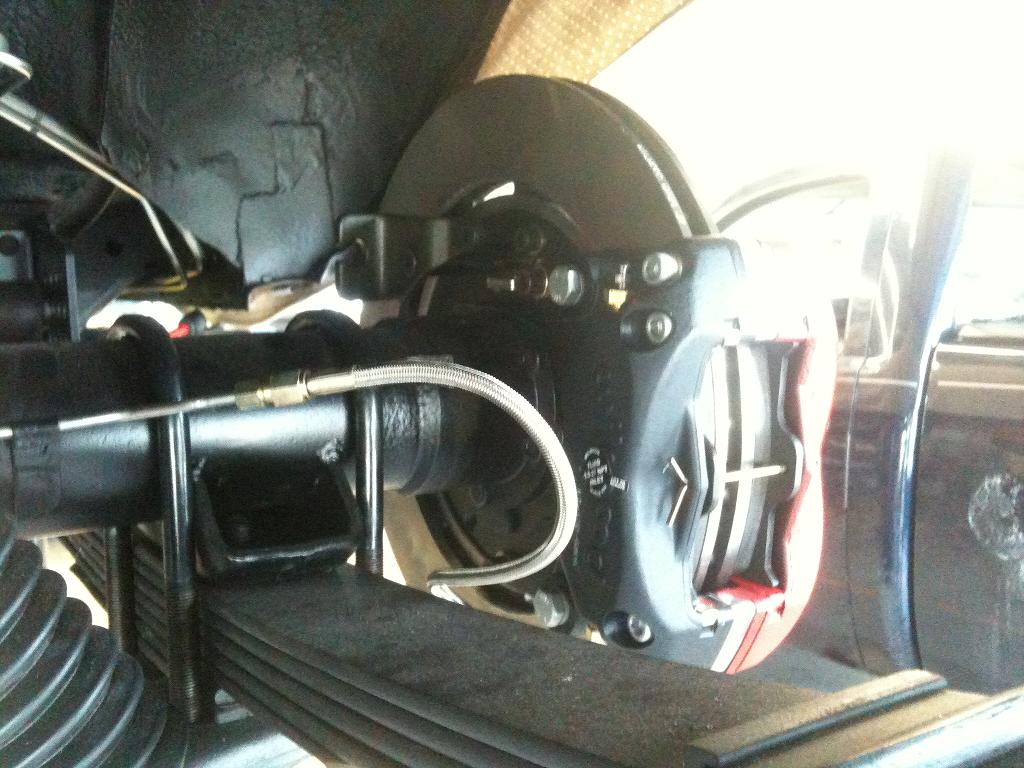
I got the rear brake lines cut and flanged for the rear wilwood discs. I have the flex lines installed and the brake calipers painted and ready, I'm going to pull out the old inner axle seals today and install new ones and then button up the rear brakes/axles between today and tomorrow here at work
I got them in securely, but the rear discs do not fit properly. they hit the shoulder on the wheel studs that protrudes from the axle shaft flange about 1/8" ugh.. It's always something..
-Jarrod Pilone '70 Plymouth RR Convertible with amazing custom paint(Tribute/Recreation/Whateveryouwannacallit) My Project Thread
No pics yet, but I loosely installed my Pypes exhaust (X pipe system). Very nice system, but the pipes between the header collector and the X pipe don't match up to the header collector (bad angle). I'm going to have to get a local exhaust shop bend me a new pair of those at the right angle so I can button it up.
I don't have any exhaust tips for now, I'll worry about that after it's able to run and drive.
Slowly but surely, but it's always something.
-Jarrod Pilone '70 Plymouth RR Convertible with amazing custom paint(Tribute/Recreation/Whateveryouwannacallit) My Project Thread
It's actually fitting well, except the angle to the header collector. So I'm going to have a local exhaust shop make me new collector extensions to work for it..
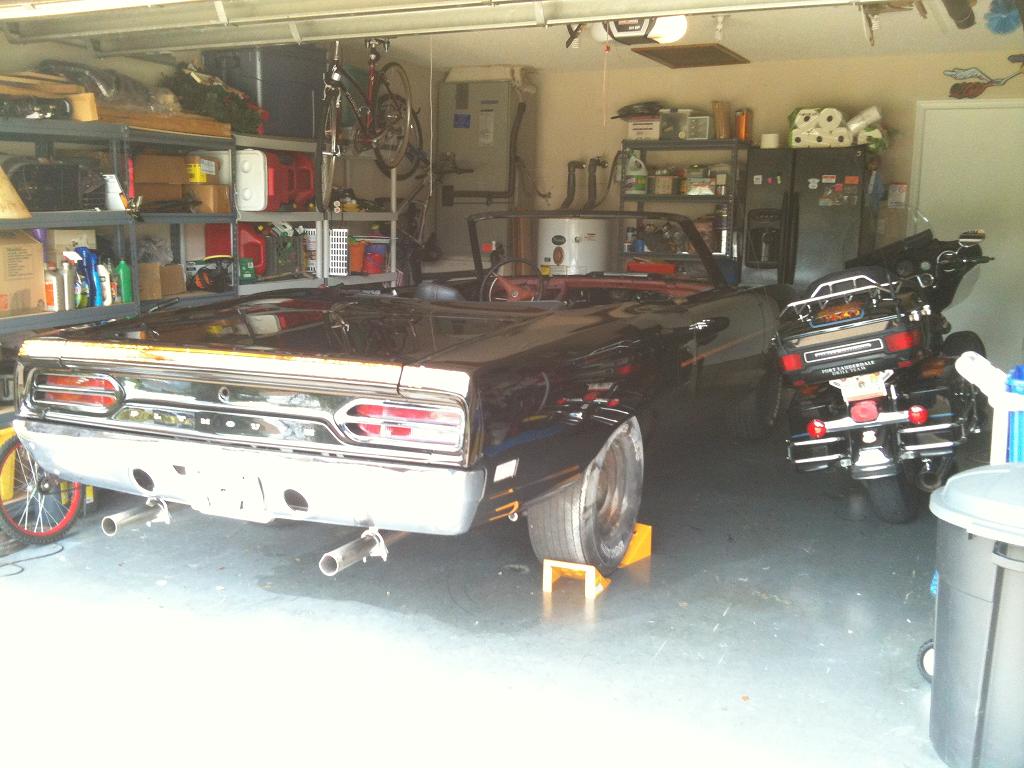
So I lost my storage at work (stupid HR got on our case about employee cars at work). So it's now home in my newly set up garage. Boy did I have to get creative with everything, but it all fits!
Quote: You should invest in some car skates, that way you can move the car around easily.
Still looking good BTW!
I have a set, but the car is centered in the garage where I want it, and if I need space I can push it out and put it back in. And it's all nice and covered up now, with some moving blankets ontop of the car cover in strategic spots to protect it from children...
-Jarrod Pilone '70 Plymouth RR Convertible with amazing custom paint(Tribute/Recreation/Whateveryouwannacallit) My Project Thread
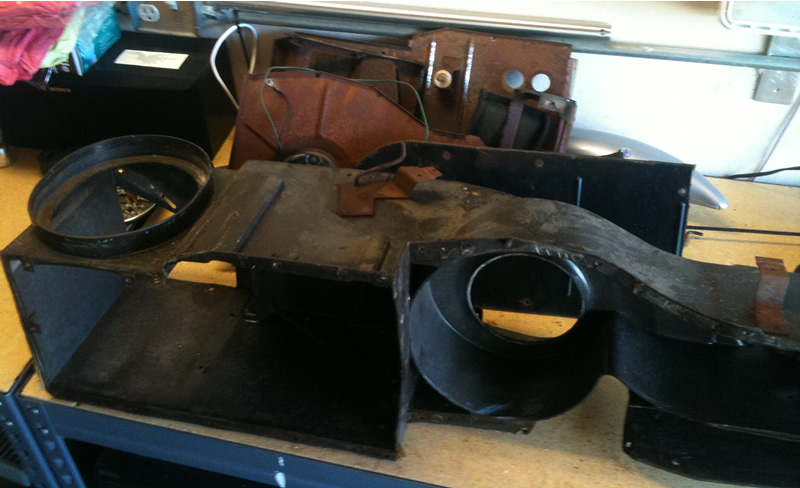
So I finally took the heater box apart today... Good lord was it nasty!! I cleaned the case good, and the metal parts, well, I need to sandblast them. Gotta get some time here soon to get to my buddy's to use his blast cabinet.. nasty!
Does anyone make a heater box resto kit with new screws and seals??
Detroit Muscle Technologies make a great resto kit. Not sure if he has the screws. He is a member here and also sells the kits on Ebay. If you do an EBay search for "DMT heater box" you will find his stuff. Good luck!
70 Road Runner 383-4 4 speed FJ5 & black guts 70 Charger R/T 440-4 4 speed FJ5 & white guts
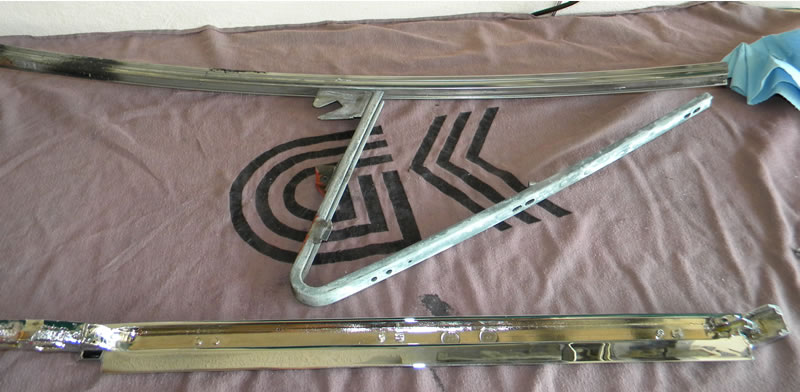
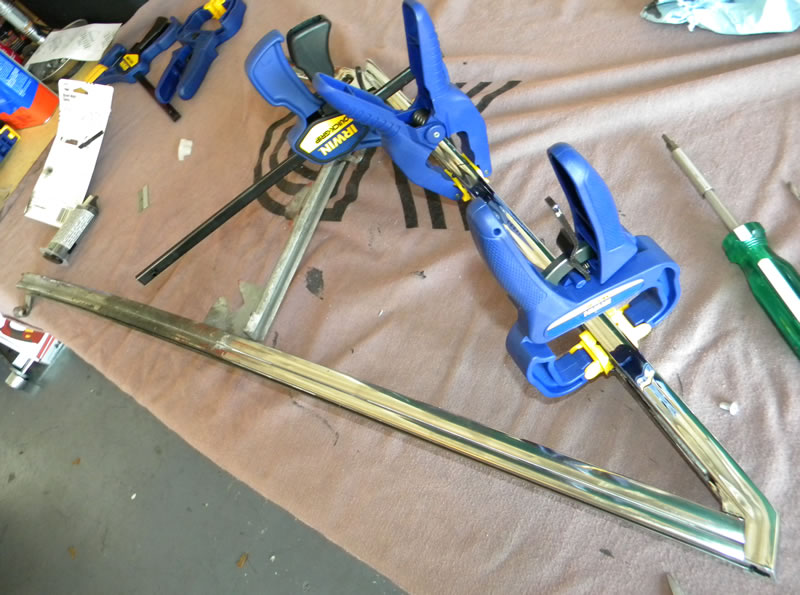
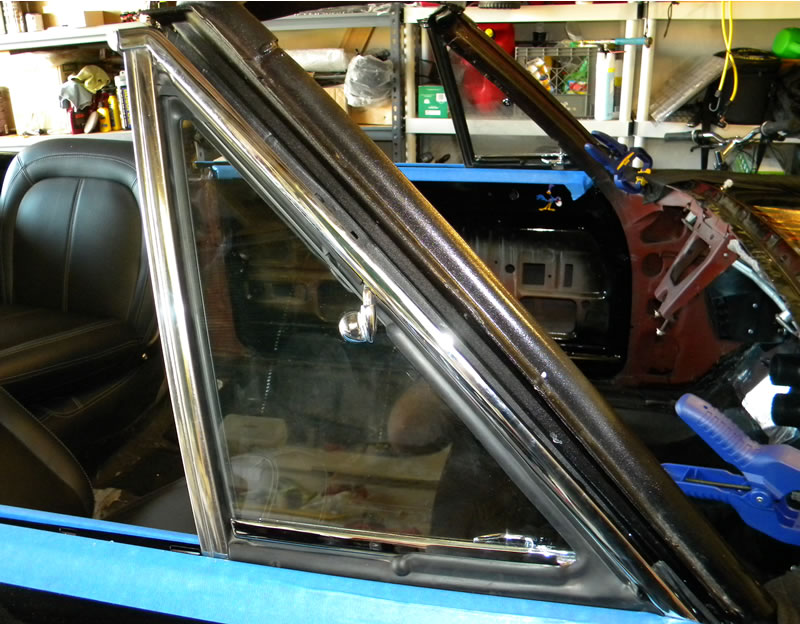
As I wait for the heater box parts (and the fact that I need to visit my buddy next week and use his blast cabinet to clean up the metal parts from the heater box), I decided to look at putting together my vent window frames (I dismantled them to have them rechromed).
I need to pick up the epoxy today and some clamps and get to reassembling! I polished the brightwork that's for the vertical window channel and laid it all out ready to assemble..
Feels good to get some sheeet done!
-Jarrod Pilone '70 Plymouth RR Convertible with amazing custom paint(Tribute/Recreation/Whateveryouwannacallit) My Project Thread
So I'm all over the place with little parts and bits I'm working on right now.
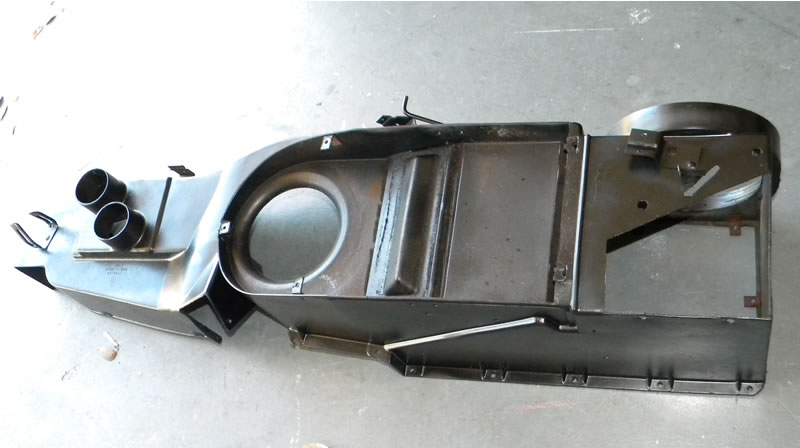
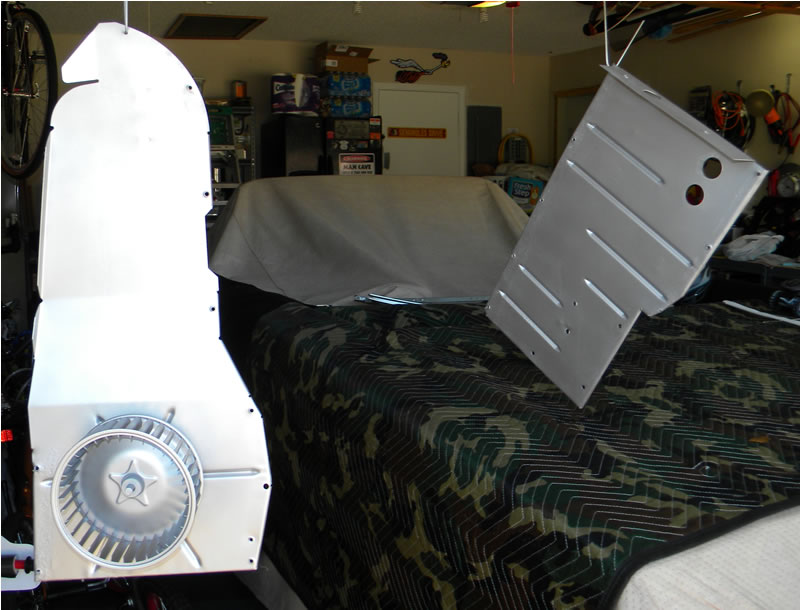
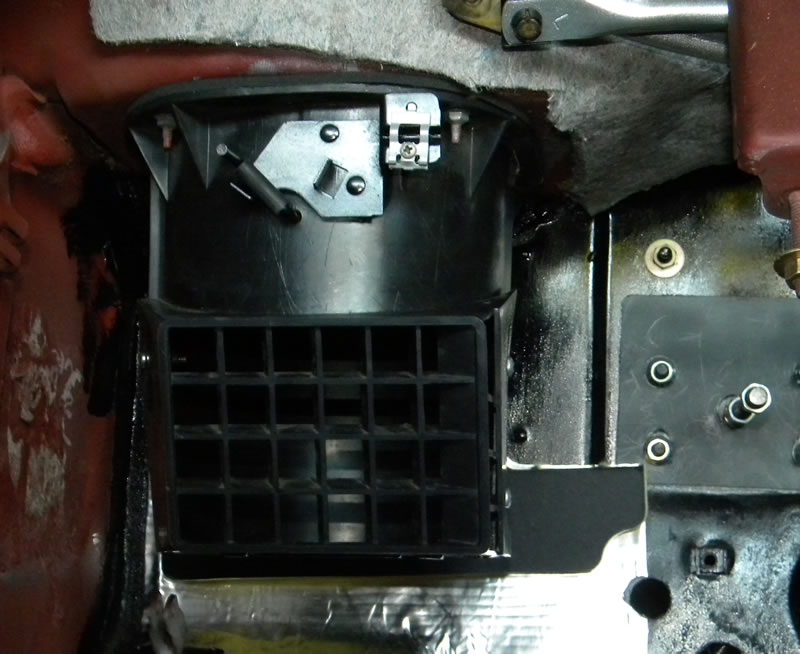
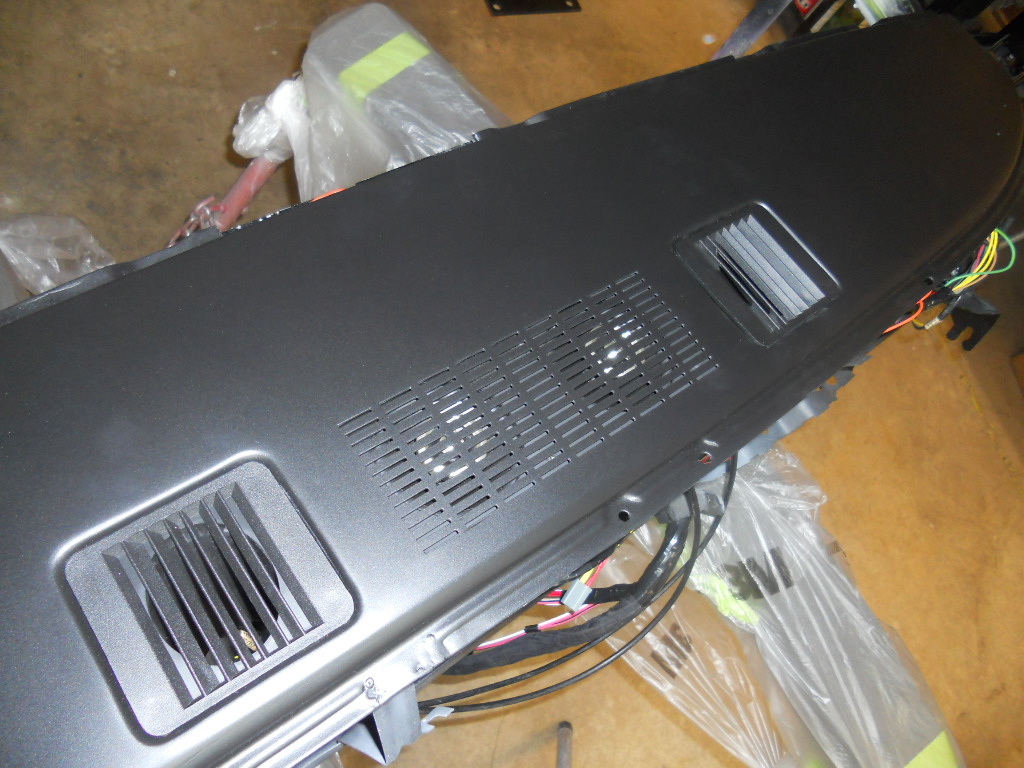
I got a wild hair up my rear last night and cleaned my heater box shell further and I shot it with some satin black paint (It's actually VTH brand black brake caliper paint, tough stuff!!!). It came out looking brand new!!
I can't wait to put it back together when I get my seals, and if I can find my new heater core! DOH!
-Jarrod Pilone '70 Plymouth RR Convertible with amazing custom paint(Tribute/Recreation/Whateveryouwannacallit) My Project Thread
And I used some silver wheel paint for the silver/bare finished panels, these are't visible, so I really have no idea why I didn't paint them black, oh well, just to be different??
Mixed the stuff up (2 hour set time) and gooped it into the channel after cleaning both gluing surfaces with denatured alcohol. First set in place and clamped together
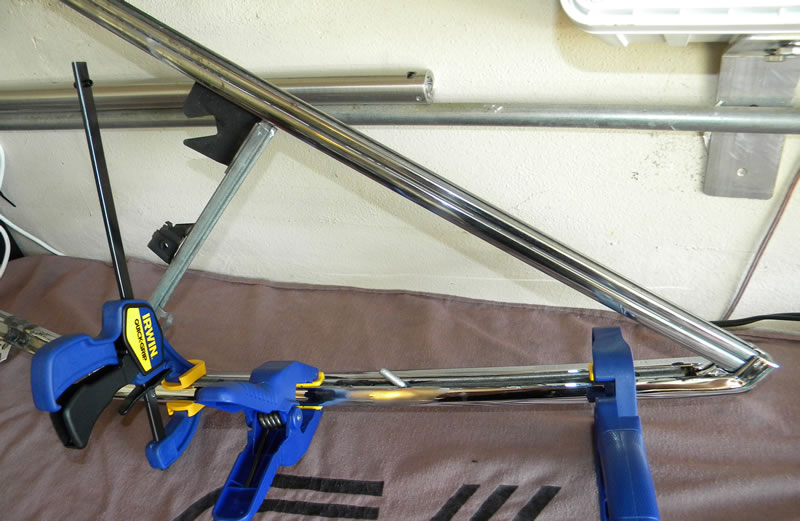
Other side.. Gonna have to clean them up some more after it's all set. This epoxy stinks!! I won't touch them for about 24 hours or more, to ensure it's fully cured.
Quote: Other side.. Gonna have to clean them up some more after it's all set. This epoxy stinks!! I won't touch them for about 24 hours or more, to ensure it's fully cured.
Feels good to get something accomplished!
Never thought of that. Using the epoxy. Mine are at the chromer. I'll do the same when I get them back
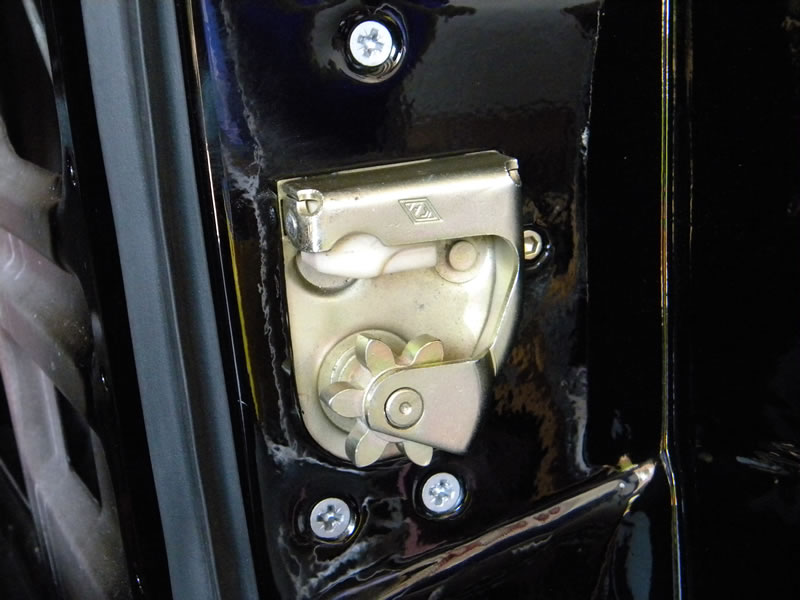
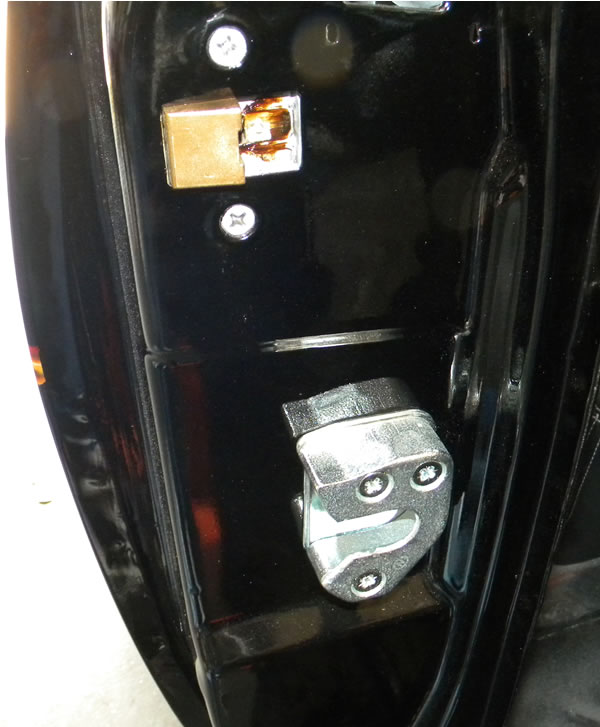
Boy I just had a wild hair up my rear end and got some more stuff done after posting those last few pics. I forgot I had my latches from my buddy who had them and I didn't know it, so I got those installed just now on both doors (along with the convertible door wedge thingies).
They were all replated, and are so nice! Glad I spent money on the car when I had it! Took 2 tries and I had the doors adjusted just right, they close real nice!
That clear plastic your talkin about is supposed to be covered in a felt like material. It always wears off. Beleive it or not you can still get them from your dodge dealer but the price is crazy I want to say like $60 each. Maybe someone can give you the part number or an alternate vendor. either way nows the time to replace them or you woll kick yourself later.
I just checked my favorites and had this info saved. Here is the part number. Your local dealership can help you out. Ask for 2 of part number 2932230.
Question, I noticed you are running a Keisler kit. I have the same one. How is your driveline angle / header clearence? I have my tranny up as high as i can get it and my 2" tti's are about 2" off the ground. Curious hows your is as I need to find a solution to this and it seems that either cutting the tortion bar crossmember or cutting up the headers is about the only way.
1969 Charger R/T under construction 2014 Ram 3500 Cummins 2006 Corvette Z06 2015 Corvette Z06 2014 BMW M5
Just a little tip, if you like the quality of Jim's heater box seal kit and I'm sure you do... Have a look on Ebay for what else he makes.... There I go costing you money again....
Lookin Good, glad to see you back after it...
"The Armies of our ancestors were lucky, in that they were not trailed by a second army of pencil pushers."
The little window-edge things came in today. Got my roll of sound deadening stuff yesterday from ebay (for interior firewall and floorboard, and inside doors)
I'm going to spend a decent portion of Sunday working on the car.
My goal is to have the firewall covered in sound deadener, the firewall pad and underdash insulation in place, and the heater box assembled and installed.
So I made an order with summit last weeek for my griffin aluminum radiator, which I now see I'm going to have to polish the top of it! also ordered some AN fittings and hose and fuel filter to fab up something fancy from the fuel pump to the carb.
I was all set to be in the garage for the weekend, but saturday turned into running errands and spending time with my 10 yr old son. Sunday I slept in, till 10:30!! yes, that's right, I woke up at 10:30!! It was awesome! Took a while to get going.. Then wouldn't you know it, the man-vision shows were on spike/speed/etc and then the race, and then we went to lunch, got home, had a small honey-do list to do, then I forced myself into the garage to find the stupid a/c drain line clogged and backing up to the garage. Had to deal with and correct that, and then got some gumption to do something.. I cleaned up the car parts around and on my car and evaluated stuff. I had a hair up my rump to work on my grill. I noticed my left headlight bezel stainless trim had a bend in it! UGH!! So I figured out and painstakenly removed it and it was an edge bend, so I was able to carefully bend it back with pliers. I also noticed the bezel has a tiny chunk of plastic missing at that bend, so I went to the store and got some JB weld, I mixed up a little and smoothed it on that missing part. should be cured by now, so I can sand it tonight when I get home. I also sanded the satellite-style paint off the outer perimter of the grille so I can paint that this week.
I'm all over the dang place, but little by little!
-Jarrod Pilone '70 Plymouth RR Convertible with amazing custom paint(Tribute/Recreation/Whateveryouwannacallit) My Project Thread
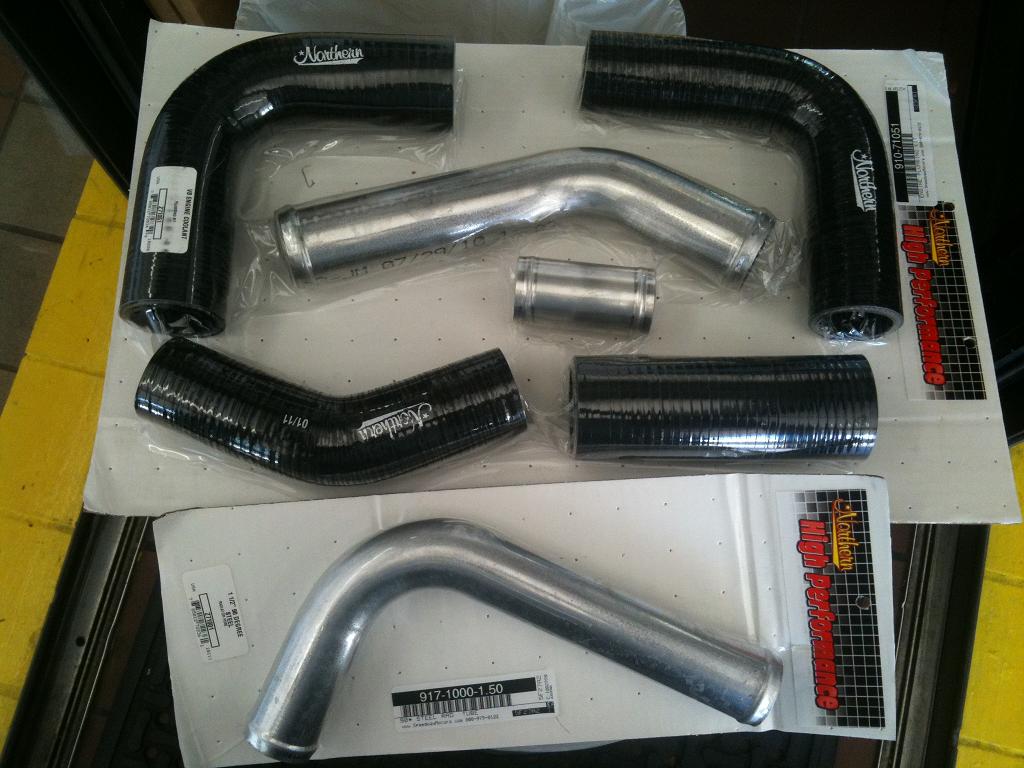
I picked up this nifty street rod/custom radiator hose kit from speedway motors, so I can use the pipe and hose combo to match up to my griffin aluminum radiator. Not to mention I intend on having my painter paint the tubes for me, still undecided if I want some subtle graphics, or just shiny black paint.
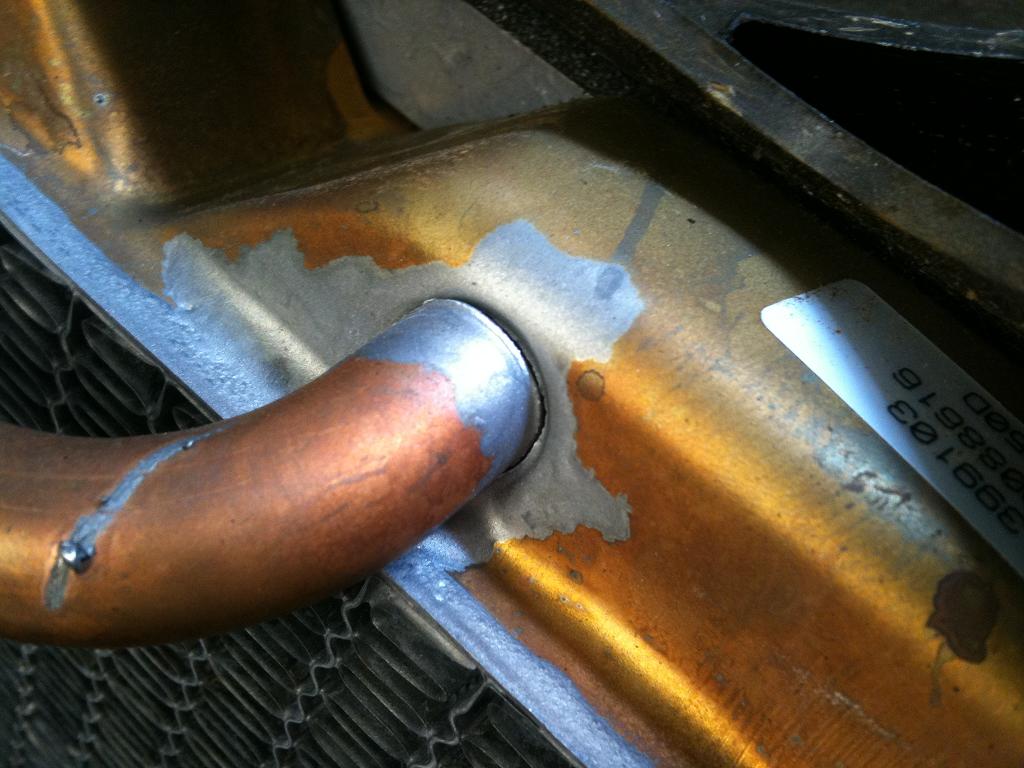
And look what I did (posted a thread in general about this Friday). Putting the heater box back together, getting the new core to fit right, the tube fought back! Gonna solder it tonight I think. Easy fix apparently.
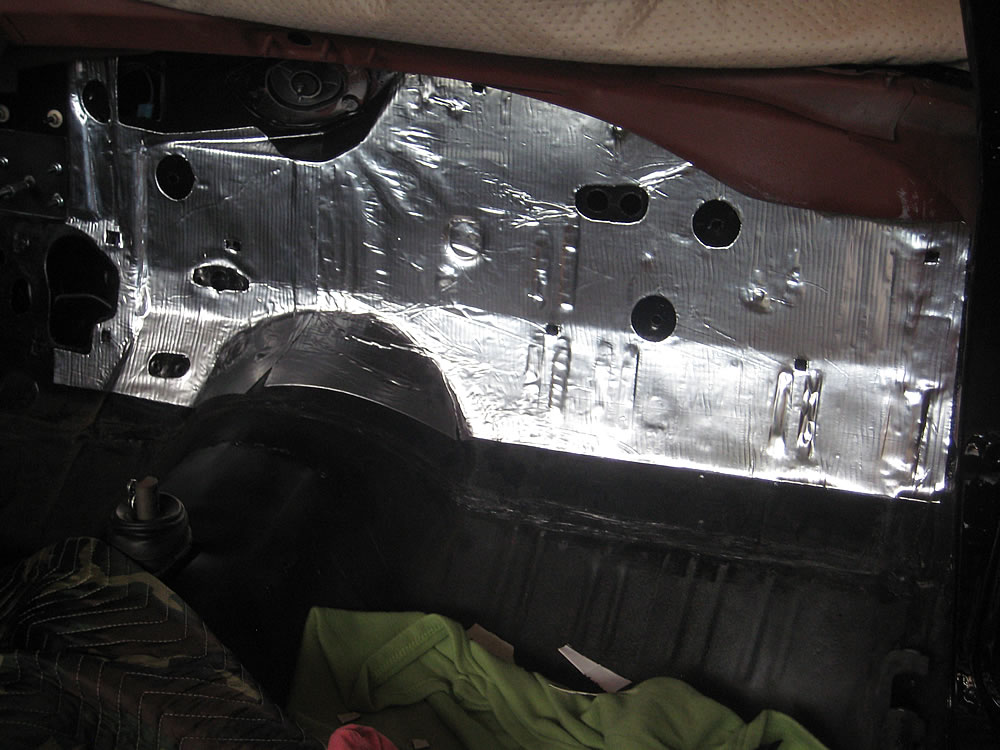
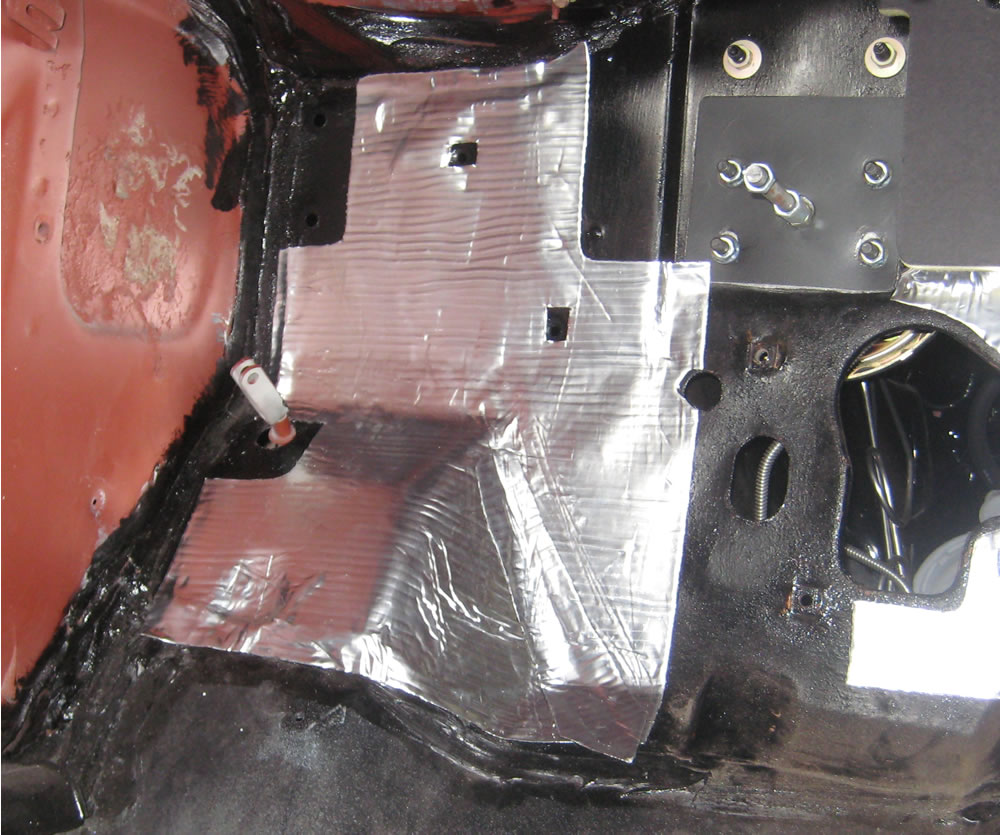
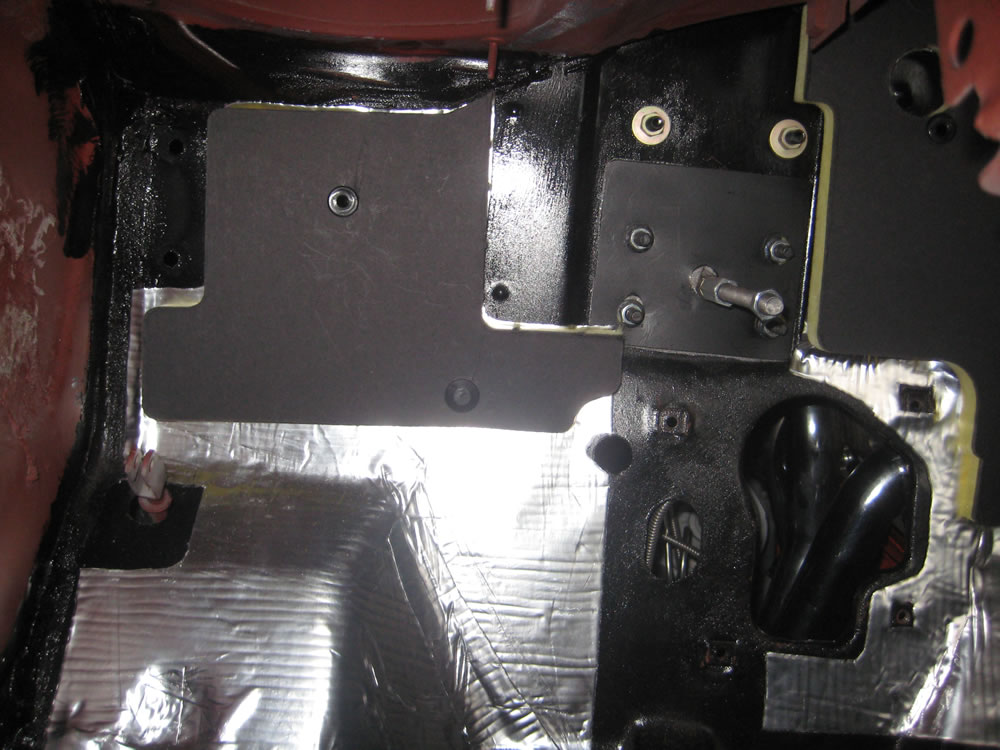
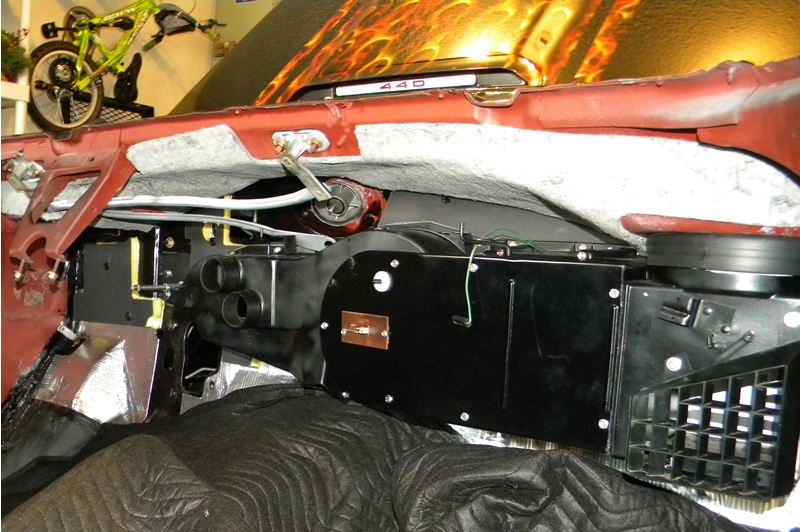
So I had to leave work early today to pick up my 13 yr old son because he was sick at school, so I took that opportunity to get out in the garage.. I put some hush mat on the firewall and put up the firewall pads..
Driver's side, took me some trial and error to get it right, not going to fill in the center gap between the two hush mats till I get my 4 speed pedals and hydraulic clutch setup done, not sure what goes where..
Left side pad in place, I messed up two nails, and had no extras, so I had to use one of the generic fasteners that comes with the kit, which I used on the lower one, since it probably won't be much visible under the hood..
The Hush Mat wasn't bad to deal with, easily cut, etc. Worked well with the little roller they include with the kit.
Tomorrow a friend of mine is going to fix my heater core, so I'll get that back together tomorrow night and hopefully installed in the car.
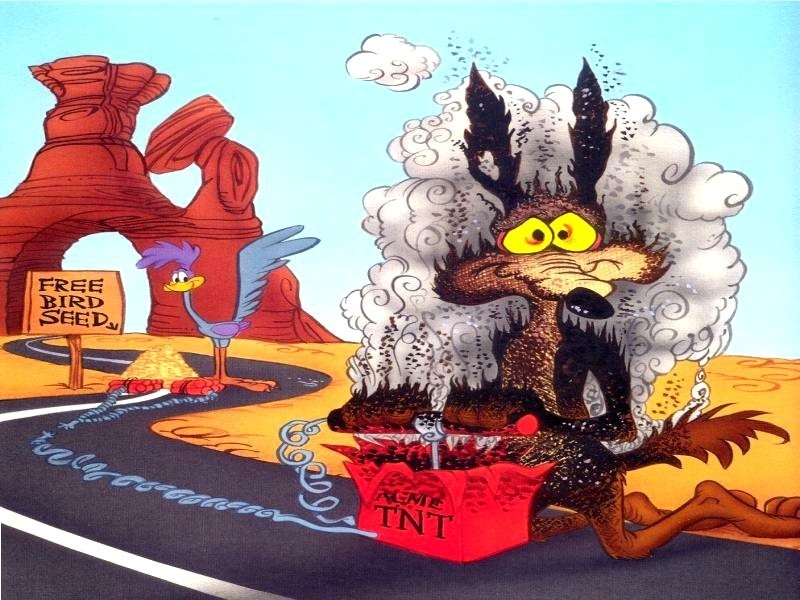
No, we haven't nailed it down yet. Here's the list of suggestions:
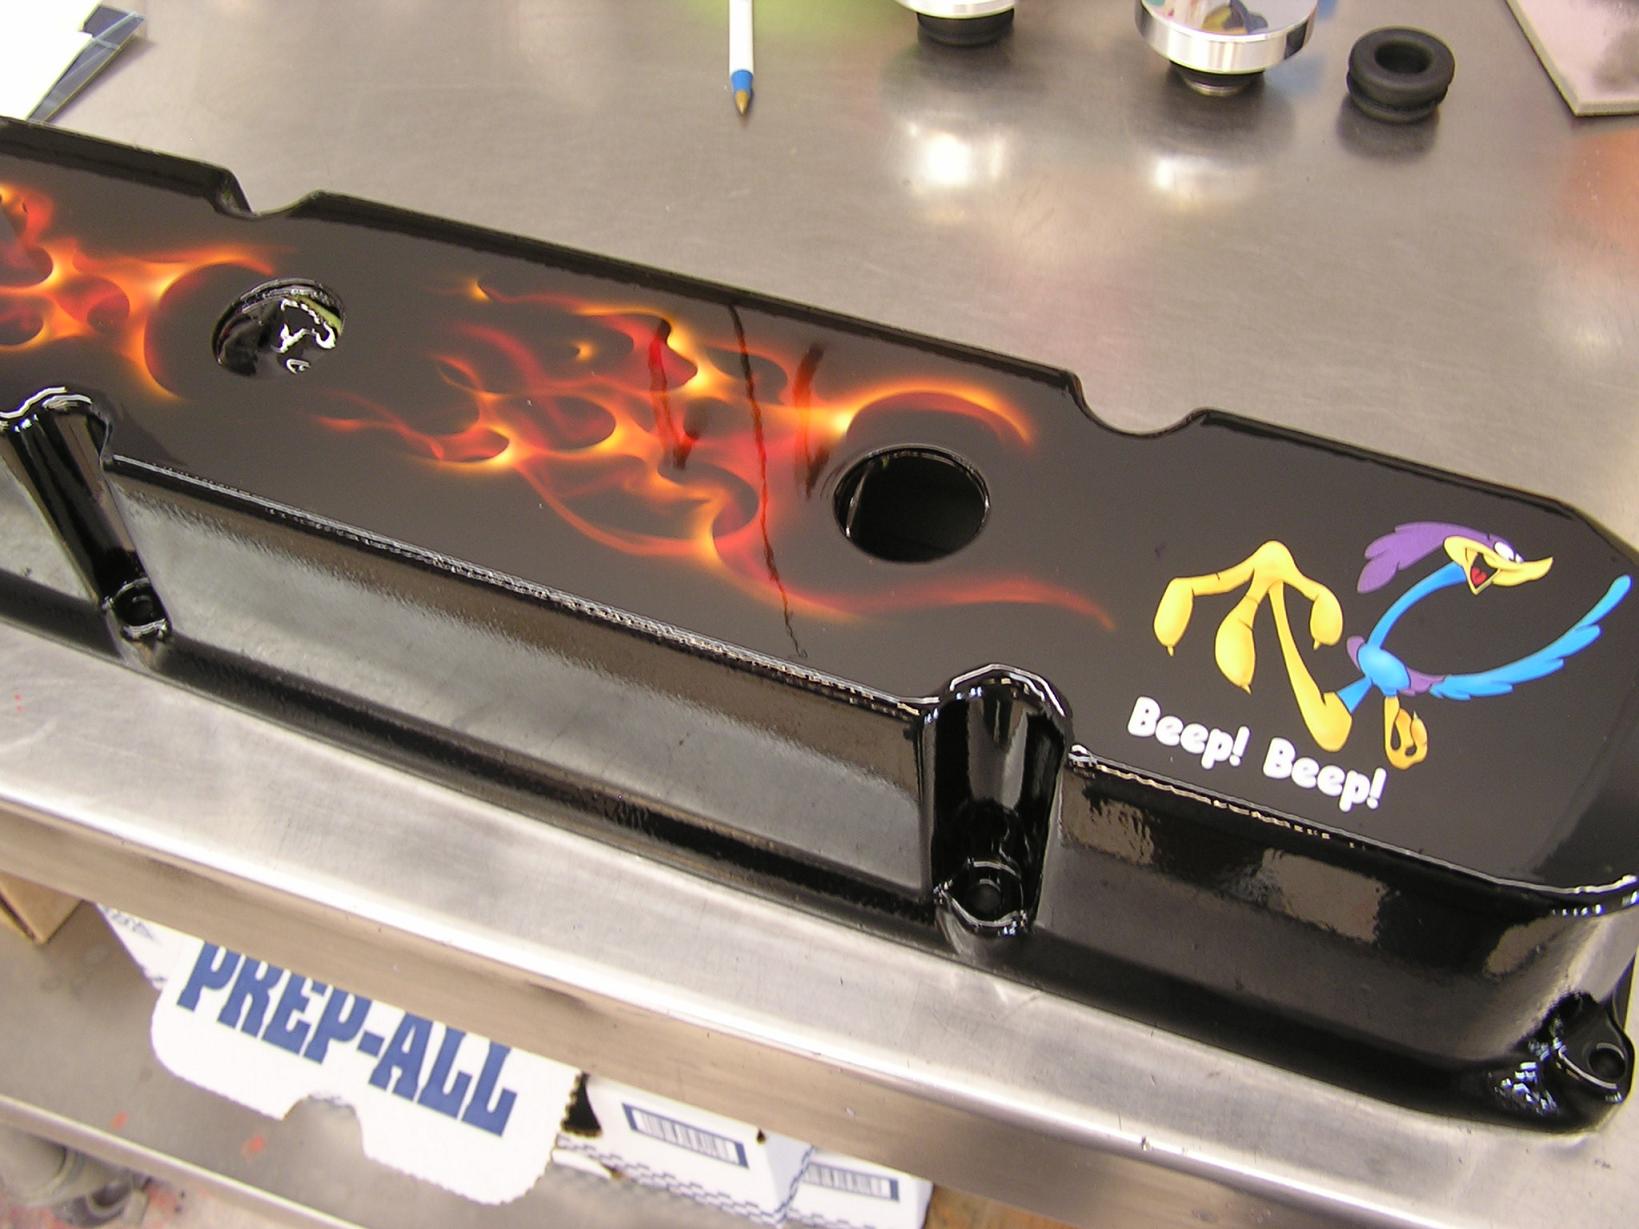
1. road runner be chased by wile e. coyote on an acme rocket 2. road runner with flames for a trail 3. a realistic "Roadrunner" logo painted towards the front of the lid. Then put another bigger Roadrunner on there with a giant claw grabbing at the logo...with flames getting heavier going back towards the back of the lid 4. Maybe have the coyote hiding behind an acme box pushing the plunger on a bomb and integrate the real fire into the explosion 5. Have a wild-eyed Wile E. hanging on to the front edge while being blown back over the front of the lid! You've already got the roadrunner on the valvecovers. (Tie design in with the valve covers) 6. Birds head (like '71 RR grille emblem), complete fire for fill in, with the outline and facial details in a lighter tone fire, so you have to look 3 times before you make out the full detail
Quote: Did you decide on a design for the air cleaner lid yet?
I'm really curious to see it espicially after seeing the cool work on the valve covers!
-Jarrod Pilone '70 Plymouth RR Convertible with amazing custom paint(Tribute/Recreation/Whateveryouwannacallit) My Project Thread
I like it also but would switch the characters so the road runner is in front. also that has got to be the baddest 70 roadrunner vert I have ever seen, cant wait to see it finished.
So I made zero progress this weekend. I worked Saturday and left work at 5:00 not feeling well, and ended up staying in bed, sick as a dog, most of Sunday, and missed work Monday because of being sick too. Feeling 50% better, enough to work today (tuesday). I'll get to spend some time in the garage tonight, finishing the reassembly on my heater box (I filled the repaired core with water the other day, to check for leaks, so far so good).
-Jarrod Pilone '70 Plymouth RR Convertible with amazing custom paint(Tribute/Recreation/Whateveryouwannacallit) My Project Thread
So I left work early from not feeling good, and sitting on the couch was boring, so I decided to go into the garage and put the box back together. Got the heater core re-installed and the back panel back on and all secure
Finally got the heater box in place!! I also cleaned up and painted the wiper transmission parts, and can't find the stupid clip to mount the long arm to the wiper motor, so that's going to have to wait till I get to my buddy's house to get a spare clip from him. The heater box went in without a hitch, had my girlfriend hold it in place from the other side while I put the re-plated original nuts on under the hood.
So yesterday I spent time at my buddy Richard's house (guy who did the body/paint) and we reassembled the vent frames (well, I assisted him is more accurate LOL)
Got them home and rested them in the doors, to keep them out of the way until next weekend when I get the glass in the doors and that buttoned up..
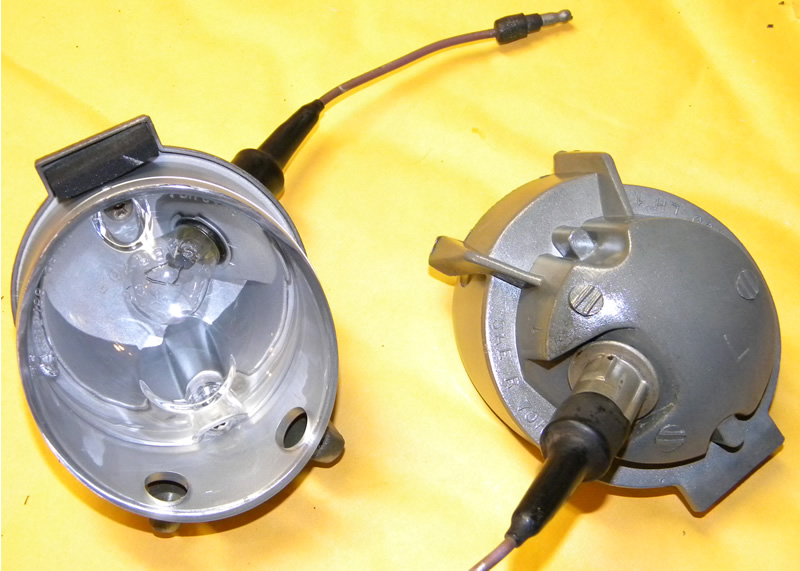
While at my buddy's house I took advantage of being there and blasted my backup light housings. I cleaned up the rubber wire shield and wire with lacqure thinner and sprayed some bright bright silver in the reflector area and used clear engine paint for the freshly blasted housing. I also used new repop lenses I got from PG classics, nice peices, look the same as the original, just with no pentastar (original ones were cracked and nasty)
After a long break from doing anything with the car, I've finally come to the conclusion that with work, family, and my life in the way, I have no time to work on the car to get it done, so I am having my friend who painted the car do the final assembly for me. Otherwise it will take me another 3 years to get it done myself.
Money well spent I beleive.
It's coming back to my work in a week or so to get prepped to go to his shop, which I beleive will take about a month to get completed (get it running and driving, and maybe some final trim work).
Stay tuned...
-Jarrod Pilone '70 Plymouth RR Convertible with amazing custom paint(Tribute/Recreation/Whateveryouwannacallit) My Project Thread
You and Finoke.....geez. Go ahead and light that fire under my butt..... OK, well, mine isn't custom, but it's mine.....so add a 3rd road runner convertible to this. I may make a thread but, it's just time to reassemble. It's been sitting for 8+ years...just replaced the brake system (sans steel brake lines).
I'm trying to get it fired up by the Mopar Atlantic Nationals....but....gremlins...
Jarrod, your custom is looking pretty cool...LOVE those valve covers
Oh, yeah...Finoke.... I'll definitely be in Dover, DE for Labor Day weekend. NorthEast Hemi Owners meet. I'd love to meet you and swap stories .... www.nehoa.org
Quote: Oh, yeah...Finoke.... I'll definitely be in Dover, DE for Labor Day weekend. NorthEast Hemi Owners meet. I'd love to meet you and swap stories .... www.nehoa.org
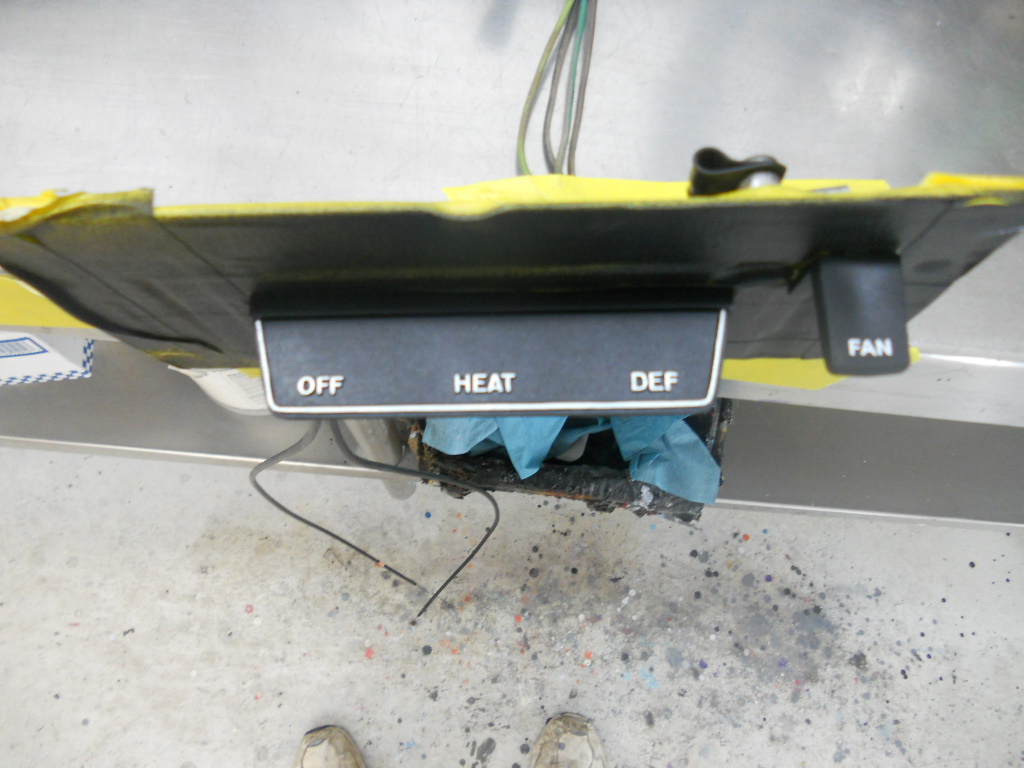
heater control has been refinished. I also ordered a bunch of "little things" I needed from year one. Time to get my rear end in gear! Lots of updates coming in the next few weeks!!
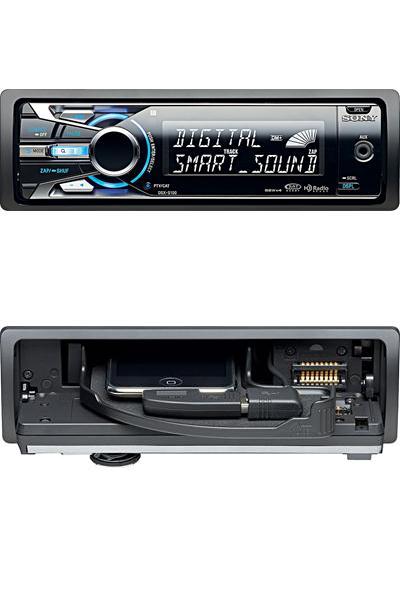
I also got this cool "digital media receiver" for infotainment. A sony DSX-S100. Face flips down and plug ipod in and enjoy. No CD. I probably won't put an antenna in it (I had the antenna hole filled on the fender). Maybe I'll do satellite radio later. I got a trick dash speaker bracket here on moparts that goes in the stock location and houses two 3.5" speakers. I'm going to run RCA cables and lines to the back of the car and figure out add'l speakers later. I am NOT cutting my doors or my rear interior panels, maybe two 6x9's in the convertible top well, and a small subwoofer that looks like a nitrous bottle.
Car is coming together... I can't wait to see it. I got this radio at discount auto Dual at Discount . I got the 200 watt version for under $34. No Ipod, but it does use an SD card or USB thumbdrive. It has a small size for easy install and a remote control.
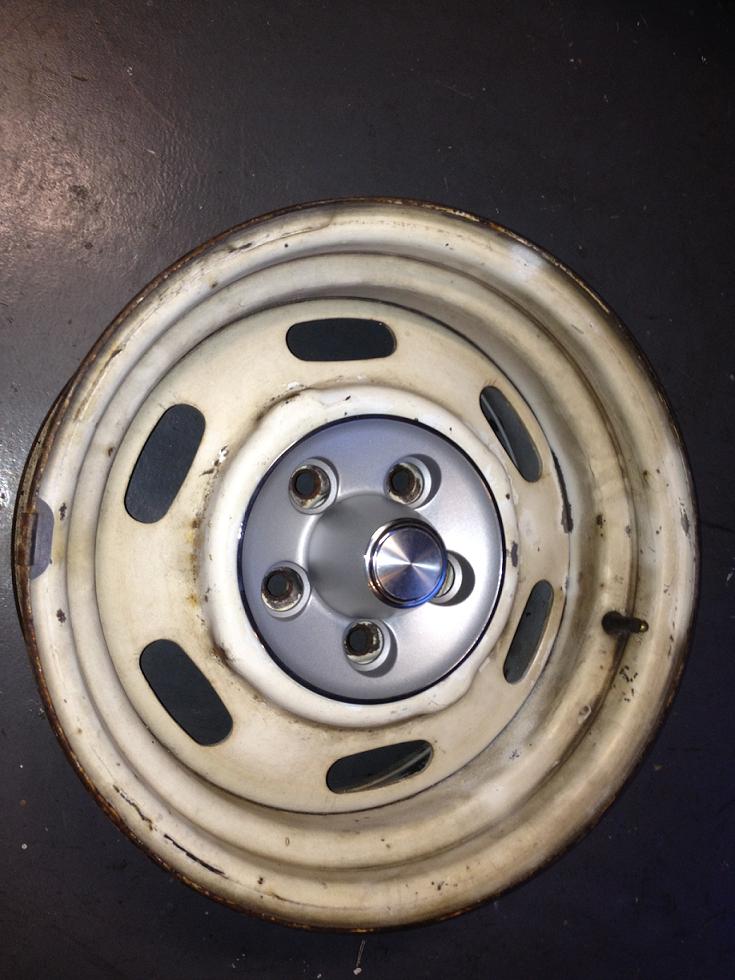
Last night, got some time, and got the holes drilled for the '70 rally center caps. First one didn't go so well, and the rim has a few extra holes there
By the time I got to the last one, I had it down pat!
Now the fun part, stripping and refinishing the rims!
It's labor day weekend. I'm working today (Saturday). I'll have my kids for part of Sunday. Girlfriend is in th ekeys with her family. So after the kids go back to my ex, it'll be just the car and I, spending quality time with one another!
I tell you, I love working on the car when I want to, it's very relaxing and peaceful and fulfilling. When I feel like I HAVE to work on it, it takes the fun out...
-Jarrod Pilone '70 Plymouth RR Convertible with amazing custom paint(Tribute/Recreation/Whateveryouwannacallit) My Project Thread
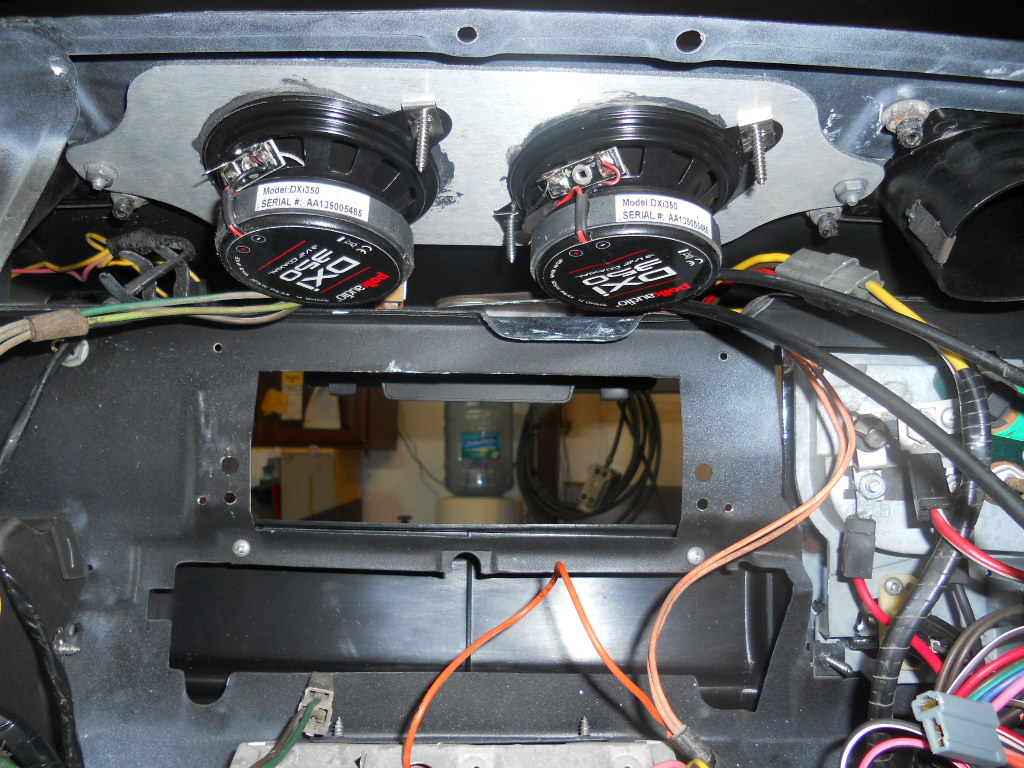
Dash speaker adapter (made by Jerry Landes, member 74sport) installed with 3.5" speakers to replace the 4x10 dash speaker. Gotta get the radio delete plate cut to match the opening for my head unit (Sony DSX-1000 digital media receiver).
Quote: Last night, got some time, and got the holes drilled for the '70 rally center caps. First one didn't go so well, and the rim has a few extra holes there \
I have been thinking about drilling some holes too. I thought that I would put some clay on the wheel and press the center cap into it to find the centers. How did you do yours?
I took a manilla envelope and cut it apart to use the paper, and laid it over the backside of the center cap, marking the holes. Flipped it over and marked the lug nut holes.
Then I took it and cut out the holes, put the template on the rotor-side of the wheel, and marked the holes with a sharpie, and drilled away..
-Jarrod Pilone '70 Plymouth RR Convertible with amazing custom paint(Tribute/Recreation/Whateveryouwannacallit) My Project Thread
I kinda like the center caps and trim rings. As of now, I have the cop wheels in satin black and chrome lug nuts on my convert. The 275-60R15s really look sweet on the back. I'm probably going to replace the 235-70's on the front to something a litter smaller....just not sure yet.
Hello all! It's been quite some time since I've updated this. Once again, life gets in the way for me.. I finally am able to focus on the car again, but this time I have decided I simply do not have the time to work on the car, so after being on a wait list for over a year, I finally have the car with my friend Richard Romanelli (the good one, not the scammer), who did all the body and paint on this car, so he can finish it. When I get it back , I only need to worry about carpet and door panels and minor trim.
-Jarrod Pilone '70 Plymouth RR Convertible with amazing custom paint(Tribute/Recreation/Whateveryouwannacallit) My Project Thread
I have had the car in storage for almost 4 years, just waiting to get worked on again..
Already ordered a ton of new parts needed to get moving with this. Richard is going to do all of the electrical and mechanical. He's done several of these B body convertibles and is an expert!
-Jarrod Pilone '70 Plymouth RR Convertible with amazing custom paint(Tribute/Recreation/Whateveryouwannacallit) My Project Thread
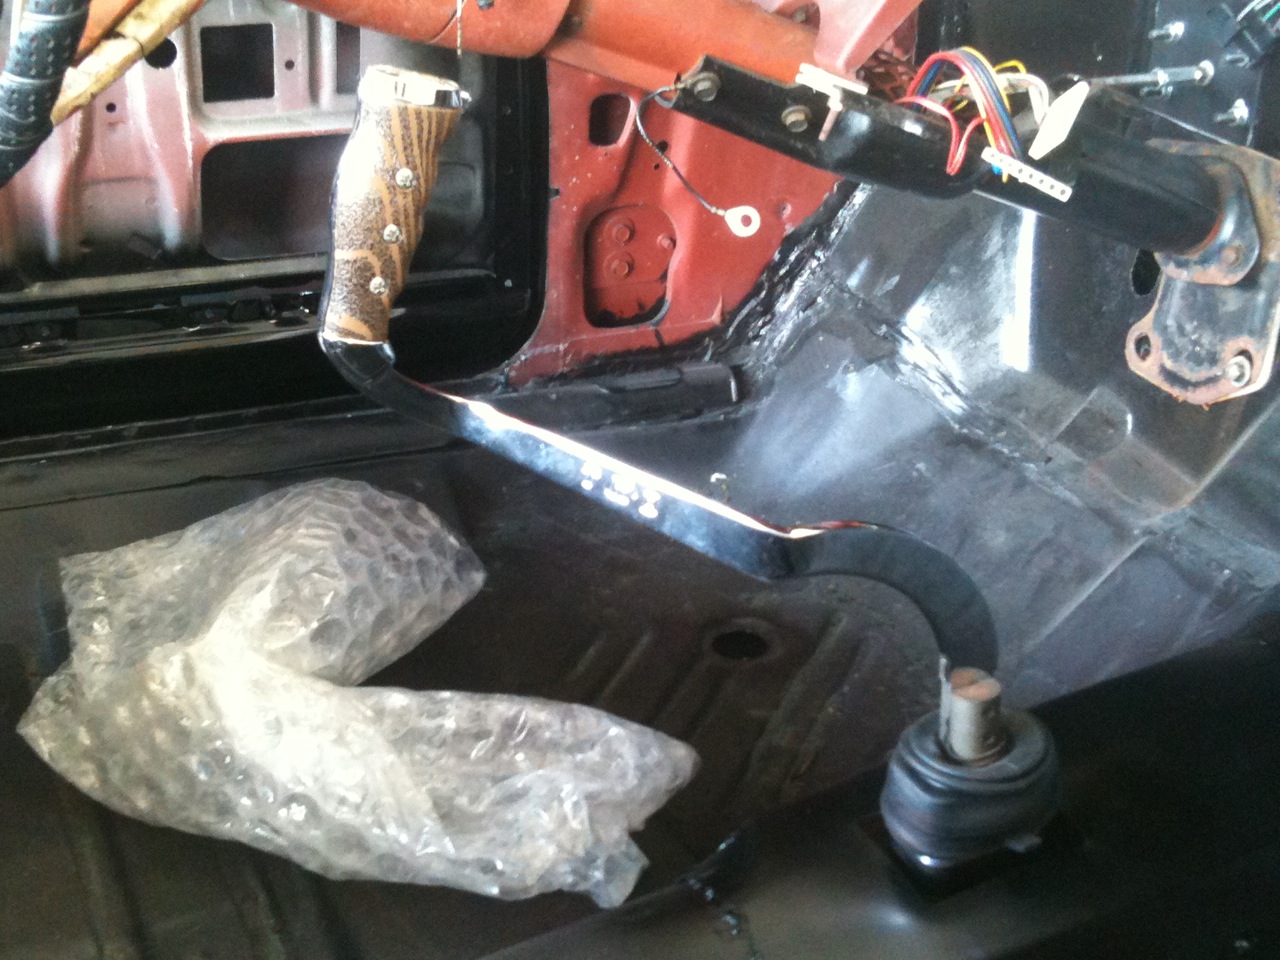
clutch master is now plumbed. Pedals are in. Fuel line fabbed up from pump to carb. Making progress. Unfortunately, the more progress he makes, the bigger the parts list gets
-Jarrod Pilone '70 Plymouth RR Convertible with amazing custom paint(Tribute/Recreation/Whateveryouwannacallit) My Project Thread
Not much to report on, Richard had to get things done on another car he has to get out of his shop. In the meantime, I blasted and painted my fender support braces and my sunvisor brackets (they were plated potmetal, but cleaned up "enough". I puff canned them with silver wheel paint and several coats of wheel paint clear coat. They look much better than in the photos.
I used VHT satin black brake caliper paint on the braces. I use this stuff for lots of small bits. It's durable and easy to work with. Of course I used self-etching primer on everything first.
I've also ordered a TON of small parts from year one, classic industries, rt specialties, even Rock Auto. Slowly by surely.
-Jarrod Pilone '70 Plymouth RR Convertible with amazing custom paint(Tribute/Recreation/Whateveryouwannacallit) My Project Thread
A little progress has been made. He added the temp control circuitry for the electric fan, mancini racing throttle cable bracket, and cable, and he refinished the parking brake assembly.
-Jarrod Pilone '70 Plymouth RR Convertible with amazing custom paint(Tribute/Recreation/Whateveryouwannacallit) My Project Thread
Cool looking hose clamps installed. Just some nice stainless clamps that I ordered from summit racing. The bottom is going to be just a stock hose with some cheap clamps (the extra ones I got, were too small for the lower hose, so I'll replace them later on to all match).
-Jarrod Pilone '70 Plymouth RR Convertible with amazing custom paint(Tribute/Recreation/Whateveryouwannacallit) My Project Thread
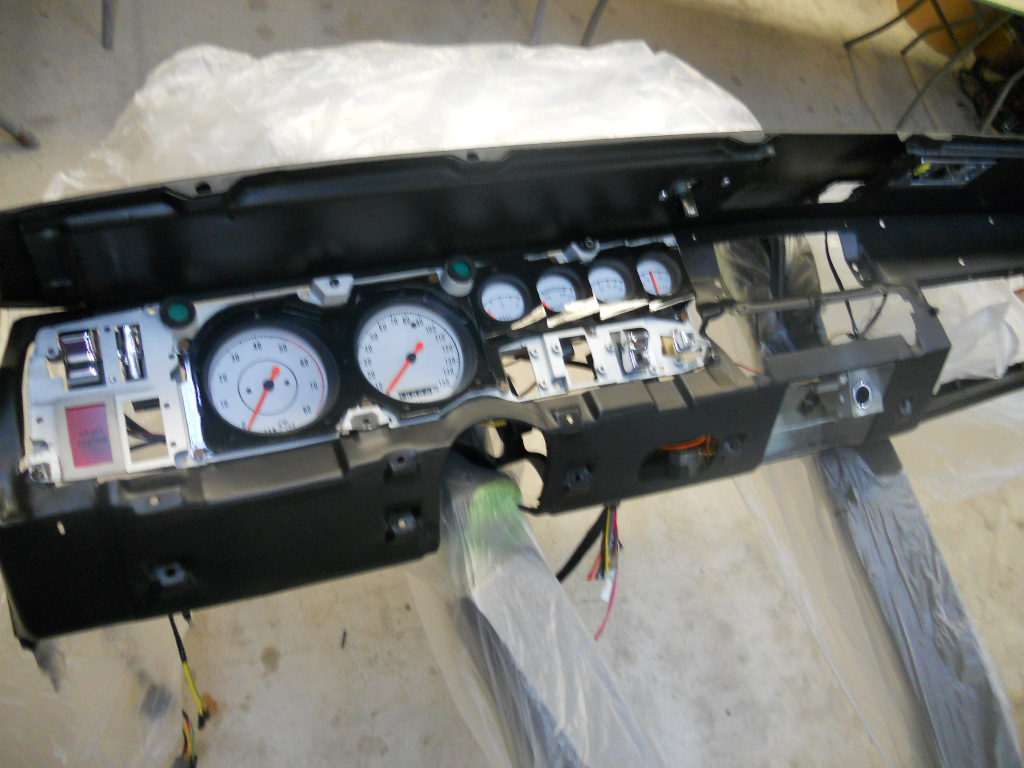
Dash is out, and 99% together. Dash pad is going on next. These were taken before the radio trim ring was installed. (this was a rally dash frame I bought years ago, and was already cut for a modern radio, so I just got a radio delete plate to accomodate it.) This radio is a digital radio receiver, and has USB inputs and is satellite and bluetooth capable. There is no antenna on this car, I had the hole filled.
-Jarrod Pilone '70 Plymouth RR Convertible with amazing custom paint(Tribute/Recreation/Whateveryouwannacallit) My Project Thread
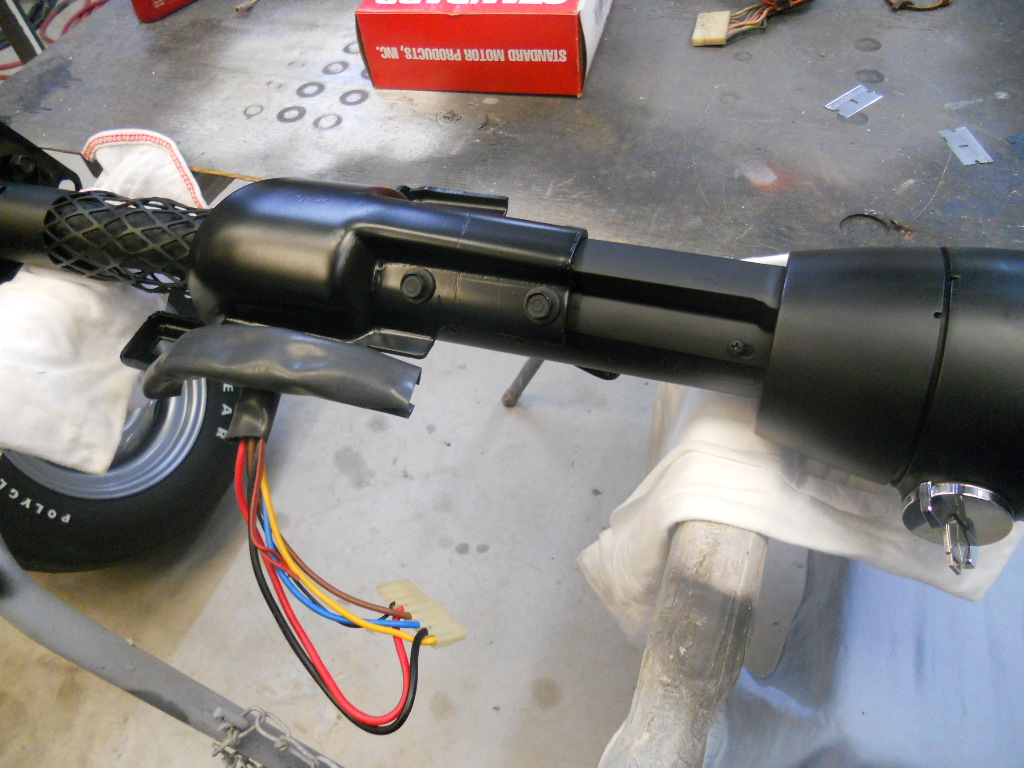
Went to visit the car yesterday. The dash is in, but not 100% secure until all electrical is installed and passed inspection/testing. The column is in, with the old steering wheel on as a "placeholder" until I get a new one (probably a PG classic repop). I gave her some eyes as well. I found the high beam headlight buckets were swapped to the wrong sides, had to correct that, and the left low beam was actually a right low beam. It was a simple mixup due to using a different fender before painting it. I gave the right one a quick sandblasting and coat of puff can paint, and we were back in business. Also blasted the front park lamp housings and cleared them and then installed new bulbs and lenses..
-Jarrod Pilone '70 Plymouth RR Convertible with amazing custom paint(Tribute/Recreation/Whateveryouwannacallit) My Project Thread
It's made its way onto his lift. Cranking the engine with the starter to check oil distribution to the valvetrain and to get the lifters pumped up strained the starter (which was a new mini-starter from 440source 6 years ago) and it took a poo. So I got a brand new mini-starter from the parts store and we were back in business. I had to flip the driver's side rocker shaft over 180 deg because I had the enlarged bolt hole facing up instead of down.. oops! There's still one lifter that's not fully pumped up, but it's coming along. We are going to let it ride till it fires up and see if it comes to life. We expect it to without a problem.
Richard is working to get the exhaust to all line up (fitting a Pypes stainless cat-back to TTI headers). It will get fulled welded in, correct tips put on, and buttoned up once the overlap-style exhaust band clamps come in from summit racing. Reverse lights are in, tank vent lines, and he's getting the rear light harness routed and connected now. Expecting to have a full electrical check early this coming week and attempt to start the engine.
Now we are cooking with grease!!
-Jarrod Pilone '70 Plymouth RR Convertible with amazing custom paint(Tribute/Recreation/Whateveryouwannacallit) My Project Thread
Tried to start it yesterday. Filled the bowls, and gave her a crank. It fired at the first bump but it stumbled and died and wouldn't start. Gotta start checking grounds for the starter solenoid and each. Just ran out of time
Developed a slight valvetrain tick after some heat cycles. I'm going to visit it Sunday and I'll do a valve adjustment on the roller rockers. I figured that would be coming. It's had a full light check. All good!
-Jarrod Pilone '70 Plymouth RR Convertible with amazing custom paint(Tribute/Recreation/Whateveryouwannacallit) My Project Thread
New plug wires installed, the ones I had on there were way too long. Got some "cut to fit" ones from summit. Also added a billet power steering cap to match the rest of the engine bay. The choke is connected and the fan wiring and all final wiring is done under the hood. Much better!
The front bumper should be going on today, and maybe some side windows if he has time. I wish I could be doing more myself with the car, but if you have been following this thread, you all know I have such limited time on my hands due to my work schedule. I have enjoyed the time I have been able to go up and work on the car with Richard myself, at least to make me feel a little bit like I had a hand in it. At least I feel good since I did the final engine assembly on the short block and installed the drivetrain.
-Jarrod Pilone '70 Plymouth RR Convertible with amazing custom paint(Tribute/Recreation/Whateveryouwannacallit) My Project Thread
Lower grille opening molding in place, bucket seat reinforcement plates installed (it *was* a bench seat car), mis-matched fender bolts replaced with gold-cad plated bolts from RT specialties (left them in cad for the contrast, I think it looks nice and different. Doesn't matter since it's a full-blown custom resto-mod).
Other door glass should go in this week. He still has to paint the kick panels, header panel pieces, and the steering wheel horn pad before those go in.
-Jarrod Pilone '70 Plymouth RR Convertible with amazing custom paint(Tribute/Recreation/Whateveryouwannacallit) My Project Thread
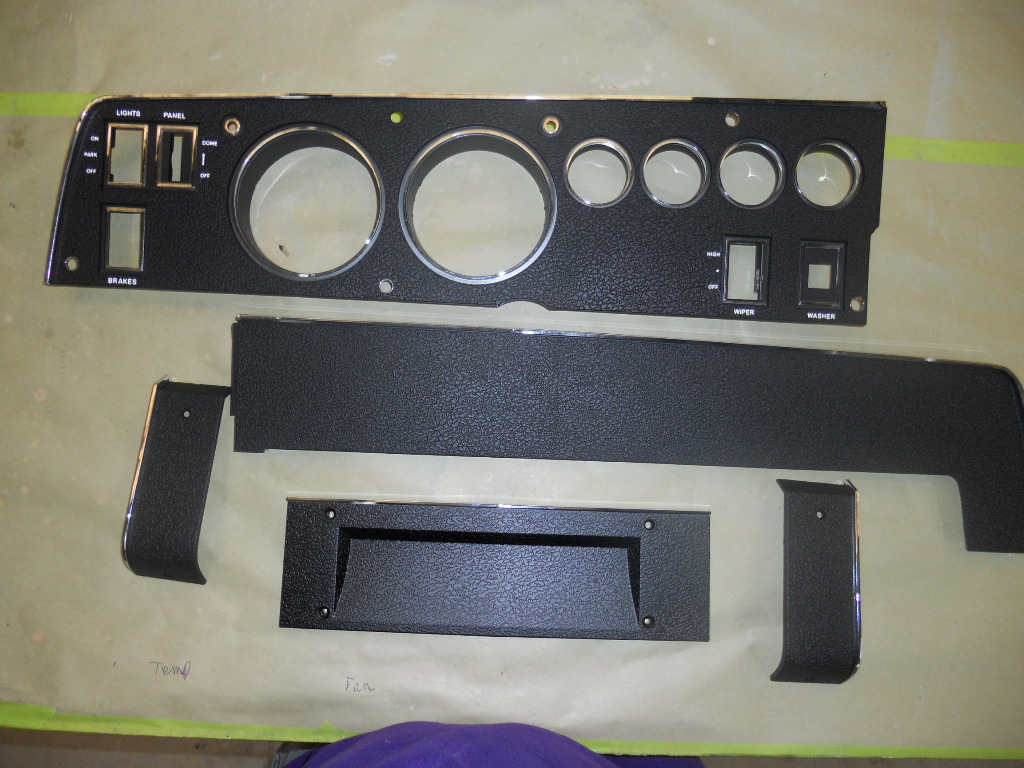
And now we are down to "the little things". He painted the steering wheel horn pad to patch (with the correct paint type for the vinyl material) and the kick panels (which were good used black ones I got from Tony's Parts years ago to replace the chalky burnt orange original ones) and the windshield header pieces.
Hoping to drop off the original door panels to the upholsterer tonight, to get them re-wrapped in material to match the custom seats.
I always wait for a 30% Y.O. coupon, and I used that last week and ordered the carpet and some other small bits I needed. I am bringing him the console tonight, so he can get it fitted and the brackets put in (it was a bench seat car)
-Jarrod Pilone '70 Plymouth RR Convertible with amazing custom paint(Tribute/Recreation/Whateveryouwannacallit) My Project Thread
I brought him the used center console I had so he can mock it up. With the keisler setup, it uses an automatic console with a 4 speed top plate. I have a brand new automatic shell coming, and already bought all the chrome bits from pg classic some time ago. I never go the top shifter boot, which I ordered over the weekend. Richard has the brackets (also got them from PG classic some time ago), and he's got it mocked up, but not secure yet, but making sure it all fits with the seats in place. Here you can also see the seats, which were from a '70 Sport Satellite, and are not custom-covered with modern stitching and a carbon fiber weave type of insert.
It's getting close! I'm hoping the new windshield and top will be done by the end of next week (3/17/17).
-Jarrod Pilone '70 Plymouth RR Convertible with amazing custom paint(Tribute/Recreation/Whateveryouwannacallit) My Project Thread
The rear interior panels are final painted (bottom is satin, top is gloss). The new console was also painted with the interior dye to match everything since it was in an oddball "fresh cast/stained" look to it. Slowly but surely.
The rear door panels were on backorder, but I was told it should be within two weeks at this point.
-Jarrod Pilone '70 Plymouth RR Convertible with amazing custom paint(Tribute/Recreation/Whateveryouwannacallit) My Project Thread
The new console shell is fitted and the brackets welded to the floor. No windshield yet unfortunately, the dry transfer for the "Chrysler corporation" on the VIN plate didn't stick so I got another from ECS coming, so the windshield is on hold for now.
If you're having problems with the front of the console top plate sticking up, I have a fixture here that we used to bend every single one (4-speed or auto) to fit the console correctly before we shipped them. Actually, the very first run of top plates were complete junk that we through away.
I never could get PG to fix the issue so I gave up and kept fixing them.
No issues came up, except the studs snapped off the console lid. I told him to use expoxy to hold the hinge to the lid and I will deal with it later in life...
-Jarrod Pilone '70 Plymouth RR Convertible with amazing custom paint(Tribute/Recreation/Whateveryouwannacallit) My Project Thread
Grille is painted (with correct paints from Totally Auto) and done, and the lower grille installed. Can't wait to see the grille installed and the car to have a "face"
-Jarrod Pilone '70 Plymouth RR Convertible with amazing custom paint(Tribute/Recreation/Whateveryouwannacallit) My Project Thread
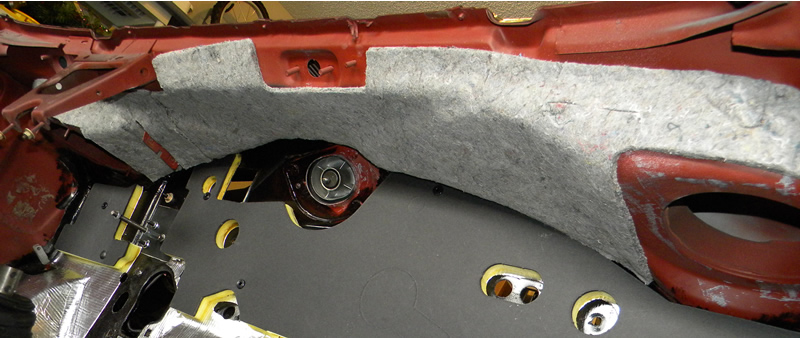
The devil is in the details. I got more insulation, so he was able to finish the rear seat floor area. Also got in the fender shields and covers for the suspension bolt access. The carpet should go in any day. The major holdup is the rear door panels that are on backorder, but expected to ship any day....
When the car leaves his shop, I will have to spend time tuning the carb, as it's running REAL rich. Other than that, I will have to get a new top done after the fact at an upholstery shop I have known for years closer to my home, that can do it in the same day for me.
Soon!!
-Jarrod Pilone '70 Plymouth RR Convertible with amazing custom paint(Tribute/Recreation/Whateveryouwannacallit) My Project Thread
The car received its final paint touch-ups and buff, and then he proceeded to install the stainless trim around the belt-line and get the grille and all surrounding trim installed. The rear door panels are on backorder from legendary, I was told another 3-5 weeks. I ordered them at the beginning of March. That's preventing the rear panels and backseat from going in. The carpet should go in next week. Getting very close!! I'm hoping it's back home by the end of May.
-Jarrod Pilone '70 Plymouth RR Convertible with amazing custom paint(Tribute/Recreation/Whateveryouwannacallit) My Project Thread
Had to wait for the passenger door to be done, after I went up for him to measure where to install the right mirror (It didn't have one from the factory), the repop I had previously bought years ago broke. So I got another one from year one, and it had much better chrome! Now the passenger door is all together and looking sharp.
While waiting for the new top to get put on and the windshield done, Richard test fit the air cleaner and I told him to go ahead and work on the artwork since we have some downtime. This is the first draft of it, there will be a few changes, but I am happy otherwise. He did this freehand! The man is an artist!
Still no rear door panels (the tiny ones that pop in there). Classic industries is going to reach out to me this week to give me a real ETA. That's preventing the large rear interior panels to be installed (these clip from behind) and the backseat installed.
Hoping the top is done this week or next, and the windshield too. Once the backseat is in, the car comes home.
I plan to "nut and bolt" the car to ensure safety, and I have to reclock the torsion bars, I messed up when putting the engine in, and the adjustment bolts stick out from the control arm too far.. oops!
-Jarrod Pilone '70 Plymouth RR Convertible with amazing custom paint(Tribute/Recreation/Whateveryouwannacallit) My Project Thread
The rear door panels shipped out yesterday! Hoping the windshield gets done next week, and the top following soon after.. I am hoping the car comes home in the first or second week of June!
-Jarrod Pilone '70 Plymouth RR Convertible with amazing custom paint(Tribute/Recreation/Whateveryouwannacallit) My Project Thread
Hood pad cut/modified to fit with the oval air cleaner (a little clearance issue due to the intake, was to be expected). Making sure no issues before artwork gets done. Convertible top latches installed. Just waiting on the windshield before the top goes on, and the rear door panels... close!!
-Jarrod Pilone '70 Plymouth RR Convertible with amazing custom paint(Tribute/Recreation/Whateveryouwannacallit) My Project Thread


 I like it also but would switch the characters so the road runner is in front. also that has got to be the baddest 70 roadrunner vert I have ever seen, cant wait to see it finished.


