|
 Re: New Paint job on a budget thread.
#37974
Re: New Paint job on a budget thread.
#37974
02/19/08 04:27 PM
02/19/08 04:27 PM
|
Anonymous
Unregistered
|
Anonymous
Unregistered
|
M2001, It's painful to watch you battle nature. Is there a Harbor Freight anywhere near you? Get one of these: http://www.harborfreight.com/cpi/ctaf/Displayitem.taf?itemnumber=42211For $170 you can't lose. I have a garage, but I bought one of these for extra car space out of the elements. It's worth it to get rid of some of the aggravation factor. Also, here's a sanding tip: pro painters put masking tape along the edges of hoods, doors, etc. when sanding to avoid burning through. It's extremely hard to avoid otherwise. Good luck and don't give up! LanceB
|
|
|
Re: New Paint job on a budget thread.
[Re: Gusteve]
#37976
02/19/08 05:14 PM
02/19/08 05:14 PM
|
Anonymous
Unregistered
|
Anonymous
Unregistered
|
Quote:
Quote:
Applied 2nd coat. I applied the paint to a hot surface. It was so hot, steam was rising from the paint, lol. Not to sure if this was a smart thing to do. but the paint was still workable.
Dude - If the surface temp of your hood is that hot you are just asking for more problems. It would be a shame to start all over and then have a completely different set of new issues.
I can't imaging you'll get consistent leveling if its that hot. That may not show up on the coat you just did - but it probably will by the time you are on a 3rd or 4th coat.
If you really can't do this indoors somewhere (and I know you said before that you can't) you should really think about that other guy's suggestion about a tarp and some 2x4's or aluminum poles or something.
Buy a 15x15 tarp, and maybe four or six 2" PVC pipes and some rope, and make a tent.
Well the surface only began to steam after I spread out the paint. When it was thin enough then it would start to steam. in any case it does make sense that it wouldnt flatten out correctly. But as of right now, its pretty flat. even to the touch.
Im finally going to end up making a tent out of PVC and tarp if that doesnt work out, ill end up buying that medium portable tent from Harbor Freight.
ME = 0
Mother Nature = 1

|
|
|
Re: New Paint job on a budget thread.
#37977
02/19/08 05:30 PM
02/19/08 05:30 PM
|
Anonymous
Unregistered
|
Anonymous
Unregistered
|
Just to make sure -- when prepping the car before the first coat how far down do I need to go? Sand it all down to where it is whiteish in the picture? I had a rust spot (top-left) that sanded down to bare metal when I started sanding it. Will this be fine? This is after 30 mins with 250 grit: 
|
|
|
Re: New Paint job on a budget thread.
#37978
02/20/08 12:08 AM
02/20/08 12:08 AM
|
Joined: May 2006
Posts: 575
Canada
Marq

mopar addict
|
mopar addict
Joined: May 2006
Posts: 575
Canada
|
Quote:
Just to make sure -- when prepping the car before the first coat how far down do I need to go?
Sand it all down to where it is whiteish in the picture?
I had a rust spot (top-left) that sanded down to bare metal when I started sanding it. Will this be fine?
The most important thing about the initial sanding down process is to make sure that you end up with one smooth level surface. Meaning that the edges need to be well feathered so that the edges are no longer defined or obvious.
When you have to take a section or spot down to metal make sure the edges where the metal ends and the original primer or paint begins is blended smooth so that it is not pronounced.
Overall, you normally don't have to go all the way down to metal ( except of course in the case where you are trying to work out some rust spots ). If you were to take a brand new car to MAACO for a paint job, they will just sand the original paint so that it no longer has any gloss or shine to it. You could call it scruffing the paint, compared to sanding the paint, in that you are just scruffing the outer skin and coatings off the original paint - to provide a clean surface ( free of clear coat and free of any painted surface that might be bearing former wax and polish jobs ). It also is slightly scoring the surface so that the paint will have lots to adhere to...
If the rust area requires quite a bit of sanding - to the point that there is a significant differnce between the bottom of the rust sanded area and the top of the scruffed outer skin of the paint, then you might want to lay an extra layer of primer or two ( or maybe even a thin coat of bondo ) to level up the two surfaces.
Just remember the key concept here is that any imperfections in the smoothness of the hood, will be amplified when you start added layers of glossy and shiny paint. The paint job will not be filling in discrepancies between the surface smoothness. So the better you work the smoothness of the surface during prep.... the smoother and shinier the end paint job on that surface will be. The more time spent on the prep stage will add up to greater satisfaction with the overall job at the end of the project. This holds true whether you are rolling your paint or spraying it at a pro-paint shop.
.
|
|
|
RE
[Re: Marq]
#37979
02/20/08 12:59 PM
02/20/08 12:59 PM
|
Anonymous
Unregistered
|
Anonymous
Unregistered
|
Does any1 have any experience on putting a fiberglass hood scoop on a existing hood without a scoop? after you place the scoop on and fiberglass/bondo/rivet it on do you cut away the hood under the sccop? Do you have to re-enforce the hood at that area? please help, want to place a scoop but not sure.
|
|
|
Re: RE
#37980
02/20/08 01:31 PM
02/20/08 01:31 PM
|
Joined: May 2006
Posts: 575
Canada
Marq
mopar addict
|
mopar addict
Joined: May 2006
Posts: 575
Canada
|
Quote:
Does any1 have any experience on putting a fiberglass hood scoop on a existing hood without a scoop? after you place the scoop on and fiberglass/bondo/rivet it on do you cut away the hood under the sccop? Do you have to re-enforce the hood at that area? please help, want to place a scoop but not sure.
I have seen it done in quite a few different ways. The worse and cheapest looking 'attempts' are where the guy has simply riveted it on to the hood and then tried to bondo the edges of the scoop and rivets to try to make it look like it belongs there.
The best I have seen is where the guys have templated the scoop's position on the hood, then cut away from the hood and inserted the scoop piece by attaching it under the hood. The biggest problem is that if the hood has 'bracing' under the area where you want to place the scoop... then you have to cut away the underhood bracing that would stop you from getting a flush fit underneath.
The other problem is what the scoop is made from... and what the hood is made of... For example :
a ) a fiberglass hood with the addition of a fiberglass scoop... is probably the easiest for someone familiar with working with fiberglass. Its probably the easiest situation to adhere and to blend together so that they look like original.
b ) a metal hood with a metal scoop is also fairly easiest to produce a fairly professional look and finish.
c ) a metal hood with a fiberglass scoop is also fairly easy to do and produce a fairly original look with.
d ) a metal or fiberglass hood with a polyurathane scoop is usually the biggest pain in the butt for getting a professional / original look to it. These are those type of scoops you see sold that come with two way tape and the guys just tape them on to their hoods. Ugh...
Part of the game is deciding whether you are going to make it a decorative scoop or a functional scoop. Normally the functional scoop almost always requires that the hood be cut...
And I guess the other part of this equation is whether you are buying some 'third party' scoop ( in which case you simply have to follow the instructions provided by the manufacturers ) OR whether you are being a bit of a customizer and adding some original factory scoop off a similar or different model of car and incorporating it into your vehicle ( in which you are best off imitating how the original manufacturer did their installation ).
One nice thing is that once you have narrowed down your answers to the above questions, I am pretty sure you will be able to hunt down quite a few fully detailed 'how to' instructions via a search with Google. The odds are that no matter how odd or routine your scoop plan is, there is probably someone out there that has already gone that route and lived to tell about it on the Internet 
.
|
|
|
Re: New Paint job on a budget thread.
[Re: Donny O.]
#37981
02/20/08 09:42 PM
02/20/08 09:42 PM
|
Anonymous
Unregistered
|
Anonymous
Unregistered
|
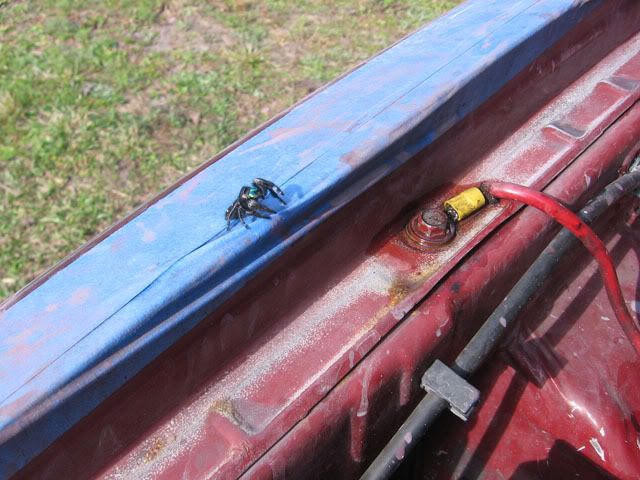
OMG- what the hell is that? I have never seen a bug like that!!!! -Nathan Quote:
Quote:
----------------------------------
look who came to pay a visit, mr.green fangs
 (good thing he didnt get stuck in the wetpaint) (good thing he didnt get stuck in the wetpaint)
----------------------------------
what the 'beep' is that?? other than the visitor I think you are on the right track....keep up the good work.
Last edited by 69DartGT; 02/21/08 12:16 AM.
|
|
|
Re: RE
[Re: Marq]
#37982
02/21/08 09:48 AM
02/21/08 09:48 AM
|
Anonymous
Unregistered
|
Anonymous
Unregistered
|
Quote:
Quote:
Does any1 have any experience on putting a fiberglass hood scoop on a existing hood without a scoop? after you place the scoop on and fiberglass/bondo/rivet it on do you cut away the hood under the sccop? Do you have to re-enforce the hood at that area? please help, want to place a scoop but not sure.
I have seen it done in quite a few different ways. The worse and cheapest looking 'attempts' are where the guy has simply riveted it on to the hood and then tried to bondo the edges of the scoop and rivets to try to make it look like it belongs there.
The best I have seen is where the guys have templated the scoop's position on the hood, then cut away from the hood and inserted the scoop piece by attaching it under the hood. The biggest problem is that if the hood has 'bracing' under the area where you want to place the scoop... then you have to cut away the underhood bracing that would stop you from getting a flush fit underneath.
The other problem is what the scoop is made from... and what the hood is made of... For example :
a ) a fiberglass hood with the addition of a fiberglass scoop... is probably the easiest for someone familiar with working with fiberglass. Its probably the easiest situation to adhere and to blend together so that they look like original.
b ) a metal hood with a metal scoop is also fairly easiest to produce a fairly professional look and finish.
c ) a metal hood with a fiberglass scoop is also fairly easy to do and produce a fairly original look with.
d ) a metal or fiberglass hood with a polyurathane scoop is usually the biggest pain in the butt for getting a professional / original look to it. These are those type of scoops you see sold that come with two way tape and the guys just tape them on to their hoods. Ugh...
Part of the game is deciding whether you are going to make it a decorative scoop or a functional scoop. Normally the functional scoop almost always requires that the hood be cut...
And I guess the other part of this equation is whether you are buying some 'third party' scoop ( in which case you simply have to follow the instructions provided by the manufacturers ) OR whether you are being a bit of a customizer and adding some original factory scoop off a similar or different model of car and incorporating it into your vehicle ( in which you are best off imitating how the original manufacturer did their installation ).
One nice thing is that once you have narrowed down your answers to the above questions, I am pretty sure you will be able to hunt down quite a few fully detailed 'how to' instructions via a search with Google. The odds are that no matter how odd or routine your scoop plan is, there is probably someone out there that has already gone that route and lived to tell about it on the Internet
.
Gee golly gosh, that was very informative. lol. I have a metal hood and the scoop is coming from Jegs (I believe its fiberglass), but thanks alot for the info. I will be showing pics of my work as when and if i descide to do it.
|
|
|
Re: RE
#37983
02/24/08 03:04 AM
02/24/08 03:04 AM
|
Anonymous
Unregistered
|
Anonymous
Unregistered
|
Marq, I still remember the day you first posted pictures of your red (mustang?) I think you mentioned something about that you did not have to thin the paint and you only put 3-4 layers or something along those lines.
Well seeing how I have no choice but to paint outside (working on make-shift carport) and fighting a losing battle against mother nature it would seem that using brightside paint would make more sense. for the fact that I dont have to lay down so many layers, risking the chances of bugs, hair and other debris laying onto my paint.
Would you mind laying out some pros and cons on interlux brightside paint? in the meantime ill type in *gulp* brightside into search and see what i can come up with.
-thnx
|
|
|
Re: RE
#37984
02/24/08 10:23 AM
02/24/08 10:23 AM
|
Joined: May 2006
Posts: 575
Canada
Marq
mopar addict
|
mopar addict
Joined: May 2006
Posts: 575
Canada
|
Quote:
Marq, I still remember the day you first posted pictures of your red (mustang?) I think you mentioned something about that you did not have to thin the paint and you only put 3-4 layers or something along those lines.
Well seeing how I have no choice but to paint outside (working on make-shift carport) and fighting a losing battle against mother nature it would seem that using brightside paint would make more sense. for the fact that I dont have to lay down so many layers, risking the chances of bugs, hair and other debris laying onto my paint.
Would you mind laying out some pros and cons on interlux brightside paint? in the meantime ill type in *gulp* brightside into search and see what i can come up with.
-thnx
Well... one of the main advantages of the Brightside paint is that it doesn't take as many coats of paint to get full coverage. There appears to be a higher concentration of paint pigments ( or solids ) in their product.
In theory... their product is designed to be painted straight on to boats from the can. Although they do sell a thinner to cut it a bit for situations where the paint is being done in hotter climates or to give the painter a little more working time with the paint. Mineral spirits worked equally well as a substitute for the 'official' Brightside thinner.
The rolling process is identical for the Brightside as the Tremclad/Rustoleum method. But it takes less coats on the overall project.
The main advantage that caught my attention about Brightside was that is is a polyurathane paint ( think plastic ), whereas Tremclad/Rustoleum is an enamel. Although both polyurathane and enamel are both used by professional paint shops for painting cars, the polyurathane is the one that would cost more to have done at a paint shop.
The main selling points of polyurathane over enamel is that it has UV protection built in, it has teflon anti-stick protection built in, it has been successfully used by 'home hobbyist boat painters using rollers' for years etc, and it is specificically designed and developed for use on boats which are exposed to constant extremes of temperature, water and sun.
Now... the one fly in the ointment is that bugs are just as likely to land and stick on wet Brightside paint as they are to land and stick on wet Rustoleum/Tremclad.
So you will end up using less coats of Brightside paint, BUT if the bugs keep flying and landing on it, then you may still end up having to do extra coats if you are forced to repair a bug infested paint job.
The only weak point with the suggestion about building a plastic tarp lean to, is that it will stop rain but not bugs ( unless it is fully enclosed ).
Is there a particular part of the season where you live when the bugs are not as plentiful ? I gotta figure that at various times during the year the number of flying bugs is not so punishing. Maybe you need to time your painting to that 'lull' in the flying bug season. Remember that Charger was able to paint his car in the extremes of winter ( mind you he did have a garage to protect his car from falling snow ).
My other though on this... is that maybe if there was some 'parking garage' near you that you could sneak to and slip a coat of paint on at. For example, where I live we have several universities and colleges with multi-level parking garages. If I was stuck in a situation like you are encountering, I would pop over to the local college parking lot and find a nice remote parking spot in their above ground parking. Slap a coat of paint on the car... wander off to the students bars or pubs or cafeteria ( or maybe even just to their library or bookstore ) and kill a few hours. Then come back to my car and hopefully it is dried enough to make the trip home . Its an environment where cash tight students wouldn't look twice at some bloke painting his car. In fact I think we even had a white Camaro in this message thread who use to paint his car in the outside parking lot at his nearby college...
Shopping center above ground garages are not necessarily as ideal, because they tend to have 'rent-a-cops' patrolling the parking garages looking for muggers or guys trying to break into shoppers cars.
Dunno... just a thought on how you might be able to get the car away from the bugs and fresh rain while the coat of paint cures...
.
Last edited by Marq; 02/24/08 10:27 AM.
|
|
|
Re: RE
[Re: Marq]
#37985
02/24/08 05:27 PM
02/24/08 05:27 PM
|
Anonymous
Unregistered
|
Anonymous
Unregistered
|
I realized bugs are only a concern little before sunrise and sunset really. My property is surrounded by 20ft+ pine trees, so from 10am-11am would be prime time to paint. The sun would be out at this time, but no direct sunlight will be making contact with my car. The only bugs that would be out around 10am, would be dragonflies. which arent an issue.
Regarding the rain. If I were to use BS, i could go ahead and check out the forecast for rain. seeing how it would take 2-3 days to paint VS a whole week for rusty.
Sounds like I should be using BS.
EDIT - what grit sandpaper should i be using with BS?
Last edited by M2001; 02/24/08 05:34 PM.
|
|
|
Re: RE
#37986
02/24/08 08:11 PM
02/24/08 08:11 PM
|
Joined: May 2006
Posts: 575
Canada
Marq
mopar addict
|
mopar addict
Joined: May 2006
Posts: 575
Canada
|
Quote:
EDIT - what grit sandpaper should i be using with BS?
Grits etc are basically the very same as for Rustoleum/Tremclad at the respective stages of the painting, wet sanding and finishing.
.
|
|
|
surface contamination and adhesion problems
[Re: Marq]
#37987
02/24/08 10:39 PM
02/24/08 10:39 PM
|
Anonymous
Unregistered
|
Anonymous
Unregistered
|
Last October painted my truck w/ Brightside and have noticed that I have adhesion problems. I think that I didn't sand the old paint sufficiently well prior to repainting. Also, I lightly coated with Duplicolor spay primer (primarily to hide the old darker color). I can see I didn't use sufficeient primer and this stuff might not be chemically compatible w/ the Brightside. I'm testing an old fender with Brightside's roll on primer after making certain that I sanded properly w/ 120 grit. Ater the paint has had a couple weeks to dry I will test. Should primer be thinned like paint for a smoother coat? Also, before the failing paint job I wiped down the truck w/ mineral spirits changing rags frequently. Maybe I didn't let it evaporate fully and I contaminated the surface (I see it take 333 a good 10 mins to evaporate on the test piece at room temp.). Note this reccomendation from Rustoleum: http://www.rustoleum.com/CBGResourceCenter.asp?sn=sur"Surface Preparation Guide Incomplete or insufficient preparation is the single greatest cause of paint failures. All surfaces should be sound, clean and dry before painting. Use the guidelines below to prepare your surfaces for painting. STEP 1 Remove dirt, grease, oil and chemicals Dirt, grease, oil or chemicals may interfere with the adhesion of paint. Clean your surface with soap and water, household cleaner or trisodium phosphate (TSP) solution. Do not use solvents to clean surfaces. Solvents tend to smear grease and oil and levae residue on your surface. Strong solvents can also soften a previous finish and make your new paint application susceptible to wrinkling. Do you think they are saaying that MS can be a problem? thanks Mitch
Last edited by rustinaway; 02/24/08 10:46 PM.
|
|
|
Re: RE
[Re: Marq]
#37988
02/24/08 11:48 PM
02/24/08 11:48 PM
|
Anonymous
Unregistered
|
Anonymous
Unregistered
|
Quote:
Quote:
EDIT - what grit sandpaper should i be using with BS?
Grits etc are basically the very same as for Rustoleum/Tremclad at the respective stages of the painting, wet sanding and finishing.
.
Then I would be sanding after every coat then, right?
|
|
|
Re: surface contamination and adhesion problems
#37989
02/25/08 07:18 AM
02/25/08 07:18 AM
|
Joined: May 2006
Posts: 575
Canada
Marq
mopar addict
|
mopar addict
Joined: May 2006
Posts: 575
Canada
|
Quote:
Last October painted my truck w/ Brightside and have noticed that I have adhesion problems. I think that I didn't sand the old paint sufficiently well prior to repainting. Also, I lightly coated with Duplicolor spay primer (primarily to hide the old darker color). I can see I didn't use sufficeient primer and this stuff might not be chemically compatible w/ the Brightside.
I'm testing an old fender with Brightside's roll on primer after making certain that I sanded properly w/ 120 grit. Ater the paint has had a couple weeks to dry I will test. Should primer be thinned like paint for a smoother coat?
What I found is that the Brightside primer works great when rolled on straight from the can. One rolling of Brightside primer is equal to about 3 to 5 layers of sprayed on aerosol type primers. So the big advantage with the Brightside primer is :
a ) rolls on thicker
b ) has a higher color and solid content then aerosol spray bombs.
And so you are able to do a very light sanding of the primer with a 400 to 600 grit sand paper on the primer and increase the overall smoothness of the primed surface. If you tried that on a sprayed on primer surface you would not have enough primered coating on the panel to properly sand ( cuz there isn't much on the panel to begin with ). The other advantage of using the Brightside primer is that you can cut it with 20% to 30% Brightside PAINT to assist the primer and give it a head start towards reaching the color you are going to actually be painting it with.
I did a little rant about spray on primer's within the last ten pages of this thread... and if Brightside primer rolled on is a 10, then a Duplicolor spray primer is a 2 in my books. I also ranted about how most primer in aerosol sprays goes into the air or builds loosely on itself with loss of adhesion ( due to flying through the air )
I don't think there is a compatibility problem with Duplicolor primer and Brightside. I think the problem is that the Duplicolor spray bomb primer is an inferior product.
Quote:
Also, before the failing paint job I wiped down the truck w/ mineral spirits changing rags frequently. Maybe I didn't let it evaporate fully and I contaminated the surface (I see it take 333 a good 10 mins to evaporate on the test piece at room temp.).
A bigger problem usually occurs when people use a little too much soap in the water when they are wet sanding every second coat of paint OR they are not effectively rinsing off with water to remove any sanding sludge that is loosened up by the wet sanding.
One thought that did strike me about the 'rinsing off' stage following the wetsanding, is the very water itself. One variable between different locations in North America and around the world is the mineral content of the water, additives added to water by the local water distribution companies and whether it is a 'hard water' or a 'soft water'. I do know that in some locations the body shops have to invest money in water softeners or water treatment devices to eliminate the quality of their local water as a variable in how their work turns out.
Quote:
Note this reccomendation from Rustoleum:
http://www.rustoleum.com/CBGResourceCenter.asp?sn=sur
"Surface Preparation Guide
Incomplete or insufficient preparation is the single greatest cause of paint failures. All surfaces should be sound, clean and dry before painting. Use the guidelines below to prepare your surfaces for painting.
STEP 1
Remove dirt, grease, oil and chemicals
Dirt, grease, oil or chemicals may interfere with the adhesion of paint. Clean your surface with soap and water, household cleaner or trisodium phosphate (TSP) solution.
Do not use solvents to clean surfaces. Solvents tend to smear grease and oil and levae residue on your surface. Strong solvents can also soften a previous finish and make your new paint application susceptible to wrinkling.
Do you think they are saaying that MS can be a problem?
It's like what we were saying previous about 'dampening' the cloth with mineral spirits rather than saturating the wiping cloth. I believe I tried to describe it as soaking the cloth and then wringing it out to remove almost all of the mineral spirit from the cloth. A soaking wet cloth would leave excess mineral spirits on the surface being wiped and this excess might be all it takes to soften the paint onthe wiped surface. As well, a soaked cloth would just swish and move around any foreign matter on the body panel... where as a slightly dampened cloth will tend to pick up the foreign matter and attach it to the wiping cloth.
Last edited by Marq; 02/25/08 07:29 AM.
|
|
|
 Re: surface contamination and adhesion problems
[Re: Marq]
#37990
Re: surface contamination and adhesion problems
[Re: Marq]
#37990
02/25/08 03:01 PM
02/25/08 03:01 PM
|
Anonymous
Unregistered
|
Anonymous
Unregistered
|
My problem is the Brightside not sticking to the truck (layer to layer I don't have any problems). The paint will pull off the truck with masking tape.javascript:void(0) I'm wondering should the clearcoat have been removed or just roughened up? thanks
|
|
|
Re: surface contamination and adhesion problems
[Re: Marq]
#37991
02/25/08 03:07 PM
02/25/08 03:07 PM
|
Anonymous
Unregistered
|
Anonymous
Unregistered
|
I was looking at some other projects with people using brightside and notice there was some guys who had orange peel. I thought BS did not to be thinned? Or is it because they soaked the roller and did not roll out the excess paint? 
|
|
|
Re: surface contamination and adhesion problems
#37992
02/25/08 03:10 PM
02/25/08 03:10 PM
|
Anonymous
Unregistered
|
Anonymous
Unregistered
|
Quote:
My problem is the Brightside not sticking to the truck (layer to layer I don't have any problems). The paint will pull off the truck with masking tape.javascript:void(0)
I'm wondering should the clearcoat have been removed or just roughened up?
thanks
Ive had nothing but bad experience with painting over clear coat. especially when it came time to wet sand. but then my clear coat was chipping off. I would sand off *all* clear coat. but thats just me.
|
|
|
Re: surface contamination and adhesion problems
#37993
02/25/08 04:06 PM
02/25/08 04:06 PM
|
Joined: May 2006
Posts: 575
Canada
Marq
mopar addict
|
mopar addict
Joined: May 2006
Posts: 575
Canada
|
Quote:
My problem is the Brightside not sticking to the truck (layer to layer I don't have any problems). The paint will pull off the truck with masking tape.javascript:void(0)
I'm wondering should the clearcoat have been removed or just roughened up?
thanks
I may stand to be corrected, but my personal thought on the clear coat is that it should be fully removed. Something in the back of my memory seems to tell me that ever professional paint shops will remove the previous clear coat during prep in order to paint a car ( yuppp... even MAACO I believe ).
.
|
|
|
|
|


