Previous Thread
Next Thread
Print Thread
Page 3 of 9 1 2 3 4 5 6 7 8 9
Re: 68 Dart GT convertible [Re: burdar] #1497857
12/14/13 05:34 PM
12/14/13 05:34 PM
Joined: Jul 2007
Posts: 2,554
Maryland
wally426ci Offline
master
wally426ci  Offline
master

Joined: Jul 2007
Posts: 2,554
Maryland
Nice work Darren. Is that all before and after with evaporust? I have never used it.

Re: 68 Dart GT convertible [Re: wally426ci] #1497858
12/14/13 08:31 PM
12/14/13 08:31 PM
Joined: Oct 2006
Posts: 7,363
Iowa
burdar Offline OP
Owen's Dad
burdar  Offline OP
Owen's Dad

Joined: Oct 2006
Posts: 7,363
Iowa
Muriatic acid(pool cleaner) for the big stuff. EvapoRust for more delicate stuff and stuff that's not rusted as bad. The blower motor mount was soaked in EvapoRust.

Re: 68 Dart GT convertible [Re: burdar] #1497859
12/26/13 02:12 PM
12/26/13 02:12 PM
Joined: Oct 2006
Posts: 7,363
Iowa
burdar Offline OP
Owen's Dad
burdar  Offline OP
Owen's Dad

Joined: Oct 2006
Posts: 7,363
Iowa
I've been working on the gauges. I still need to get them calibrated and buy a sold state voltage limiter.

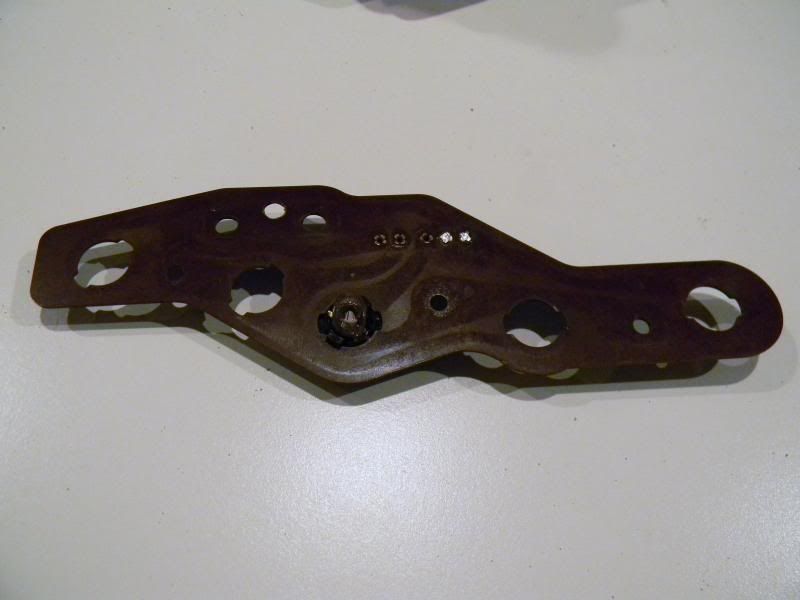
I was a little too aggressive when I removed one of the connectors from the printed circuit and damaged two of the pins. I read where I could fix them by inserting a paper clip as reinforcement so I thought I'd give it a try. I coated the inside of the pins with flux, inserted a paper clip through the pins and soldered them in. Then I cut off the excess paper clip from either end. I had to grind a little on the back side so the repair would clear the gauge cluster housing. It seemed to work and the pins are now solid.

The two pins on the right were loose.


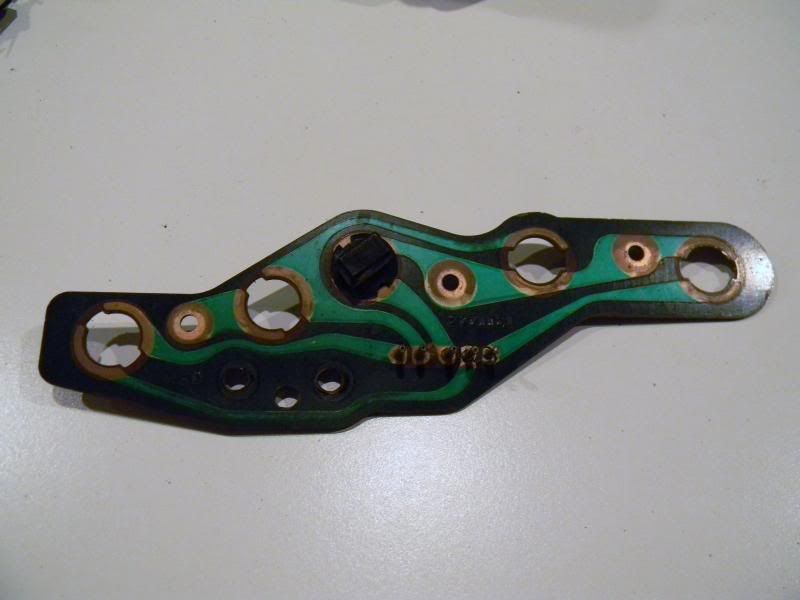
You can see they are now filled with solder.


The car didn't come with an oil pressure gauge...just and idiot light. I wanted to add an oil pressure gauge but I don't like the look of extra gauges under the dash. I thought about adding one where the idiot light was but there wasn't enough room.(plus I like the idea of the idiot light)

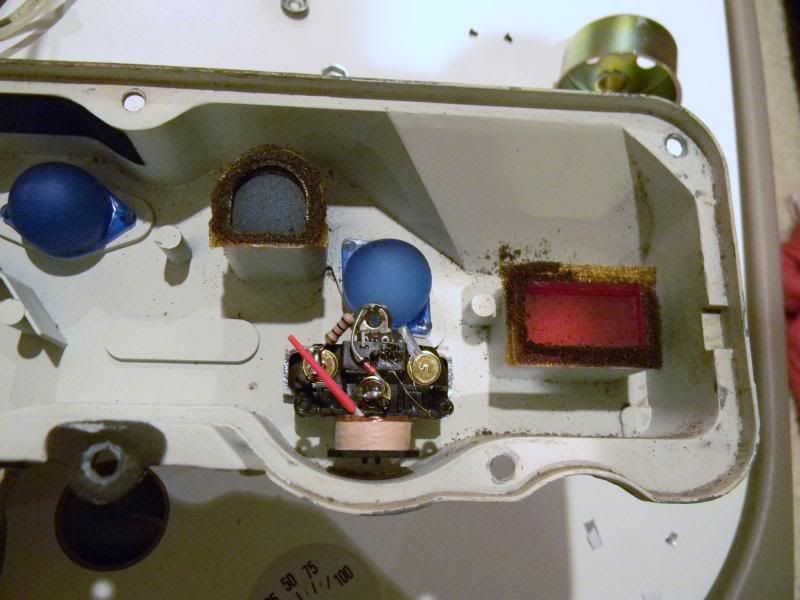
I was going to bypass the AMP gauge anyway so I thought an oil pressure gauge would be more important than a volt gauge. I ended up buying a 2" SunPro electric oil pressure gauge and gutted it. I took the mechanism and mounted it in the gauge cluster housing in place of the AMP gauge. The + and sender terminals were the same distance apart as the factory AMP gauge. I had to drill a hole through the cluster housing and the printed circuit for the ground wire. Luckily there was a blank area in the printed circuit where I had to drill the hole.

The mechanism just barely clears the blue lense.


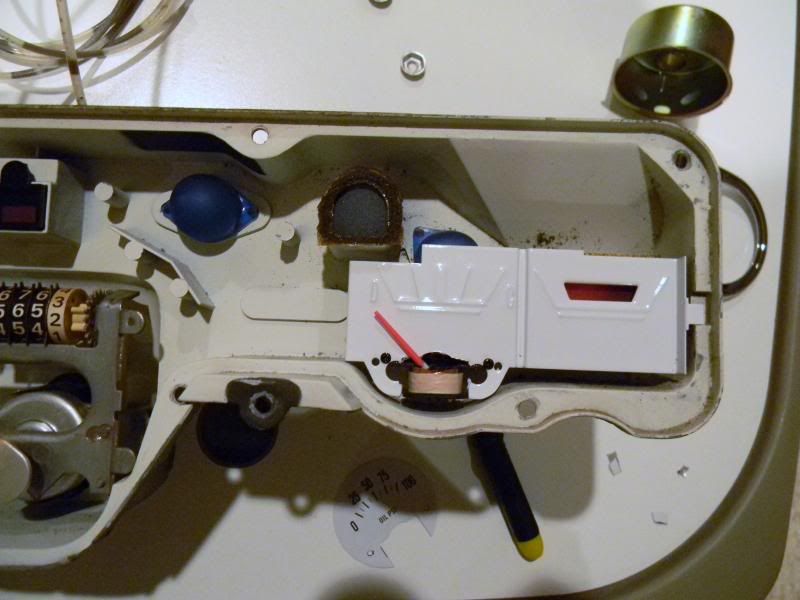
I removed the SunPro gauge face and used it as a template. I had to cut away some of the original gauge face so it would clear the new mechanism. I also cut off the AMP gauge needle and glued it onto the oil pressure gauge needle.


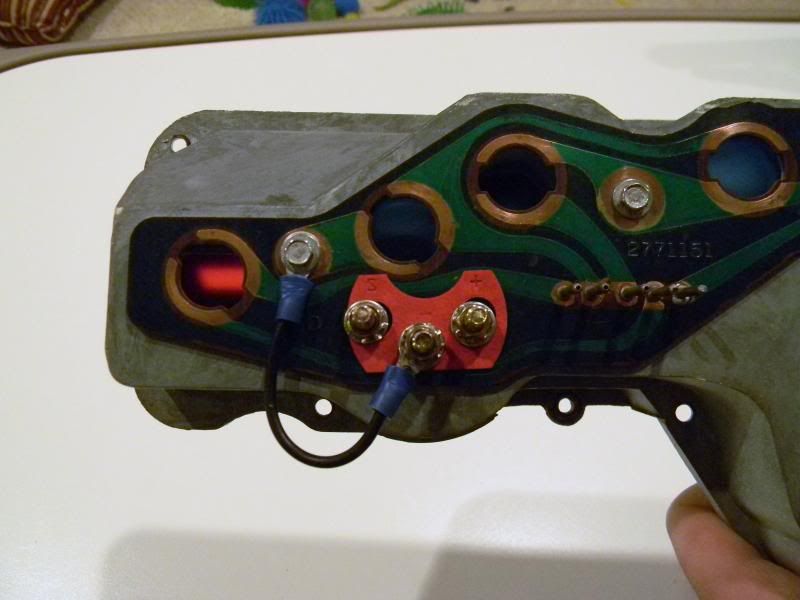
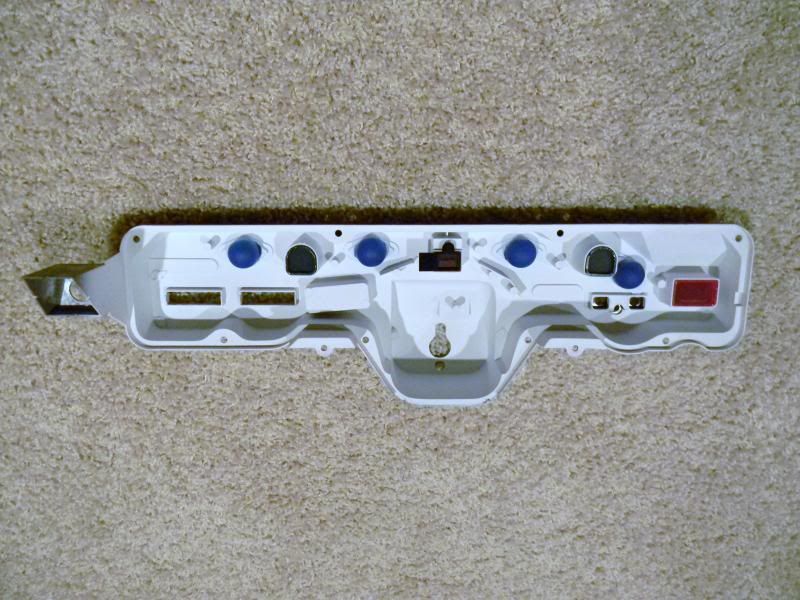
Here is what the back of the gauge looks like mounted in the cluster housing.


Next, I cleaned and repainted the inside of the cluster housing. I also made some new gaskets for the turn signal lenses and idiot light lense. Scrap foam from DMT gasket kits comes in handy for things like that.


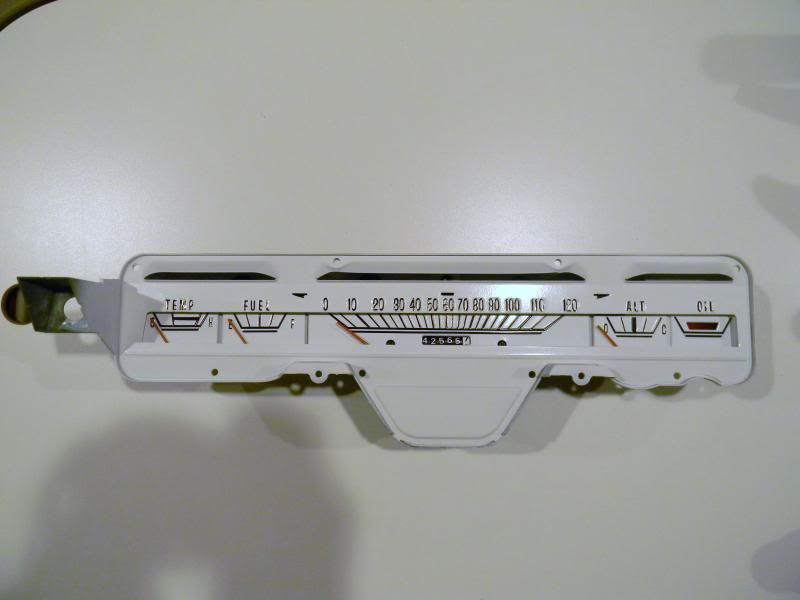
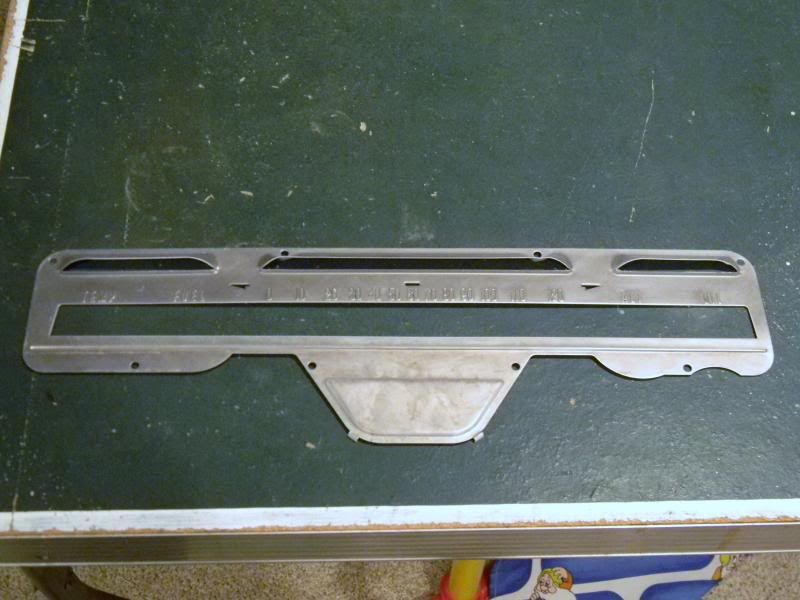
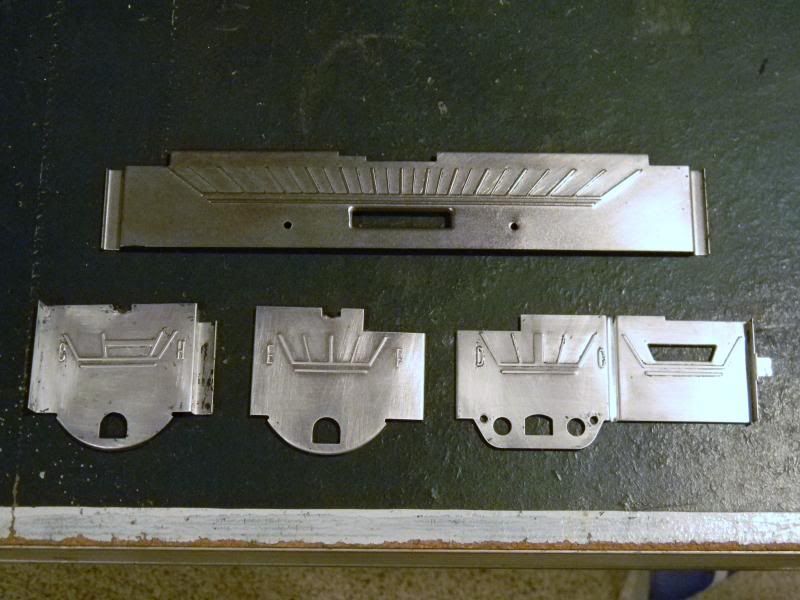
I tried repainting the gauge faces but I didn't have any luck. My plan was to paint the faces white, then spray SEM trim black over it. Then I was going to wipe off the black from the raised areas with lacquer thinner. I stripped the faces and painted them with single stage Centari with a Prevail sprayer. After four days I sprayed them with trim black. Four days wasn't long enough because the white paint lifted as soon as I sprayed the pieces with the trim black.

I stripped the faces back down to bare metal and purchased a white overlay kit. I'm not sold on the white gauge look so this may just be temporary. Since the interior is white, there's a chance it may look OK.


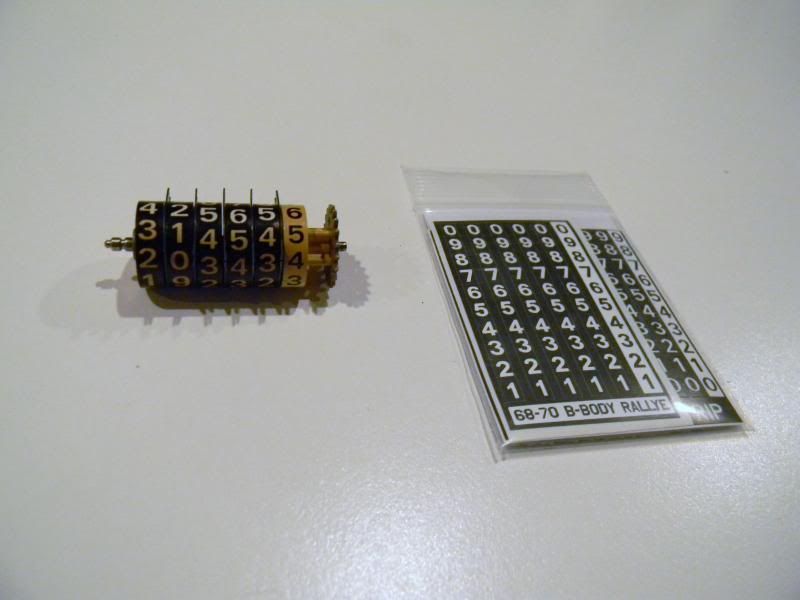
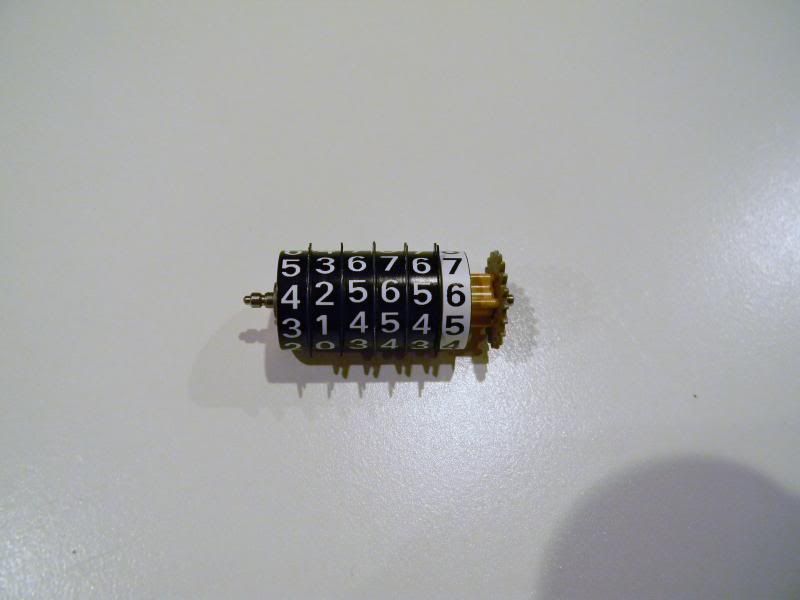
I also bought an odometer reface kit. Originally I bought one for a standard dash E-body since they didn't offer one for the Dart. The size of the overlays was correct but the Dart's odometer spins in the opposite direction so the numbers were reversed. They sent me an E-body Rallye gauge kit as well as a B-body kit to try. The E-body Rallye gauge kit worked great.


Here's what the gauge cluster looks like now. I'm going to wait for final judgment until I can see what it looks like with the entire dash assembly together. I've seen a picture of the gauges at night and they look cool with the blue light on them. I'm just not sure about how they'll look in the daylight.

Re: 68 Dart GT convertible [Re: burdar] #1497860
12/26/13 02:43 PM
12/26/13 02:43 PM
Joined: Jan 2003
Posts: 1,664
NE Iowa
R
Road_RunnerSteve Offline
top fuel
Road_RunnerSteve  Offline
top fuel
R

Joined: Jan 2003
Posts: 1,664
NE Iowa
I think that'll look great. It works with the theme you've chosen for the car.

Re: 68 Dart GT convertible [Re: Road_RunnerSteve] #1497861
12/26/13 02:57 PM
12/26/13 02:57 PM
Joined: Oct 2006
Posts: 7,363
Iowa
burdar Offline OP
Owen's Dad
burdar  Offline OP
Owen's Dad

Joined: Oct 2006
Posts: 7,363
Iowa
There is so much black on the dash it kind of looks out of place with white interior. Hopefully this will look at home. I've got all my switches boxed up and will be sending them off to JS Restorations today.

Re: 68 Dart GT convertible [Re: burdar] #1497862
02/09/14 04:46 PM
02/09/14 04:46 PM
Joined: Oct 2006
Posts: 7,363
Iowa
burdar Offline OP
Owen's Dad
burdar  Offline OP
Owen's Dad

Joined: Oct 2006
Posts: 7,363
Iowa
A few months ago I took a bunch of parts to the powder coater.(K-member, swaybar, bumper brackets, splash shields, trans x-member, seat frames) I got everything back from the powder coater a couple weeks ago. I took the seat frames, new foam and new seat covers to the upholstery shop. It will probably be late March or April before I get them back.

I sent in my dash switches to JS Restorations. Jim worked his magic and they all look great and work again. I just got done with the steering column so now it's time to turn my attention back to the dash assembly.

Here is what the steering column looked like when I started.


I soaked the outer column jacket, the lower steering shaft and inner tube in acid to clean them up. I'm converting the car to manual steering so I separated the inner and outer steering shafts and replace the lower one with a longer manual piece.


I used a $12 insert bearing on the bottom of the column instead of the $85 stock style bearing. I needed to grind 3/16" off the bottom of the inner tube and use the plastic housing from the original bearing to make it work. It took awhile to figure it out but it's going to be an improvement for sure.

This is what it looks like with the plastic housing now acting as a bushing for the inner tube. The actual bearing parts were removed from the original bearing and the locating tab was ground off so it would slide into the column farther.(it was also installed upside down) The plastic supports the bottom of the inner shaft......there is a step in the plastic for the spring to sit on.......and the spring puts upward pressure on the inner shaft to keep it from rattling around.


The turn signal switch was reused but the wiring connector was replaced. The mounting brackets were heavily pitted so they were sprayed with high build primer and sanded before being sprayed with gloss black. The upper column pieces as well as the column jacket were sprayed with Rustoleum fine texture. I installed a new coupler kit and painted the shaft gloss black.


Re: 68 Dart GT convertible [Re: burdar] #1497863
02/16/14 01:17 AM
02/16/14 01:17 AM
Joined: Jan 2003
Posts: 3,009
Covington Georgia
RV2 Offline
master
RV2  Offline
master

Joined: Jan 2003
Posts: 3,009
Covington Georgia
Can you give more info on that lower column bearing?
What did you use on the parts after soaking in the muratic acid?

Re: 68 Dart GT convertible [Re: RV2] #1497864
02/16/14 01:46 AM
02/16/14 01:46 AM
Joined: Oct 2006
Posts: 7,363
Iowa
burdar Offline OP
Owen's Dad
burdar  Offline OP
Owen's Dad

Joined: Oct 2006
Posts: 7,363
Iowa
Here is a thread about the bearing on FABO. There is also one on CC.com
http://www.forabodiesonly.com/mopar/show...+column+bearing

After the rust is gone, the acid is neutralised with baking soda and water. The parts will flash rust imediately after being cleaned this way. I found that if I soak them in EvapoRust for maybe 5-10 minutes, they won't flash rust. I rinse off the EvapoRust and dry them with compressed air. They end up looking like the one picture I posted. After that, they were sprayed with SEM self etching primer.

Re: 68 Dart GT convertible [Re: burdar] #1497865
02/20/14 12:18 PM
02/20/14 12:18 PM
Joined: Oct 2006
Posts: 7,363
Iowa
burdar Offline OP
Owen's Dad
burdar  Offline OP
Owen's Dad

Joined: Oct 2006
Posts: 7,363
Iowa
Just a small update. There is a company called Illumin8s that sells a multi function LED parking light kit for Challenger, Cuda, Charger and some GM products. You may have seen this video before but here's how they work...
http://www.youtube.com/watch?v=nactAwM4Wtw

They didn't make a kit for the 68 Dart so I contacted them about making me one. I sent them one of my parking light housings and they designed a kit that they are now going to offer. Here is what it looks like installed in the housing. The LED just plugs into the existing socket...there is no modification to the stock wiring.


What I'm going to do is rewire the parking lights and hook them up to ignition "RUN" power. They will act as a daytime running light this way. Since I'm concerned they may be too bright at night,(they sit so high up on the grill)I'm also going to run the power wire through a toggle switch. I'll install a stock switch and bezel in place of the cigarette lighter. This way, I can turn them off at night.

Now I just have to come up with something for the tail lights. There is an LED kit available for the 69 Dart but nothing for the 68.

Re: 68 Dart GT convertible [Re: burdar] #1497866
02/21/14 10:05 PM
02/21/14 10:05 PM
Joined: Jan 2003
Posts: 6,266
Renton Washington
T
Triple Threat Offline
master
Triple Threat  Offline
master
T

Joined: Jan 2003
Posts: 6,266
Renton Washington
Very impressive work you are doing! I dont have the patience for all of this, I just make them go faster haha. Keep it up, i'll be watching.


-Dustin
67 Dart, 9 second, 392" G3 Hemi
68 Barracuda 340 F/SA
Re: 68 Dart GT convertible [Re: Triple Threat] #1497867
03/09/14 11:49 AM
03/09/14 11:49 AM
Joined: Oct 2006
Posts: 7,363
Iowa
burdar Offline OP
Owen's Dad
burdar  Offline OP
Owen's Dad

Joined: Oct 2006
Posts: 7,363
Iowa
Here's an update on the dash assembly...

There was a bad spot in the dash frame.


I separated the outer skin from the lower frame so I could clean out the rust that had formed in between. Then I cut out the bad section and made a repair piece.


I had the frame blasted. Weld through primer was used between the outer skin and the lower frame before it was welded back together.


I sprayed the frame with self etch primer, Rustoleum fine texture black and satin clear. It's just slightly more texture then it had originally. I wasn't happy with how the top looked. I thought the texture would hide some minor pitting but it didn't. I stripped the top back down to bare metal, applied a thin layer of filler and sanded it back down. It looks good now.


I sprayed the two lower pads with SEM Landau Black. If reproductions were available I would have replaced them. The vinyl is wavy in a few spots but there are no cracks. It will do for now. Having them redone will be a winter project down the road once the car is driveable. The upper pad is a new BE&A piece I bought from Dave at Roseville. It fit pretty good. There is a slight hump in the middle where it isn't sitting down against the frame. It should look fine in the car though.


All the switches were sent out to JS Restorations for a rebuild. The ash tray was hanging very low. I had to add some spacers between the dash frame and ash tray bracket to lift the tray up tight to the lower pad. The dual speaker bracket fit great and there is plenty of room between the speakers and the heater controls.


I cleaned up the dash harness and replaced a few wires and terminal ends that were chewed up by mice. The harness was really dirty but was in good shape otherwise. Right now I'm at a stopping point. I have to send the radio out for an FM conversion and I have to buy new dash bezels. I'll post more pics once it's completely done.

Re: 68 Dart GT convertible [Re: burdar] #1497868
03/11/14 08:19 PM
03/11/14 08:19 PM
Joined: Oct 2006
Posts: 7,363
Iowa
burdar Offline OP
Owen's Dad
burdar  Offline OP
Owen's Dad

Joined: Oct 2006
Posts: 7,363
Iowa
I've read that there is a lot of flex in a convertible. I want to stiffen things up, but I don't want to do anything that can't be reversed. I decided to add the fender to cowl braces found on the 74+ cars. Any time you can triangulate something, it should make it stronger. I'm going to have to make some mounting brackets for the pinch weld. The factory widened the pinch weld when these braces were installed.

I set them in place just to make sure they were going to work. I thought there might be some interference on the DS with the washer bottle. That wasn't the case though.

Re: 68 Dart GT convertible [Re: burdar] #1497869
03/12/14 01:24 AM
03/12/14 01:24 AM
Joined: Nov 2006
Posts: 6,005
Reno, Nevada
NV69B7RR Offline
master
NV69B7RR  Offline
master

Joined: Nov 2006
Posts: 6,005
Reno, Nevada
I love this build Darren!! You do fantastic work. That lower column bearing trick is really cool, I'm gonna do that on my Dart! Keep up the progress, I look forward to your updates.

Re: 68 Dart GT convertible [Re: burdar] #1497870
03/12/14 02:06 AM
03/12/14 02:06 AM
Joined: May 2010
Posts: 6
Iowa
S
Steve G Offline
member
Steve G  Offline
member
S

Joined: May 2010
Posts: 6
Iowa
Get the frame connectors or make some to stiffen the body. I had a 67 barracuda convertible that we stuffed a 440 into. Took it to the track and ended up breaking the case on the auto trans because of the body flex. Broke where the speedo cable goes in, all the way around.

Re: 68 Dart GT convertible [Re: Steve G] #1497871
03/12/14 11:22 AM
03/12/14 11:22 AM
Joined: Oct 2006
Posts: 7,363
Iowa
burdar Offline OP
Owen's Dad
burdar  Offline OP
Owen's Dad

Joined: Oct 2006
Posts: 7,363
Iowa
I don't think I can bring myself to install the welded on connectors. I do plan on installing some bolt-on ones though. The K-member has also been completely welded and the steering box mounts gusseted. Of coarse it already has the torque boxes from the factory.

Re: 68 Dart GT convertible [Re: burdar] #1497872
03/13/14 10:31 PM
03/13/14 10:31 PM
Joined: Oct 2006
Posts: 7,363
Iowa
burdar Offline OP
Owen's Dad
burdar  Offline OP
Owen's Dad

Joined: Oct 2006
Posts: 7,363
Iowa
Last night I worked on a white overlay for the radio. A guy over on FABO sent me the layout file he made for his Barracuda. I modified it for the Dart. I had an extra piece of vinyl left over from the gauge overlays. I was able to get the vinyl fed through the printer but unfortunately the ink didn't dry and it wiped right off. Next is to try and find some adhesive backed photo paper...not sure if that even exists.

Re: 68 Dart GT convertible [Re: burdar] #1497873
03/24/14 12:02 AM
03/24/14 12:02 AM
Joined: Oct 2006
Posts: 7,363
Iowa
burdar Offline OP
Owen's Dad
burdar  Offline OP
Owen's Dad

Joined: Oct 2006
Posts: 7,363
Iowa
I started modifying the console to accept an aftermarket shifter. I've always liked the Pro Stick shifter but it doesn't lend itself easily to being used with a console. I've come up with a few different ideas but scrapped them. My latest idea should work but it requires removing a lot of material from the top plate. Modifying the original pitted top plate is easy...grinding on a brand new $350 part will be a little more stressfull.

Here's what I started with...a well used and pitted automatic top plate. I think that's a 20 year old piece of gum sitting there.


First I started by cutting off the center divider. I also removed quite a bit of material on the bottom side of the top plate. Then I cut a groove in the center recessed area for the reverse lockout lever. Once everything else is fitted, I will be making an extension for the reverse lockout lever. I made the first rough template for the shifter cover out of cardboard. (The rough notch in the side of the template is just temporary. It allows me to slide the template on and off the shifter easily. I'll have to remove the lever from the shift arm in order to slide the final piece onto the shifter.) So far so good. I think it will look good when it's done. I just hope I don't destroy a brand new top plate when it comes time to modify it.

Re: 68 Dart GT convertible [Re: burdar] #1497874
03/31/14 02:10 PM
03/31/14 02:10 PM
Joined: Oct 2006
Posts: 7,363
Iowa
burdar Offline OP
Owen's Dad
burdar  Offline OP
Owen's Dad

Joined: Oct 2006
Posts: 7,363
Iowa
Still working on the console.

I cut the factory bracket off the floor since the new shifter requires a much shorter bracket.


I used a steel plate and some wood to mock up where I needed the shifter to be. I ended up moving it about an 1/8" to the passengers side from where I originally intended to put it. With it slightly farther to the right side, I can bolt an extension onto the side of the reverse lockout lever. Otherwise I would have had to weld an extension onto the top of the existing lever.


With my measurements taken, I started building a template out of cardboard. My father-in-law calls that a CAD system.(cardboard aided design)


I reinforced the template so it would support the weight of the shifter and made sure the design was going to work. Then I started making the bracket out of 18 gauge sheet metal.


I cut the cardboard template apart and transferred it to the sheet metal. I bolted a 30" sheet metal brake to my work bench that my father-in-law had given me a few month prior. This was my first time using it but I think the bracket turned out nice. Once I have the final shifter position marked, I'll drill the holes and have nuts welded on the bottom side.

Re: 68 Dart GT convertible [Re: burdar] #1497875
04/12/14 11:39 PM
04/12/14 11:39 PM
Joined: Oct 2006
Posts: 7,363
Iowa
burdar Offline OP
Owen's Dad
burdar  Offline OP
Owen's Dad

Joined: Oct 2006
Posts: 7,363
Iowa
I wasn't happy with the way the gauge cluster turned out. The vinyl didn't stick to the raised numbers/letters very well. The worst looking piece was the large outer panel. I decided to redo all of the pieces using a matte vinyl instead of gloss. The matte material will hide any imperfections better.

I took the upper panel to my father-in-laws house and we machined off all the letters/numbers. I put a thin layer of filler over the area to cover the machining marks.


I sprayed it flat white.


Since I was installing the vinyl on a flat surface, I had the wording changed to reflect the change I made to the cluster. I had the "OIL" wording moved over to where the "ALT" wording originally was. Then I had "WARNING" placed above the idiot light.


Here are the gauges after replacing all the vinyl overlays. I also ground off the "D" and "C" from the alt gauge face. I had "0" and "100" put in their place for the oil pressure gauge. The graduations on the original face match the graduations on the aftermarket gauge face, so it should read accurately.

Re: 68 Dart GT convertible [Re: burdar] #1497876
04/12/14 11:56 PM
04/12/14 11:56 PM
Joined: Oct 2006
Posts: 7,363
Iowa
burdar Offline OP
Owen's Dad
burdar  Offline OP
Owen's Dad

Joined: Oct 2006
Posts: 7,363
Iowa
I also picked up the seats from the upholstery shop. If you remember, I decided to have them redone right away since they were so nasty. Now I can store them in the house until the rest of the car is done.

The car spent a lot of its life sitting with the top down. The seat frames were in bad shape and mice had eaten holes in foam.


I had the upholstery shop strip the seats down to the frames so I could have them powder coated. The bucket seat frames were pretty rusty. I had the powder coater fix the issues before he coated them.(the upholstery shop replaced one spring as well)


The rear frames were fine. They just needed to be blasted and coated.


The frames turned out nice. The weather was nasty when I got them back from the coaters so I don't have any good pics of the frames by themselves.


I still need to buy new seat back cardboard pieces, find two hinge covers and restore the seat tracks.


Page 3 of 9 1 2 3 4 5 6 7 8 9


Powered by UBB.threads™ PHP Forum Software 7.7.1