|
 Re: 48 Plymouth business coupe, Dakota frame, low bucks
[Re: Marty cRUIZer]
#1116470
Re: 48 Plymouth business coupe, Dakota frame, low bucks
[Re: Marty cRUIZer]
#1116470
11/22/11 03:23 AM
11/22/11 03:23 AM
|
Joined: Jan 2003
Posts: 10,525
Freeport IL USA
poorboy
 OP
OP
I Live Here
|
OP
I Live Here
Joined: Jan 2003
Posts: 10,525
Freeport IL USA
|
Thanks guys.
Let me go on, I've got a ways to go to get current with this.
I told you how easy it was to load the car onto the trailer, unfortunately, it wasn't anywhere near that easy to unload. Let me give you a quick lay out of my place. I live at the last house on the end of our street. My property is zoned business and I run my one man welding shop out of the 2 car garage. The garage sits to the west of the house, the front of the garage is 10' behind the house. There is a 16' wide driveway from the garage to the street. West of the driveway is an empty lot that belongs to me. The lot is at the end of the block lined with a side street that dead ends at the back of my property. The property is pretty flat from the street to the front of the garage. Then it drops 8' in elevation from the front of the garage to the back of the garage. There is a 20' plateau before the elevation drops another 8' to the fence at the back of my property. Behind the fence, the elevation drops another 15' to a set of railroad tracks.
Because I use my garage to make a living, I must keep it mostly open, with easy access to it. That means any long term project has to sit in the grass along the west side of the drive, but in front of the garage.
The biggest piece of equipment I have here is a cherry picker, and it doesn't work very well in the grass. The car is on a borrowed trailer, so I have to get it off. The next problem is once its off the trailer, I won't be able to move it easily. The bed of the trailer is diamond plate steel, so the car can slide on the trailer with a little force, but there is a step to hook ramps to that would prevent the car from sliding off the trailer completely. To complicate matters worse, most of the time I'm working alone. My plan was to back the Dakota to a right angle to the drive, put my cherry picker in line with the drive, and chain it to the Dakota. Then I backed the trailer up to the cherry picker and unchained the car from the trailer. I hooked the cherry picker to the car frame and lifted the front about 3" off the trailer deck. Then I drove the trailer forward as the car slid on the trailer bed until only the front drums were still on the trailer. Jacked the cherry picker up another 12"-15" then put a pair of jack stands under the front frame, as high as I could go. I went back and lowered the picker until it wedged the front drums off the trailer bed. I removed the trailer and raised the picker up and set another pair of jack stands under the rear frame. With the car sitting solidly on 4 jack stands, the cherry picker was unchained from the Dakota and move it. Then the cherry picker was dug out of the grass and put back in the garage.
After several days of cleanup and all the measurements taken, covered earlier, The plan was made. For the record, everything done with the Dakota took place on the lot side of the driveway, side of the coupe. With the Dakota cut down to a frame, drive train and firewall and floor pan, it was moved onto the lot, out of the way.
Now the real fun began. It was time to remove the body shell from the coupe. The coupe body was braced inside with electrical conduit across the door openings and back to the rear wheel wells and from side to side with 2 levels of bracing, one set near the top of the doors, and the other set as low as I could get. I had hoped to keep the body as close to original as was possible, though I already knew it was off a bit from all the rusted structure. Wish I could show pictures of the bracing, but they are on the dead computer. Inspection told me I had 2 body mounts remaining at the firewall, and the very back 2 body mounts at the rear bumper that were still holding the body to the frame. In the cars previous life, someone cut out the center of the trunk floor and the lower 6" off the passenger side from the firewall to the rear wheel well. Both floor pans had rotted away from the firewall to the rear wheel wells, from the frame to the outer body shell. With a sawzall, I cut about 18" of floor along both rear wheel wells, removed the front 2 and rear 2 body mounts and the body was ready to lift off the frame. I left the doors on the body shell and intended on placing a 4" x 6" wood beam I have on a welded post on my cherry picker, through the door openings to lift the body. Here is where the next problem became apparent. Remember the car is sitting on the grass alongside of the driveway? To position the cherry picker to lift the body, the picker is completely off the driveway and will need to roll on to the driveway because I can't move the frame. The cherry picker won't move in the grass with the weight of the body hanging on it. To make matters worse, the grass is a couple inches lower then the driveway is, so even if it would have moved in the grass, it would not have come up on the cement driveway.
I acquired a couple 2" x 12" pieces of wood to put under the wheels of the cherry picker while it was in the grass. I had hoped the picker would roll on the wood then onto the the drive with the car body hanging from it. Ever try to roll a loaded cherry picker straight on an uneven surface? Didn't work for me either. I did manage to get the front wheels of the picker on the drive when one of the wheels under the car fell off one of the boards. I was pretty screwed. The body was about 1/2 way off the frame when the wheel fell off the board, so I couldn't set it down and put the picker back on the wood, and I couldn't move the picker with the 1 wheel off the wood alone. On top of that, it was getting late an would be dark in another hour. I moved my Big Blue truck up by the cherry picker and hooked a come-a-long between the picker and Big Blue. With the com-a-long, I could pull the cherry picker along onto the driveway. I had to reposition the truck 3 times but was able to get everything but that one wheel on the driveway. With a pry bar I was able to get that 4th wheel up on the drive. Once on the driveway, I was able to put the body on blocks and get the picker out from under it and back in the garage for over night. I really wish I would have gotten pictures of that body on blocks sitting on the driveway, but I didn't.pictures was about the last thing I was thinking about then. More later. Gene
|
|
|
Re: 48 Plymouth business coupe, Dakota frame, low bucks
[Re: poorboy]
#1116471
11/22/11 04:01 AM
11/22/11 04:01 AM
|
Joined: Jan 2003
Posts: 10,525
Freeport IL USA
poorboy
OP
I Live Here
|
OP
I Live Here
Joined: Jan 2003
Posts: 10,525
Freeport IL USA
|
On a fresh day, I trimmed the edges of the floor pan and removed the bottom section of the firewall off the coupe.
I picked the body off the driveway and rolled it across the drive so I could roll the prepared frame back on the drive, side of the now basically bare coupe frame. With the coupe body high, I positioned it above the Dakota frame and started lowering it. The plan was to trim either the coupe body or the Dakota firewall a little at a time until the coupe was sitting on the firewall & floor pan. Originally, I started trimming the sides of the Dakota air box (the top part of the firewall that houses the wiper parts and all the heat/vent ducts for the heater & air condition pull air from.) Early on it was determined that was a flawed plan. I cut across the firewall under the floor of the air box leaving only the lower vertical portion of the Dakota firewall. The lower portion is where the heater, the brake booster, the steering column base mounts, anything originally attached to the Dakota firewall. I also ended up cutting about 4" of each side of the firewall. Once the firewall was trimmed, the coupe body sat on top of the Dakota rockers. The rockers were marked to trim. The Dakota outer rockers were already rusted off, leaving only very clean inner rockers, I had to trim the front 1/2 of the inner rockers off at the marks. Once the rockers were trimmed, the body slid down into place. I had to support the rear of the body with a piece of wood across the frame at the rear end of the trunk. The body was squared on the frame according to the firewall body mounts and by measurements along the side & rear of the body and measured for height. Once I determined the body was in the correct position, a few contact points were tack welded to hold the body in position and another day was gone. Have some pictures for the next installment, I think. Gene
|
|
|
Re: 48 Plymouth business coupe, Dakota frame, low bucks
[Re: poorboy]
#1116472
11/22/11 08:06 PM
11/22/11 08:06 PM
|
Joined: Sep 2007
Posts: 14,889
up yours
Supercuda
About to go away
|
About to go away
Joined: Sep 2007
Posts: 14,889
up yours
|
Reminds me of how I used to move my 38 Plymouth about. I had pulled the engine, front suspension and front clip off. Then I would pick up the front frame rails like a wheel barrow and move the car about by hand. TO load it on a trailer I would wheel barrow the front end up as far as I could by hand, use my engine hoist to pick up the rear and my floor jack as a dolly under the front cross member, then shove the whole assemblage forward till I was happy and chain it down. My neighbors never said boo to me.
They say there are no such thing as a stupid question.
They say there is always the exception that proves the rule.
Don't be the exception.
|
|
|
Re: 48 Plymouth business coupe, Dakota frame, low bucks
[Re: poorboy]
#1116473
11/27/11 02:07 PM
11/27/11 02:07 PM
|
Joined: Mar 2006
Posts: 2,675
Mt. Eden Ky.
Hemi Allstate
master
|
master
Joined: Mar 2006
Posts: 2,675
Mt. Eden Ky.
|
Gene, I hope that you are able to post some pictures of your progress. Obviously a lot of thought going into your build, as well as in engineering ways to do the "heavy lifting" by yourself.  I work by myself in my one man body shop. I know what a challenge working alone can be, and so I enjoyed reading about your work so far.  I do have some guys that stop in from time to time and they do help me a lot. Keep up the good work, and post some pics when you can. Mark
|
|
|
Re: 48 Plymouth business coupe, Dakota frame, low bucks
[Re: Hemi Allstate]
#1116474
11/29/11 01:53 AM
11/29/11 01:53 AM
|
Joined: Jan 2003
Posts: 10,525
Freeport IL USA
poorboy
OP
I Live Here
|
OP
I Live Here
Joined: Jan 2003
Posts: 10,525
Freeport IL USA
|
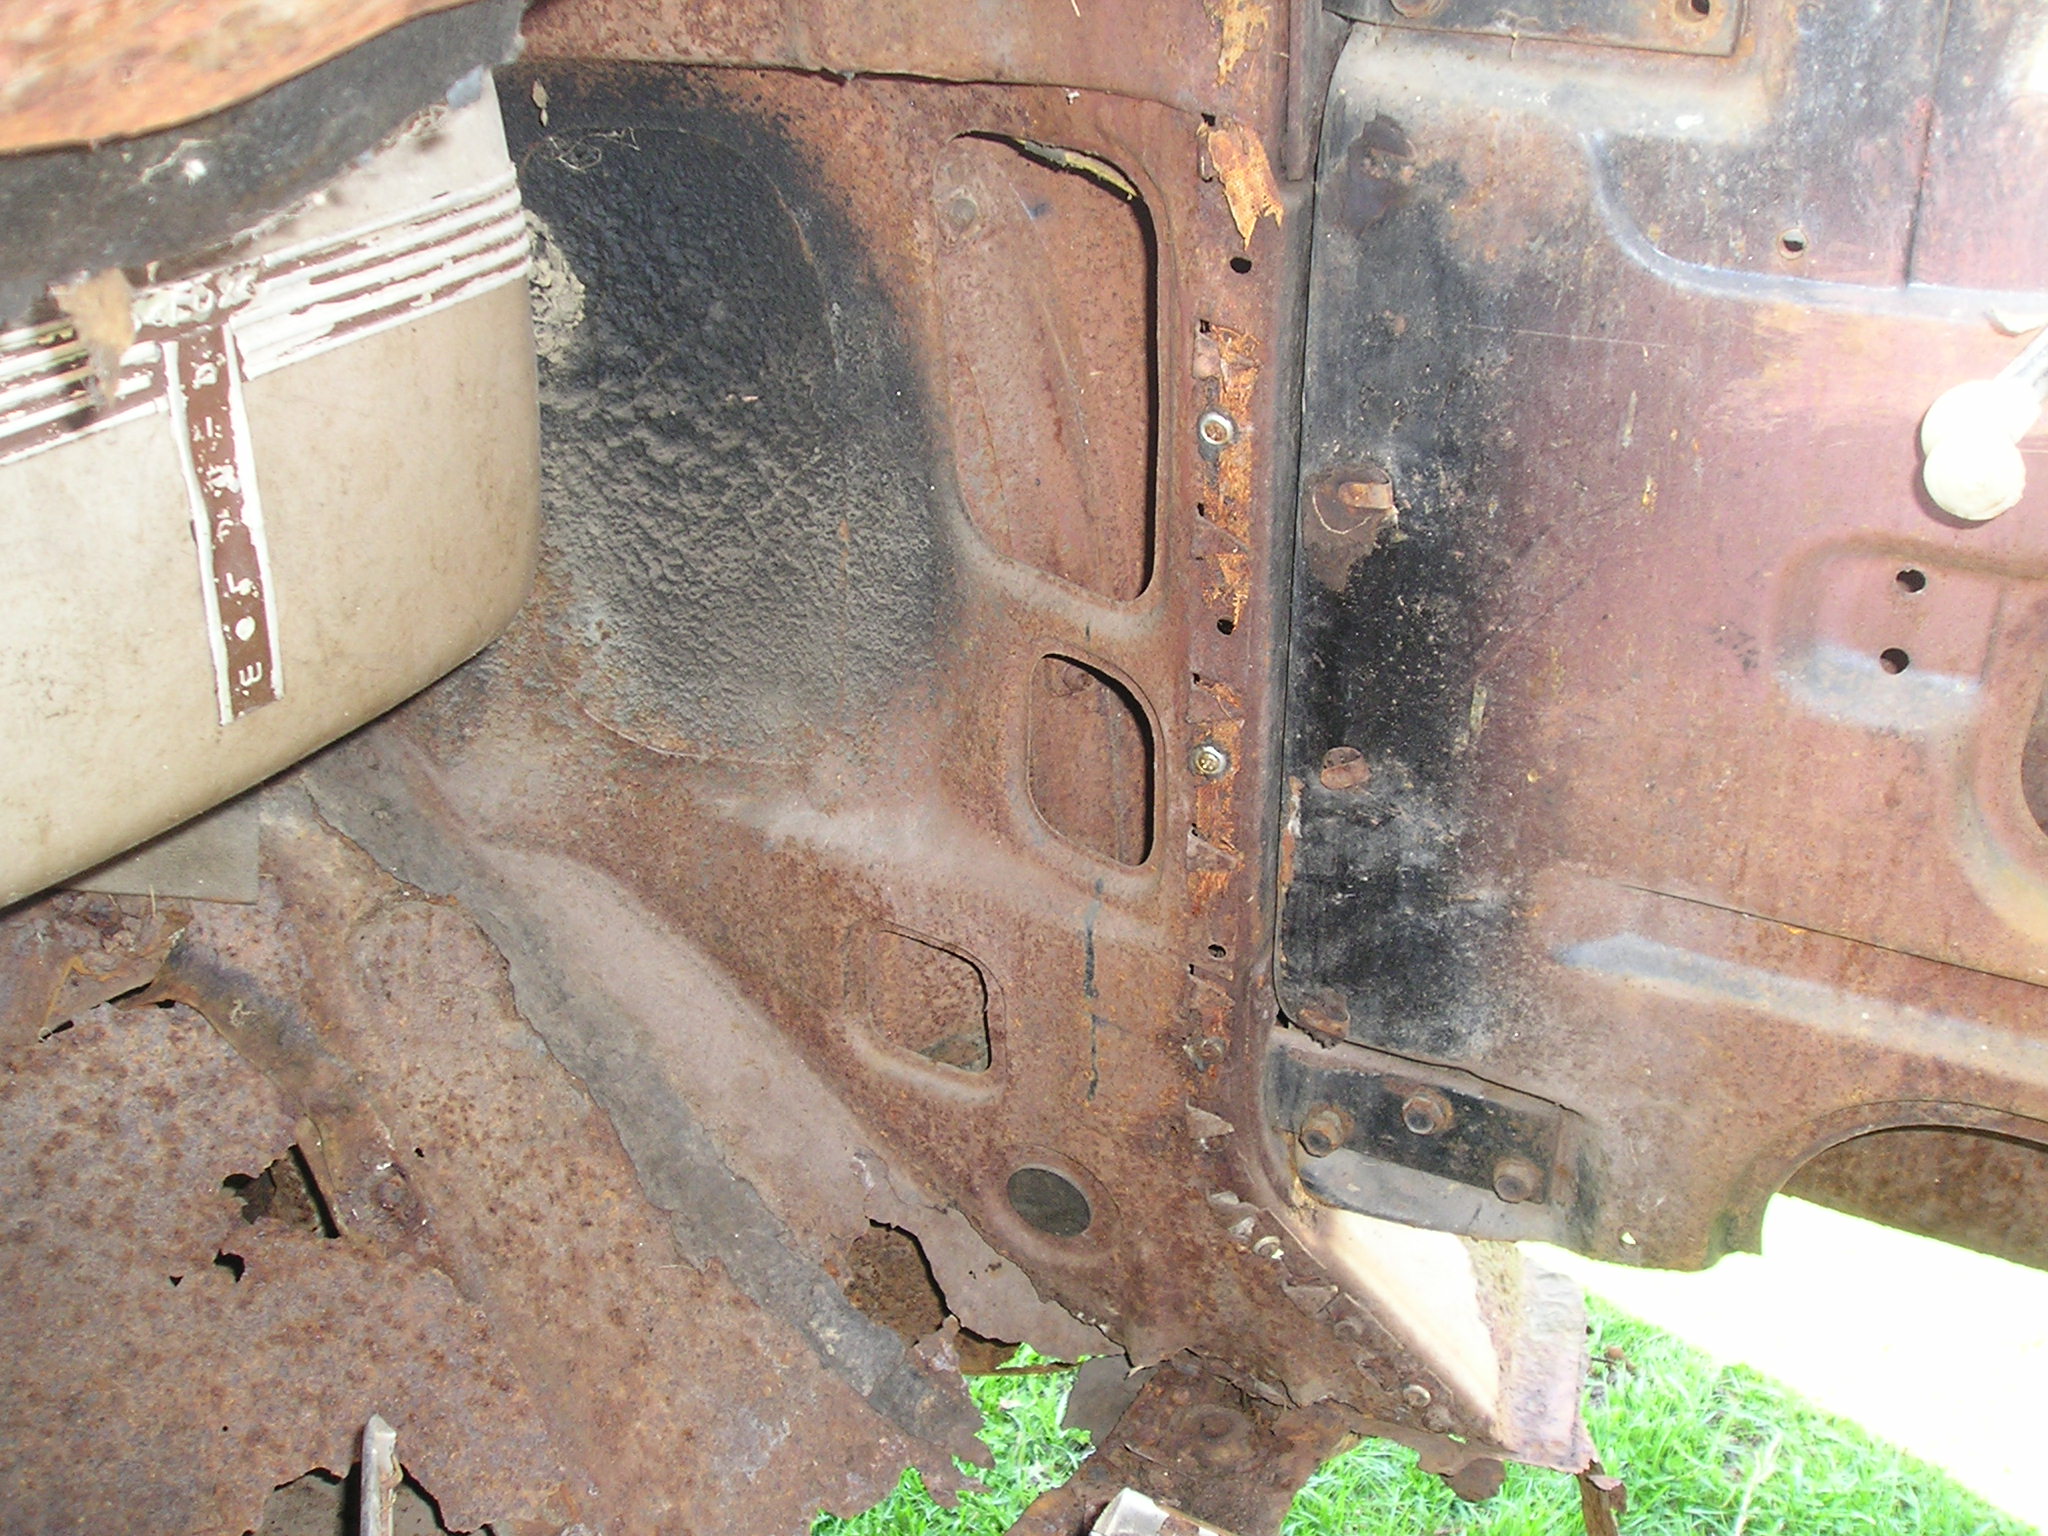
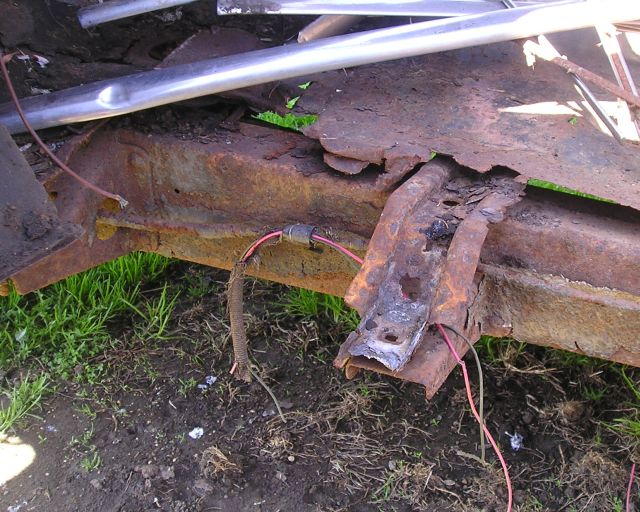
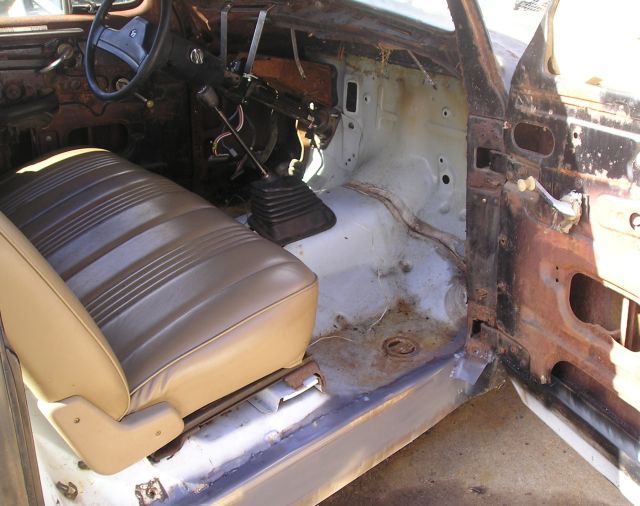
If you remember, someone before me cut off the part of the coupe's lower body that bent outward between the wheels, (about the bottom 6"-8") on one side, but the other side was still present. The side that was still present was paper thin with many pin holes, so I cut it off as well. With the crusty sheet metal gone, I can now see the crusty and mostly gone lower body structure. Just for your info, originally these cars were built with several formed sheet metal boxes. Basically, the outer rockers and floor board formed the body structure the rest of the body was built on top of. The outer rocker runs from the firewall to the rear wheel well and is formed with the floor pan attached to it. The inner rocker is spot welded to the bottom outer edge of the outer rocker and bends back towards the center of the car about 6" before it bends up and is spot welded back to the floor pan. The firewall brace is spot welded on top of the rocker assembly and consists of several pieces of steel all spot welded together. The outer firewall brace part rises up to the cowl and bends 90 degrees around the front to meet the front portion of inner firewall brace structure. The rear edge of the firewall brace is spot welded to the outer part of the "A" pillar (front door post.)There is another part of the firewall bracing inside the car that welds to the firewall itself, the upper cowl, the door post and the lower windshield header. From the top of the cowl down to the floor, the door post ("A" pillar) has a formed flanged channel (open side facing inward) with cut outs for the door hinge assemblies to bolt to. There is also an inner door post that welds to the flanges on the channel and back to the firewall brace. The door post above the cowl consists of several pieces of formed sheet steel that form the one piece inner windshield header that surrounds the entire windshield and is the inside portion of the pinch weld the windshield gasket sits on. The stamped cowl and the stamped roof skin form the outer windshield header and the glass pinch weld. The firewall is a stamped panel with 2 side and a top flange that spot welds to the front bend of the firewall braces and the lower edge of the cowl. There are 2 forward body mounts under the firewall braces on each side of the body shell.
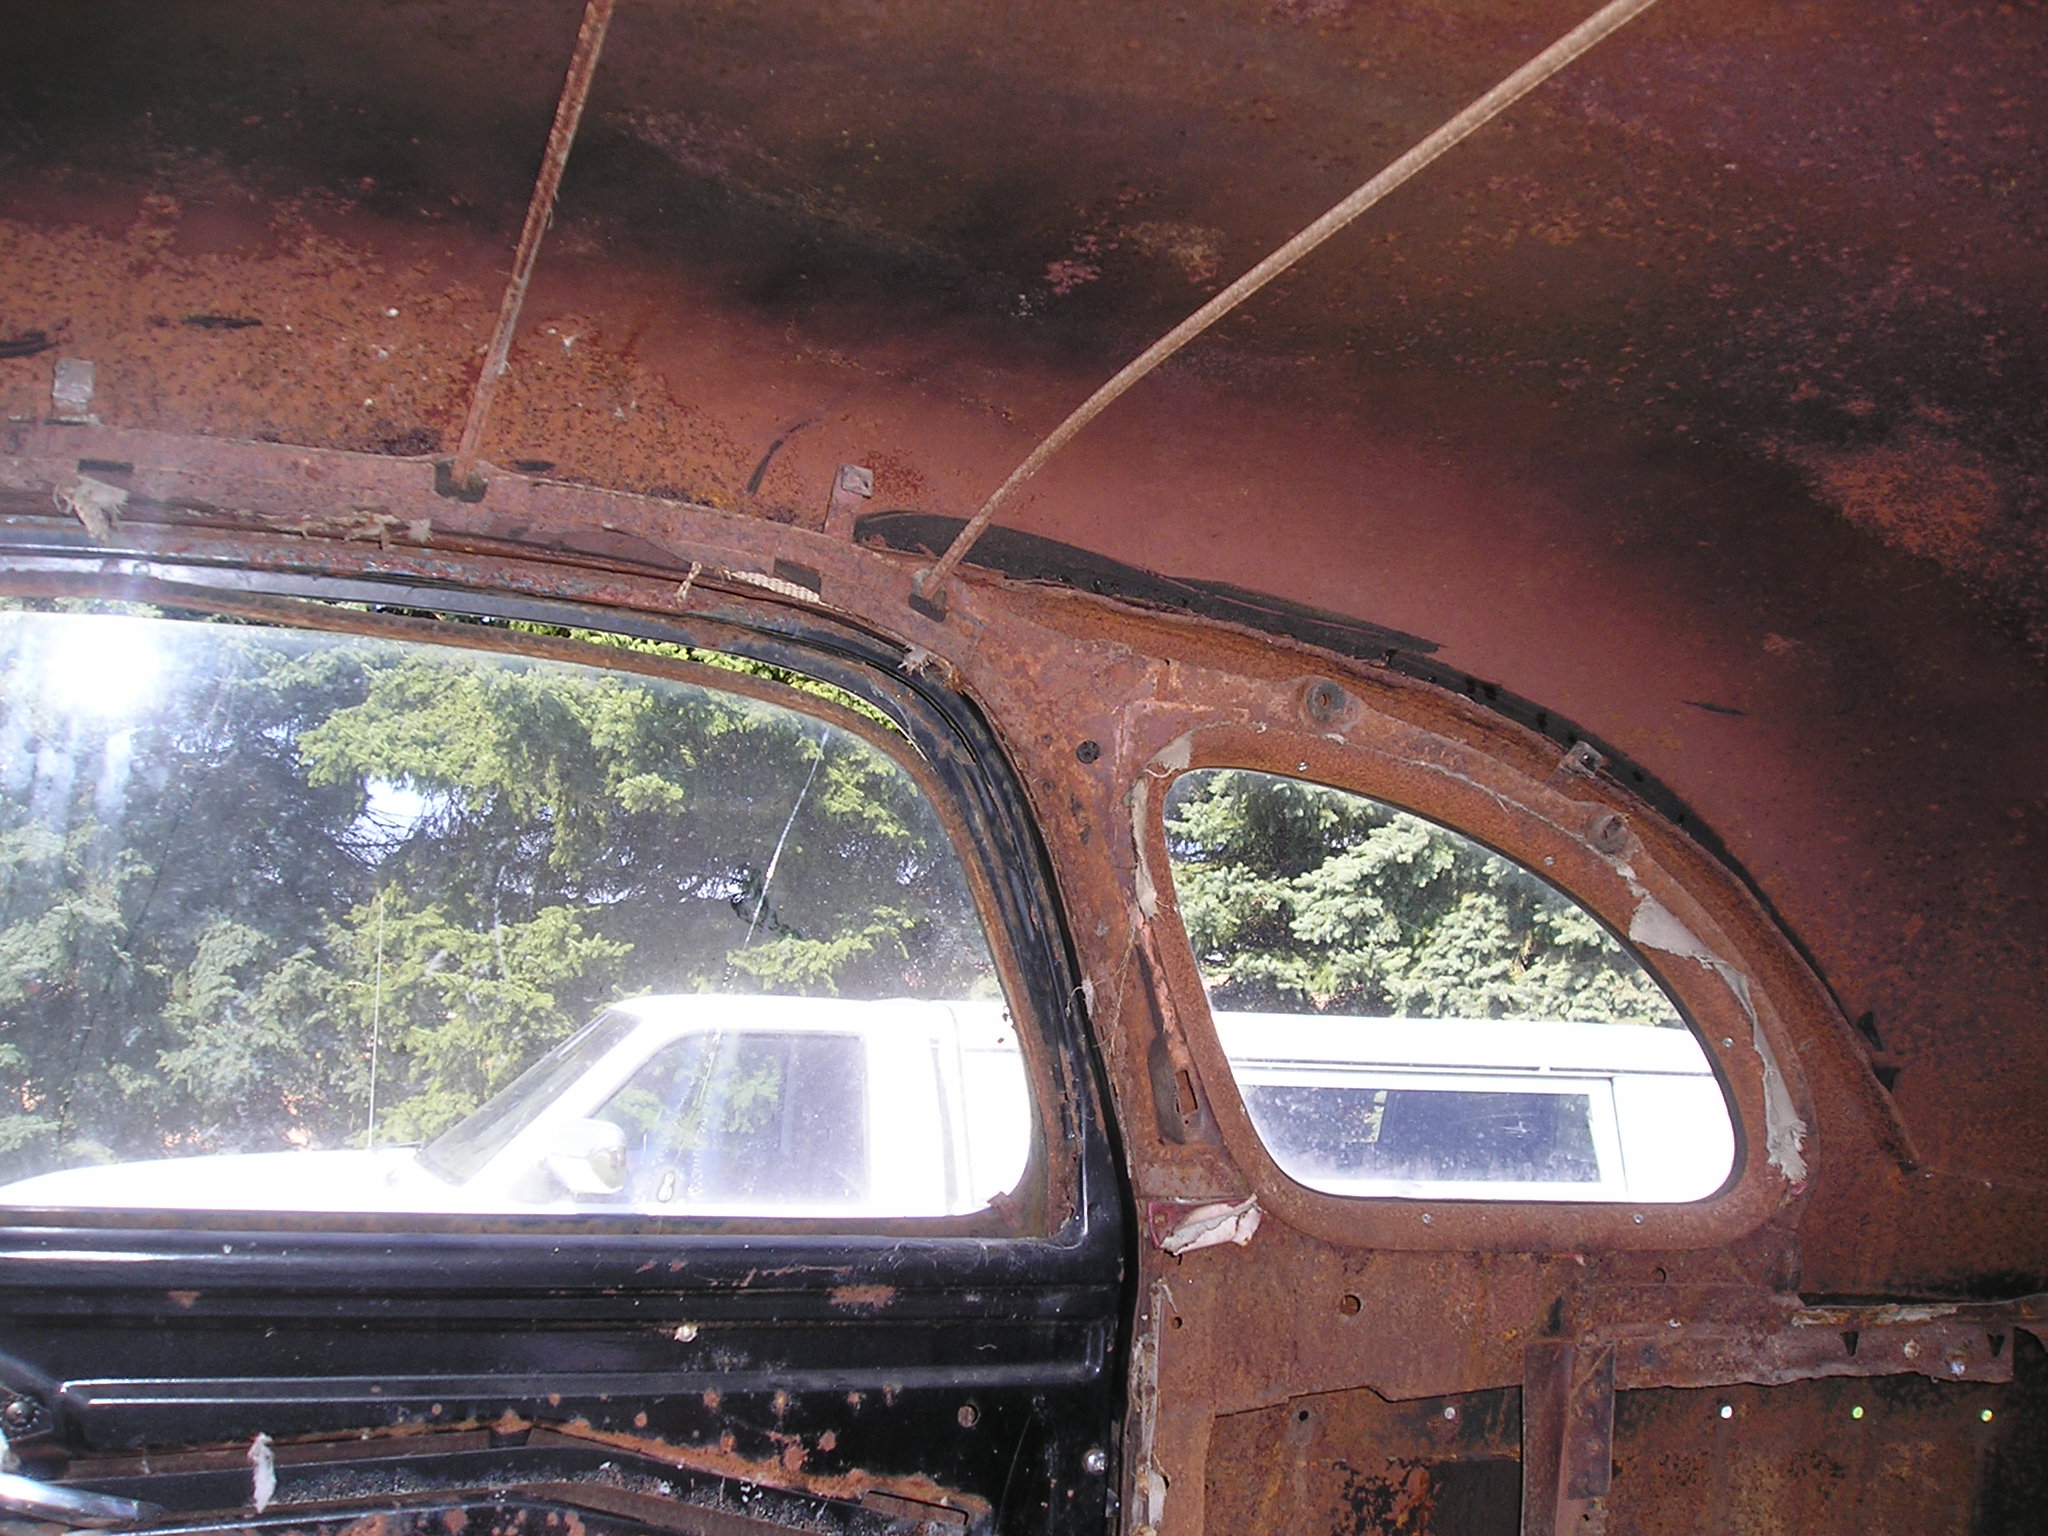
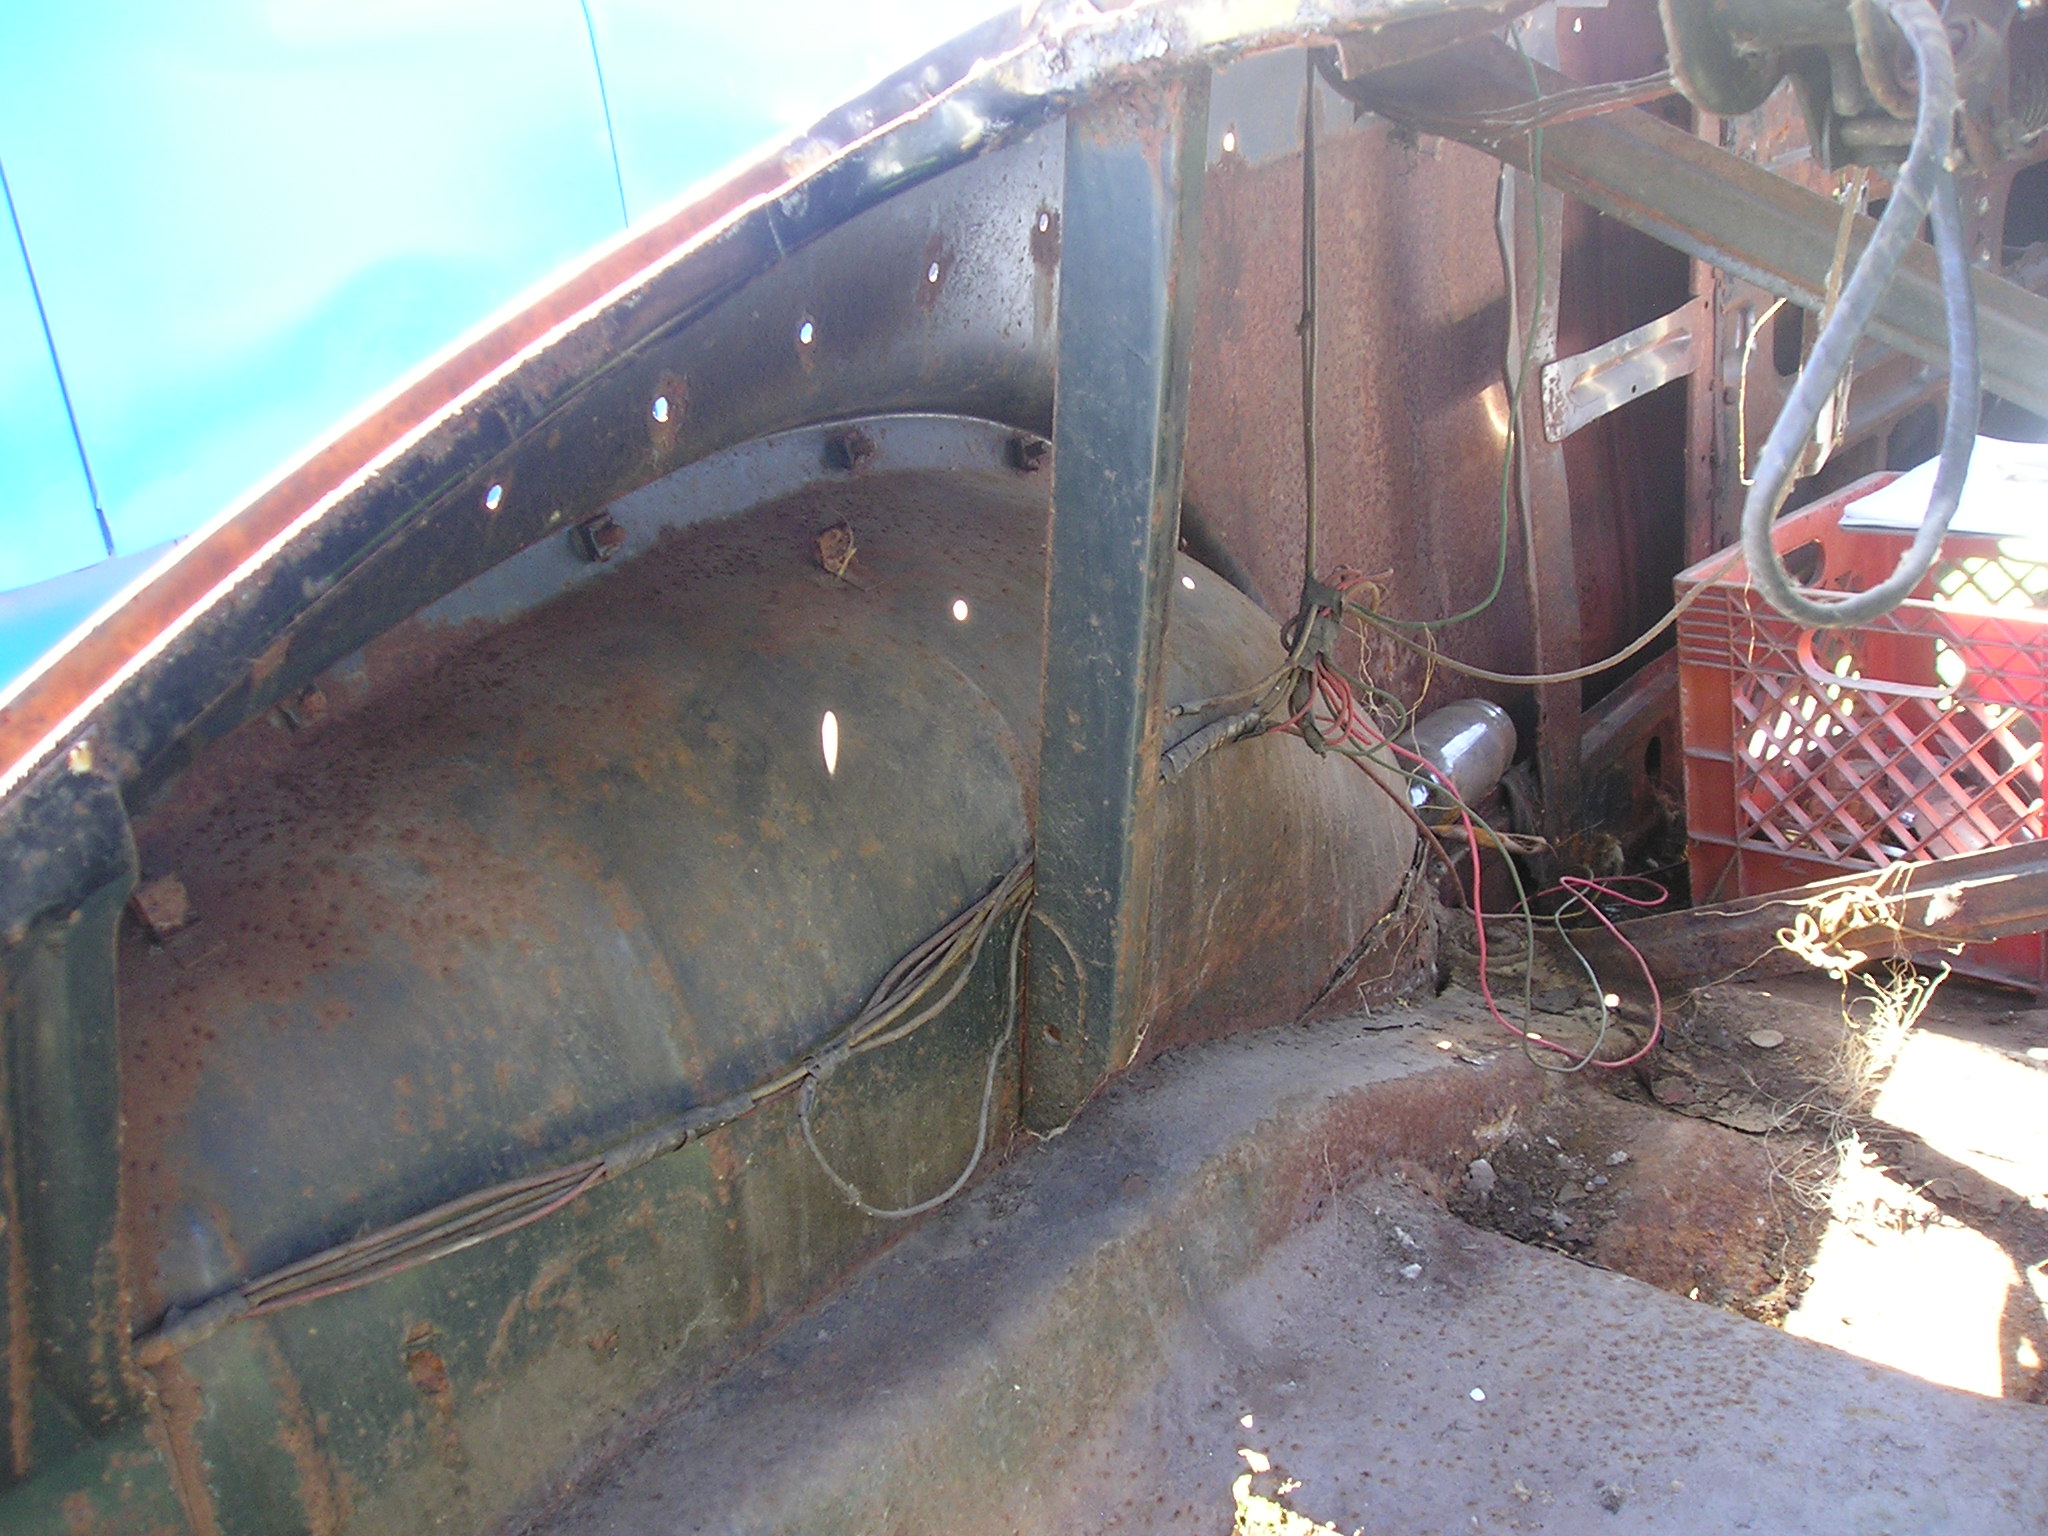
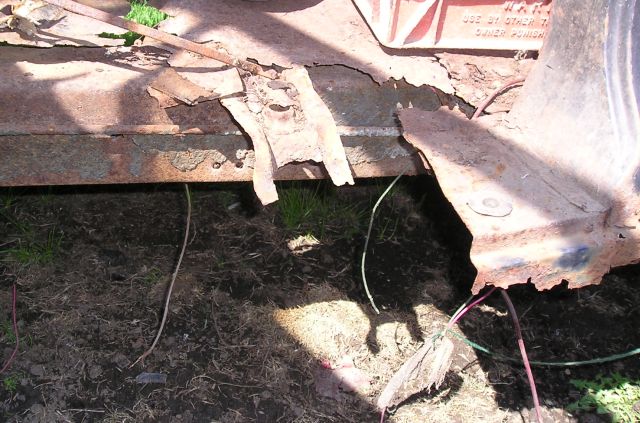
As we move rearward on the rocker assembly we find the rear door post is also a formed channel that is welded on top of the rocker assembly. The open end of this channel is towards the rear. The outer body panel is spot welded to the outer edge of the channel and extends down to the outside of the rocker assembly, and up to the roof seem under the rain gutter. The outer panel also forms the outer edge of the quarter window pinch weld. There is bracing that welds to the inside edge of the door post that is the part the trim panel screws to. It also welds to the floor pan, the rear wheel well, and the stamped inner quarter window support and inner pinch weld. The rear wheel well closes off the end of the rocker assembly, welds to the outer body panel and the floor pan. Under the floor are support pieces that are formed channels that spot weld to the inner rocker and the floor pan and run across the car. There are at least 4 of these braces and they are also used as structure points for body to frame mounts.
For your entertainment, I have pictures of most of this structure.
This picture is the bottom of the "A" pillar/door post/inner firewall looking from the inside. you can see where the car was cut before it came to me.
Last edited by poorboy; 11/29/11 01:55 AM.
|
|
|
Re: 48 Plymouth business coupe, Dakota frame, low bucks
[Re: poorboy]
#1116481
11/29/11 04:00 AM
11/29/11 04:00 AM
|
Joined: Jan 2003
Posts: 10,525
Freeport IL USA
poorboy
OP
I Live Here
|
OP
I Live Here
Joined: Jan 2003
Posts: 10,525
Freeport IL USA
|
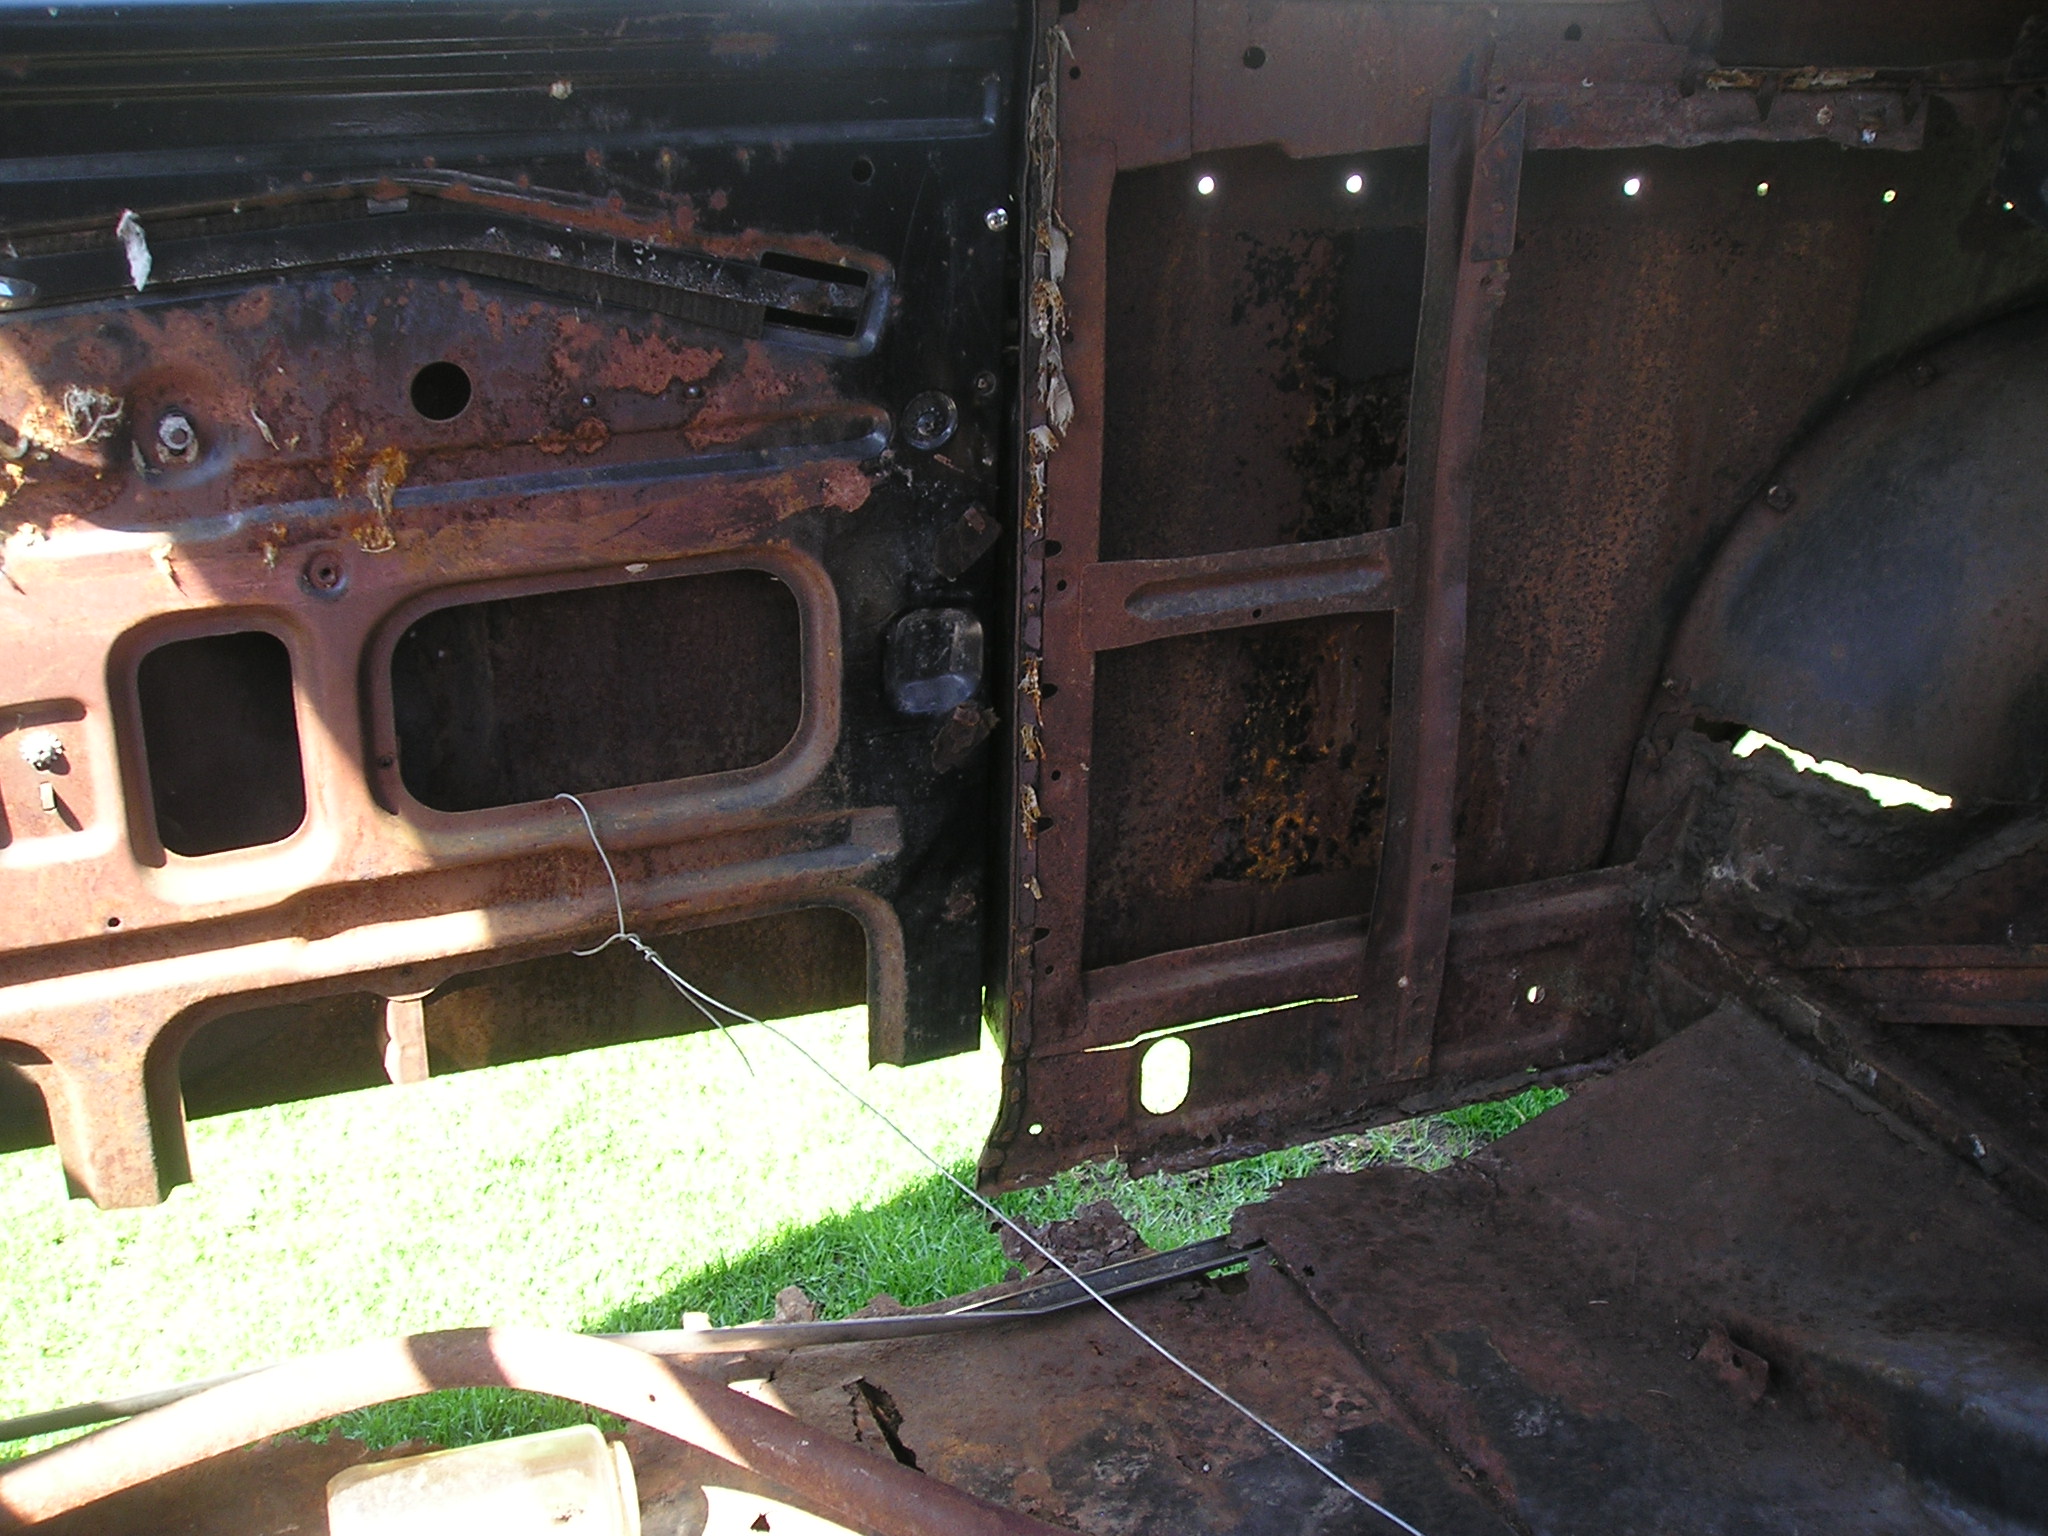
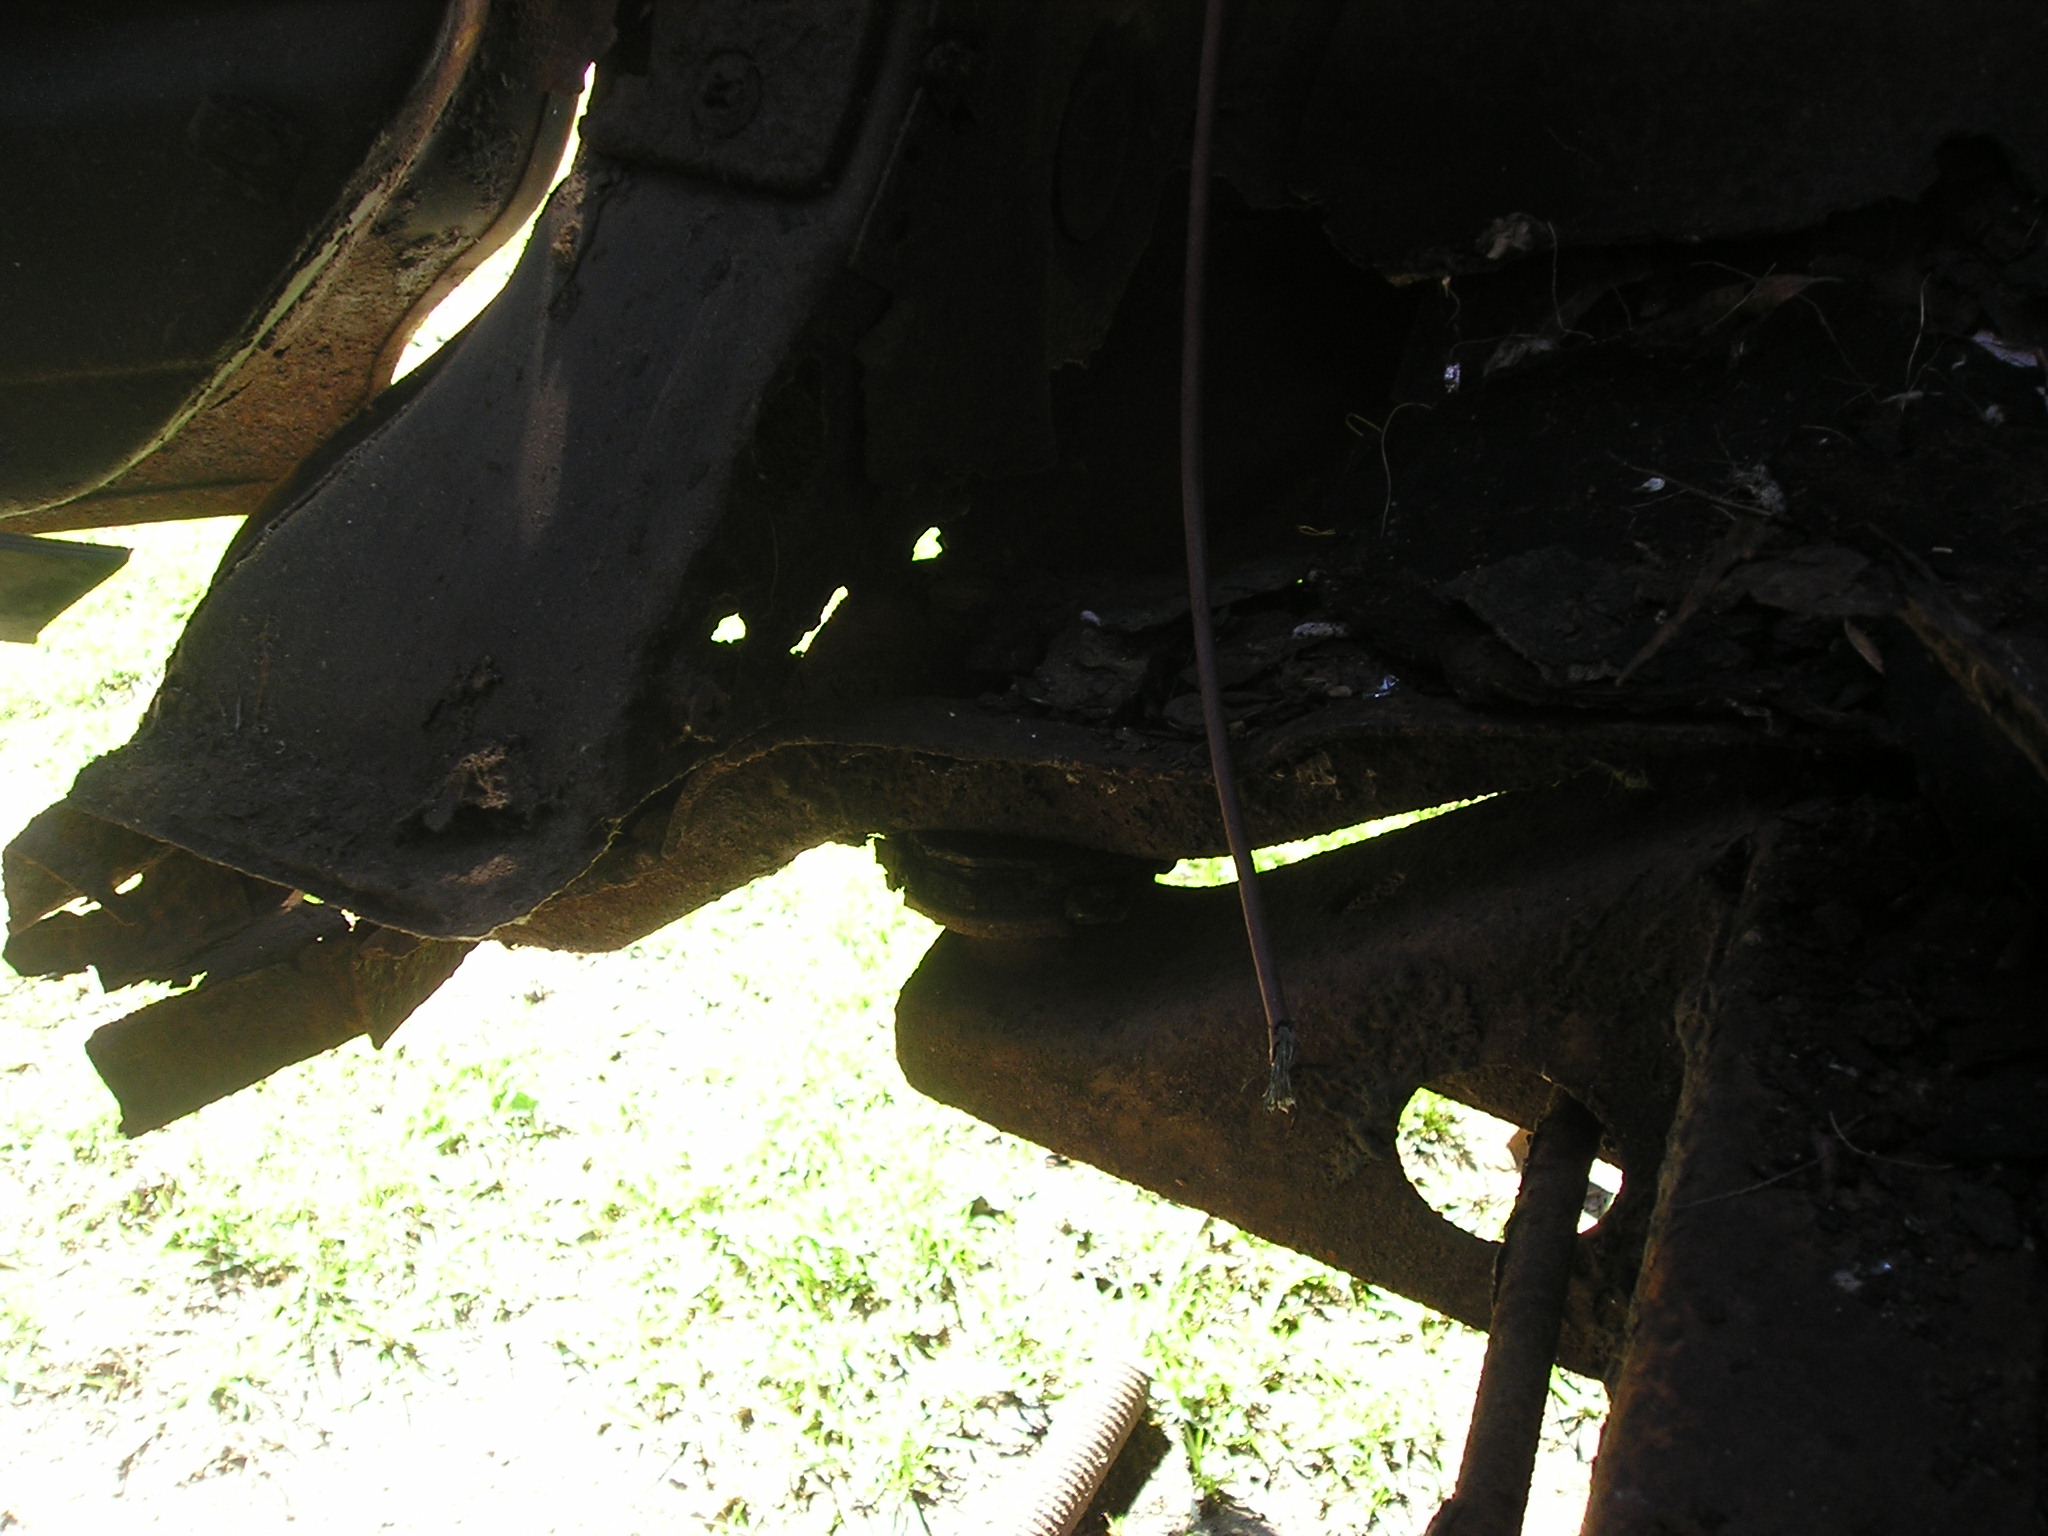
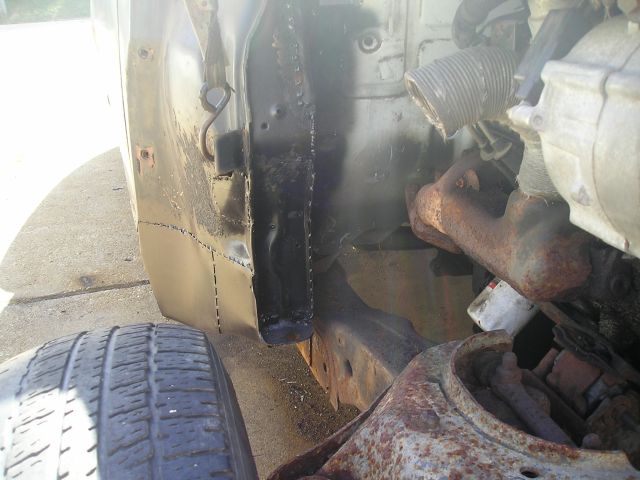
Sorry about the quality of that last picture.
The Dakota floor pan was used intact. The rear cab mounts are supported by a formed box that runs side to side. It is tied to the pan, the inner rockers, and the rear of the cab panel. Brackets were moved on the frame to make use of this floor reinforcing. As the body sat on the Dakota floor pan, the coupe's rear door posts were trimmed so the post sat just inside the floor pan box. Hindsight tells me I should have trimmed another 1/2" off the box. I welded the door post to the cab mount box.
This is the point where I wave the red flags. I made a mistake at this point that wouldn't show up until a year later. You need to understand, this coupe body was in such bad shape, many measurements were simple best guesses. My doors were hinged, but there were no latches, the doors were wired shut. Since the floor pan was gone (the previous pictures were taken before I did anything with the car other then clean up the loose stuff.) I have no reference to the proper location of the rear door post, it was just hanging in the breeze. When the bracing was welded in, before the body was removed from the frame, the swinging doors were all I had to guess the location of the door posts. While it was tacked to the new floor, the doors were test closed. The door gap was real close and the body to door was a good fit, the doors swung free and came in line when held closed, it was determined to be correct. What I failed to notice was that the tops of the doors were out about 3/8". Its easy to see now that the car is nearing finishing. I will have to cut the top of the door frame and tilt the top of the post in and reweld it. I am not going to cut the car apart to fix this mistake. Remember where the car came from, and what it is going to be, a street version of a dirt track race car. Perfection is not my highest priority.
I add a new vertical panel as an inner rocker, welded it to the floor pan and extend it from the firewall to the rear cab mount box and another vertical panel from the rear of the cab mount box to the rear wheel well. Once the inner rockers were in place, I would extend the front and rear door posts and attach them to outside of the inner rocker. The front cab mounts were located about mid way between the original coupe front 2 firewall body mounts. The mounts were modified to tie into the bottom of the firewall. At a later date, the front coupe firewall mount would be added to the frame.
Instead of attempting to have the bottom of the body kick outward as the 46-48 Plymouth's did, it would be much more simple to take them straight down and under the body like the 41 & 42 body's were.
The Dakota had a 8' box. That box had a topper on it all its life so the box floor was in great shape. Measurements revealed if I cut the sides off the box, its floor could be shortened and it would fit in the coupe as a rear floor. If i trimmed the front, I could still mount the box floor on the Dakota frame using the center 2 mounting points on each side. The box floor on a Dakota is about 6" higher on the frame then the cab floor is. The coupe is a business coupe, there was not ever a back seat, and I didn't plan on having one now. The rise in the box floor would sit behind the cab floor pan, which would be behind the seat. I would have to cut the box floor in 1/2 (front to back) to get it in the car. With the front 1/2 of the box floor bolted to the frame, the step up between the front floor pan and the rear floor pan was made and reinforced. At this point, I was still planning on installing a roll cage, so provisions were made at the step up so the main hoop could be welded to a well structured floor. Floor extensions were made to attach the wheel wells and rear body to the box floor.
The coupe trunk floor was removed before I got the car. Someone also cut the bottom 6" off the trunk lid and had it screwed to a piece of wood that was screwed to both rear quarters. A rear cross member and body reinforcing plates were built to attach to the quarters to each other and provided a pair of rear body mount locations.
Through the process the body was channeled on the frame about 3" at the front and about 2" at the rear.
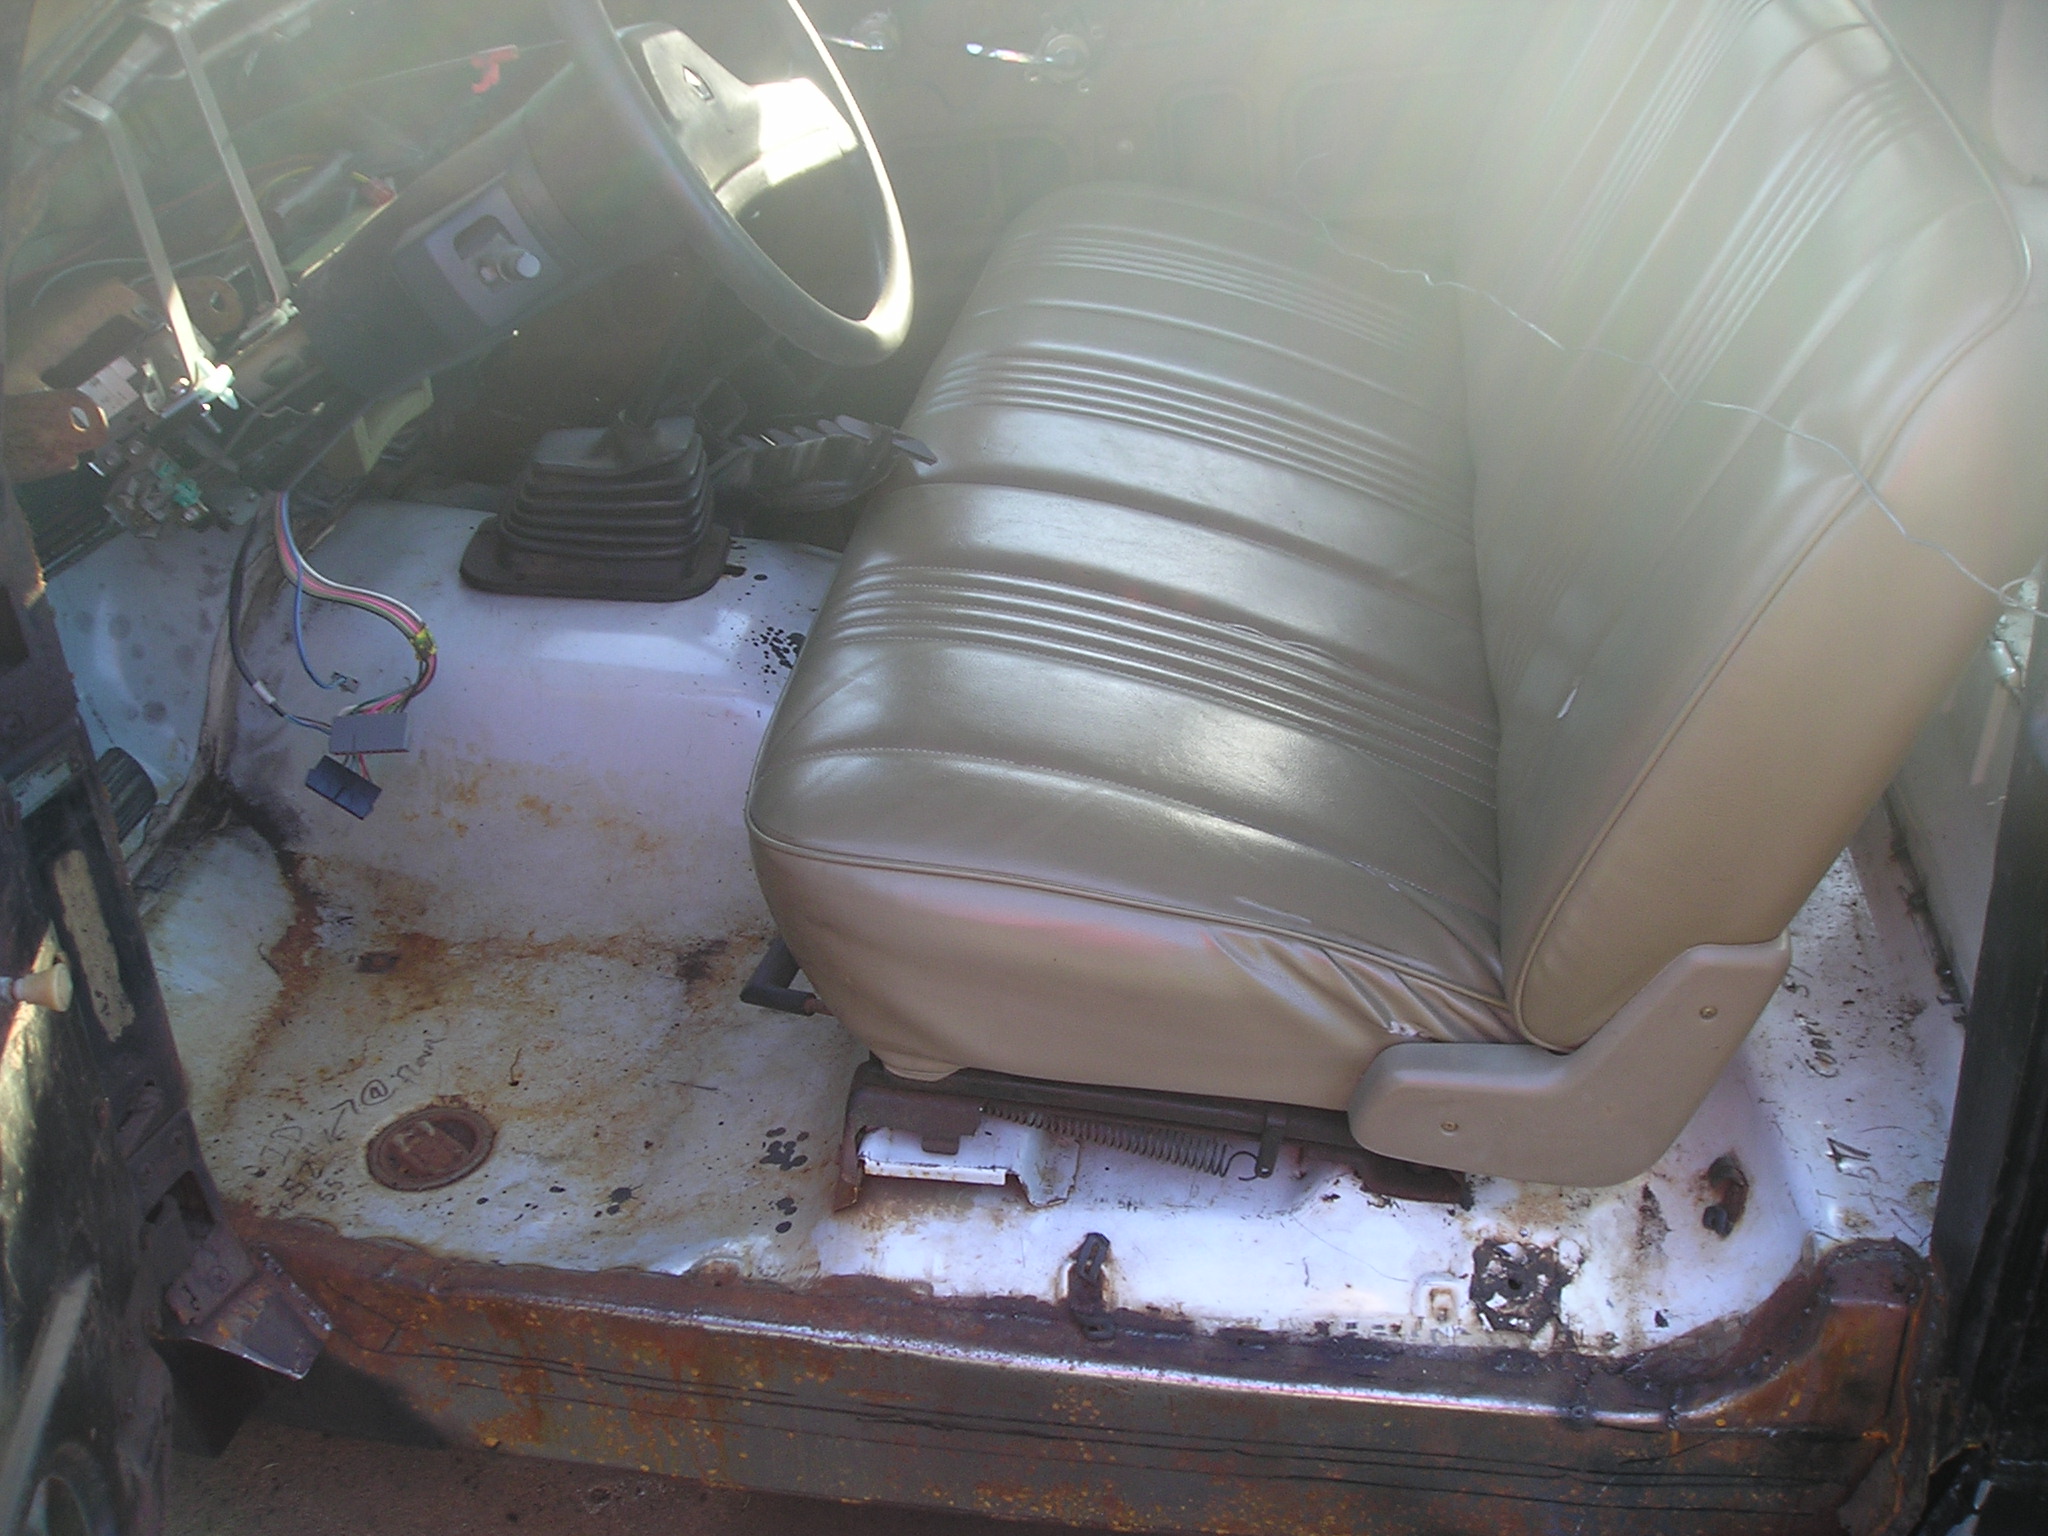
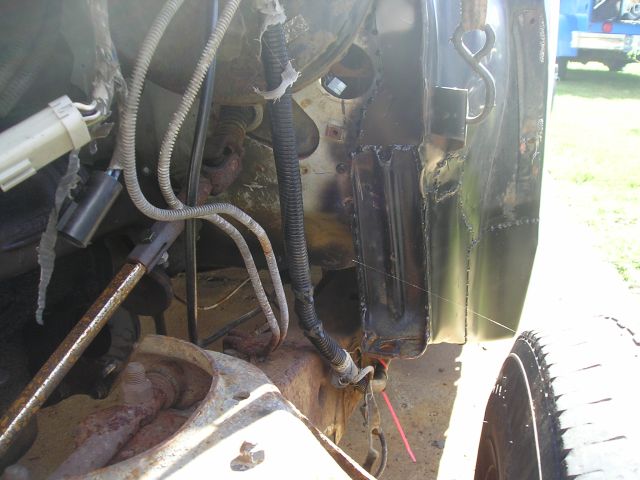
Pictures: In this one, you can see the "new" inner rocker and where the rear door post is welded to it. I believe this may have been before the door post extensions were made on this side. The raised part of the floor pan is the body mount box. You see the little kick up in the inner rocker just in front of the door post is where the rear edge od the Dakota door originally was. At the right edge of the picture you can see the step up to the rear floor.
|
|
|
|
|


